PENDING CLEANUP
Note
Problem Statement: You work for XYZ Corporation and the current requirement in the organization is for faster file sharing, which can also help in data replication from on-premises infrastructure.
Tasks To Be Performed:
- Create an FSx file system for a Windows file server: a. Make sure you have AWS Managed Active Directory with a valid domain name b. Connect it to your Windows EC2 server
- Create an FSx file system for Lustre and attach it to an Amazon Linux 2 instance.

The DNS we need is the DNS of Directory Service Make it member of the Directory with the domain service you cireated
When you run the command in cmd
Part 1: Setting up Directory Service
- Navigate to AWS Directory Service and choose to Set up a directory.
- Select AWS Managed Microsoft AD.
- Click on “Next”.
- Choose the standard edition and provide a DNS name. You can use an existing DNS name or create a new one.
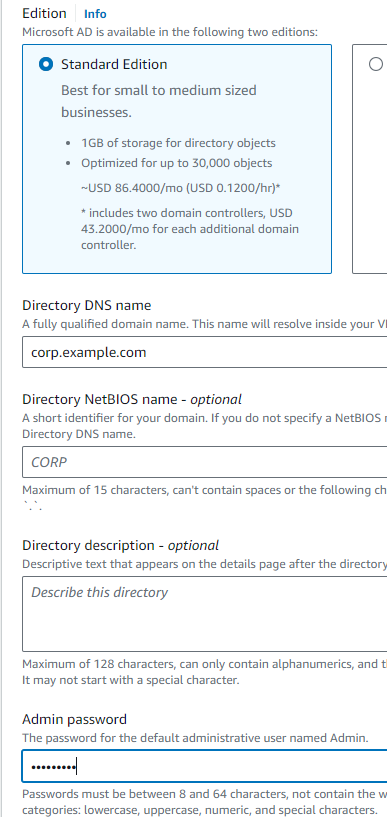 Directory DNS name:
 corp.example.com - Set an admin password. Ensure it includes at least three out of these four categories: lowercase, uppercase, numeric, and special characters.
- Configure the VPC settings:
- Left Defaults
- Review your settings and click “Create Directory”.
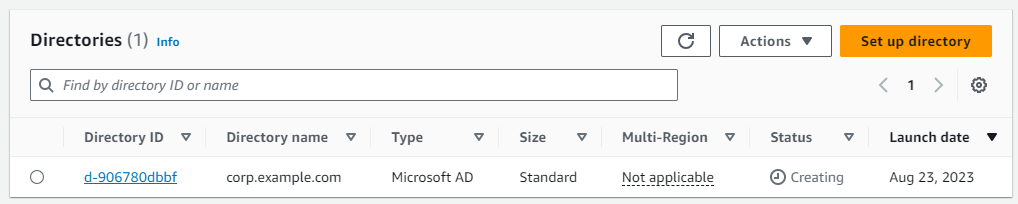
Once Status is Active I click on the Directory ID and navigate to Networking & security tab to extract DNS address for later use
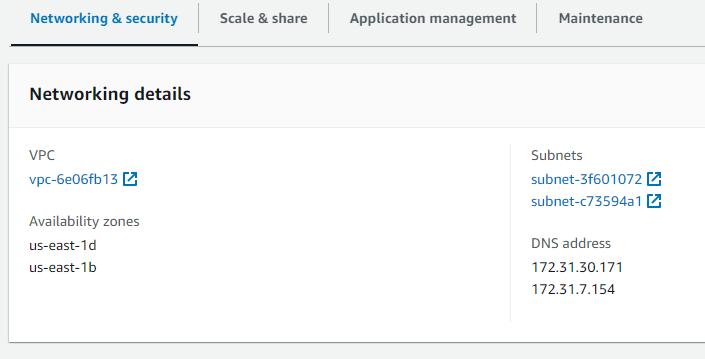
#DNS address
172.31.30.171
172.31.7.154
Part 2: Creating Amazon FSx for Windows File Server
- Navigate to Amazon FSx.
- Click ”Create File System“.
- Choose Amazon FSx for Windows File Server.
- Provide a File System name.
FSx File System - Choose the deployment type: Multi-AZ or Single-AZ.
- Set the storage capacity to a minimum of 32 GiB.
- Network & security left defaults
- Windows authentication selected previously created directory.
corp.example.com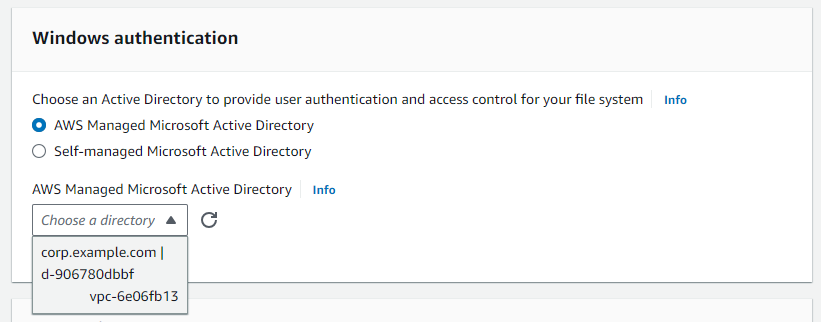
- Review settings and click “Create File System”.
 Once ready we click on it and Attach to get Attach instructions
net use Z: \\fs-045731302b7827386.corp.example.com\sharePart 3.0: Create EC2 Instance with Windows OS
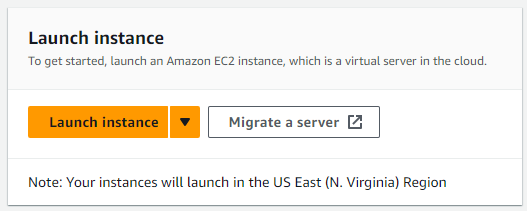
EC2 Dashboard and click Launch instance.
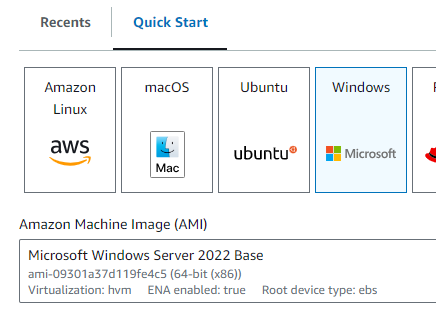
 I’ll name my instance Windows and pick:
 Left the rest as defaults
Part 3.1: Connecting to the Windows Instance
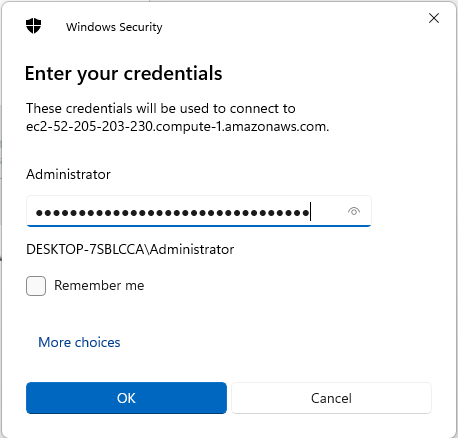
- Go to the AWS EC2 dashboard and choose your Windows machine.
- Click “Connect” and download the RDP file.
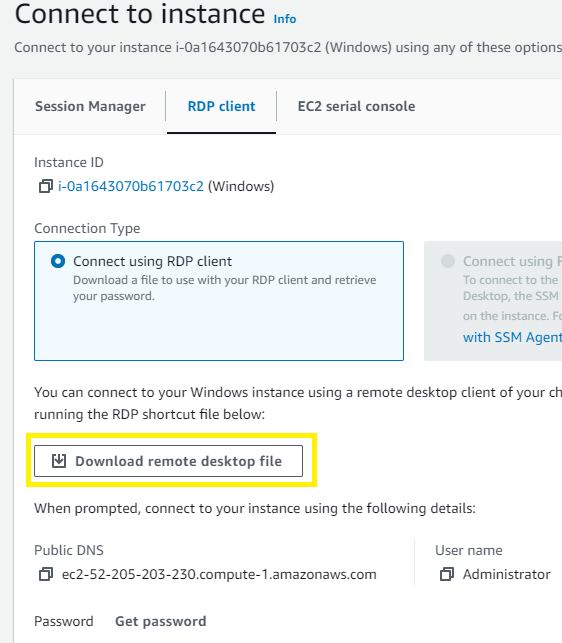
- Use your private key file to decrypt the password.
- Use the decrypted password to connect through RDP to the instance.
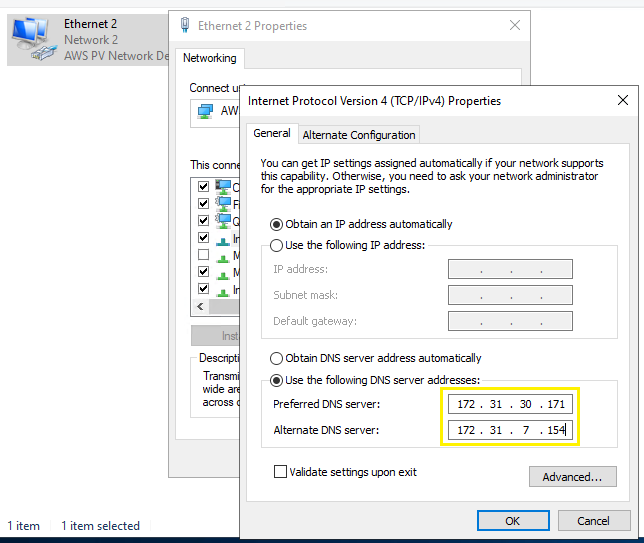
Part 4: Configuring Network Settings
- Open “Control Panel” on your Windows instance.
- Navigate to “Network and Internet” -> “Network and Sharing Center” -> “Change Adapter Settings”.
- Go to “Ethernet” -> “Properties” -> “Internet Protocol Version 4 (TCP/IPv4)“.
- Use the following DNS server addresses and input DNS from your AWS directory.
Part 5: Joining the Domain
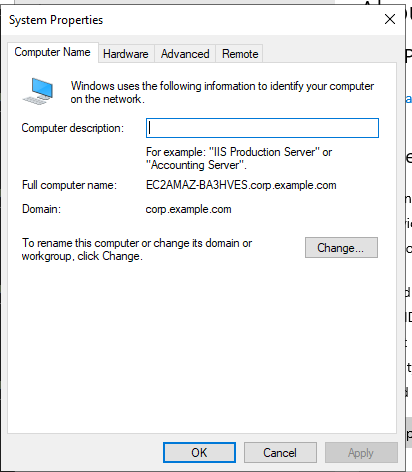
- Navigate to “System” -> “Advanced System Settings” -> “Computer Name” -> “Change”.
- Choose “Member of Domain” and input your domain name.
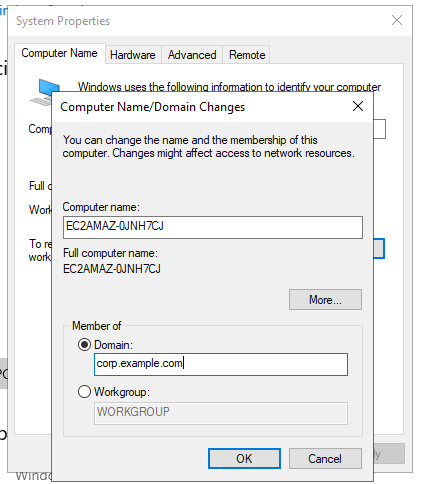
- Provide the admin username and password.
User:
Admin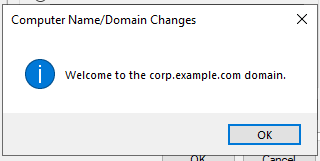
Part 6: Mounting the File System
-
Open Command Prompt.
-
Run a command to map the FSx file system to a drive letter
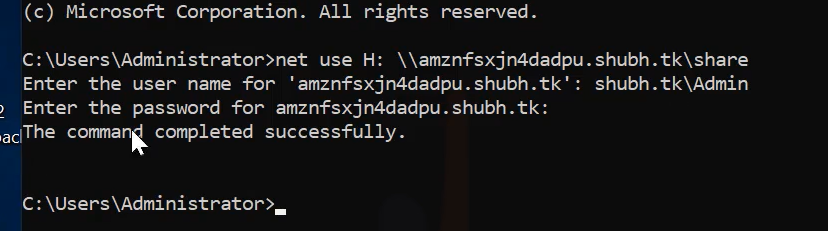
net use Z: \\fs-045731302b7827386.corp.example.com\share -
When prompted, provide your directory credentials.
You should now see the Amazon FSx mapped to a drive on your Windows instance.
Issue
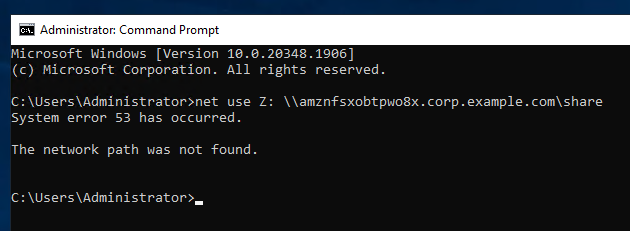
Microsoft Windows [Version 10.0.20348.1906]
(c) Microsoft Corporation. All rights reserved.

C:\Users\Administrator>net use Z: \\amznfsxobtpwo8x.corp.example.com\share
System error 53 has occurred.

The network path was not found.


C:\Users\Administrator>
Join the domain manually and through EC2
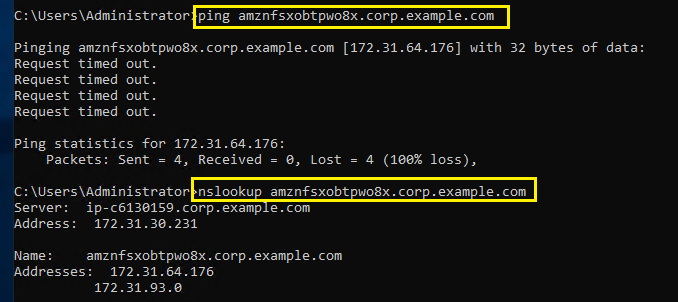
Cant ping but DNS works
 Was joined to domain
Possible Solutions
Follow this tutorial: Step 1: Create your file system - Amazon FSx for Windows File Server
2. Create an FSx file system for Lustre and attach it to an Amazon Linux 2 instance.
Step 1: Launch FSx for Lustre
- Navigate to the Amazon FSx service in the AWS Console Create file System
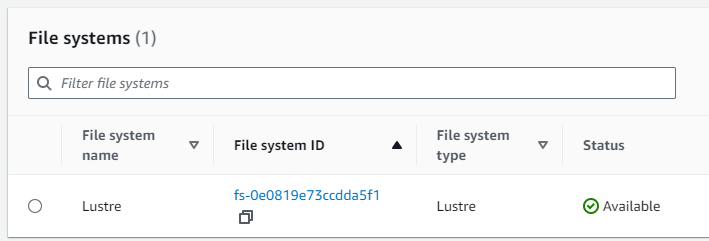
- Select “Amazon FSx for Lustre” and click on it. Name it Lustre and picked minimum storage of 1.2TiB Click Create file system
Note
VPC Security GroupsInfo Specify VPC Security Groups to associate with your file system’s network interface. Choose VPC security group(s)
- sg-e7a6a0dd (default) The VPC Security Groups associated with your file system’s network interfaces must allow inbound Lustre traffic (TCP ports 988, 1018-1023).
Warning
Might want to harden this
Fsx File systems
 Once available click on it and click Attach to get mount commands
#Create a new directory
sudo mkdir /fsx
#Mount
sudo mount -t lustre -o noatime,flock fs-0e0819e73ccdda5f1.fsx.us-east-1.amazonaws.com@tcp:/3lm7tbev /fsx
Step 3: Network and Security
- Select the default VPC.
- Open your machine’s security group to edit inbound rules.
- Add a custom TCP rule to allow inbound traffic on TCP port 988.
- Add another custom TCP rule to allow port range 1021-1023.
- Save the changes.
from default VPC’s CIDR 172.31.0.0/16. This is aimed at enabling the instance to communicate with the EFS mount target.
Name Lustre

Step 4: EC2 Setup
-
Ensure you have an EC2 instance running Amazon Linux.
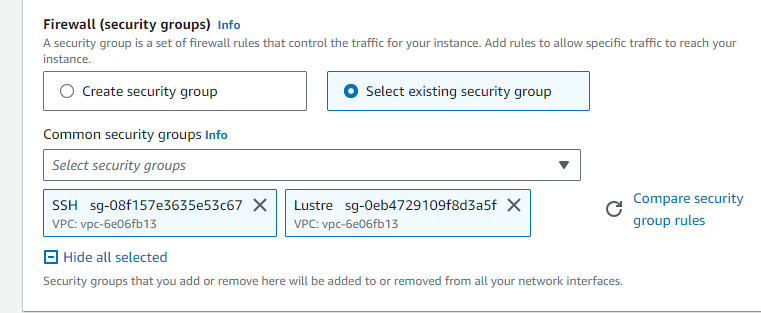
attach lustre Security Group
-
Connect to your EC2 instance.
-
Update the instance by running
sudo yum update. -
Install dependencies needed for FSx for Lustre with the appropriate commands.
sudo amazon-linux-extras install -y lustre2.10Step 5: Attach FSx to EC2
- Navigate back to the FSx console and click “Attach” on your file system.
- Copy the provided command to create a directory on your EC2 instance. Run this command.
- Copy and run the provided command to mount the FSx file system to the directory you created.


install-lustre-client.html sudo yum update -y sudo yum install -y lustre-client
Step 6: Verify
- Run verification commands to ensure the FSx filesystem is successfully mounted.