Overview
Security compliance isn’t just about passing audits, it’s about knowing exactly where your systems stand against a defined security baseline and having a repeatable process to verify it. In this lab, I used OpenSCAP and SCAP Workbench on a RHEL 7 host to do two things:
- Run a compliance scan against the C2S (Common Cloud Security) profile, a hardened baseline for Red Hat Enterprise Linux 7.
- Build and run a custom scan policy tailored to specific internal security rules, then export the results as a shareable HTML report.
These two tasks reflect a realistic workflow: you start by scanning against a known standard to understand your baseline, then you refine your policies to match what actually matters in your environment.
Environment
- OS: Red Hat Enterprise Linux 7
- Tool: SCAP Workbench (GUI frontend for OpenSCAP)
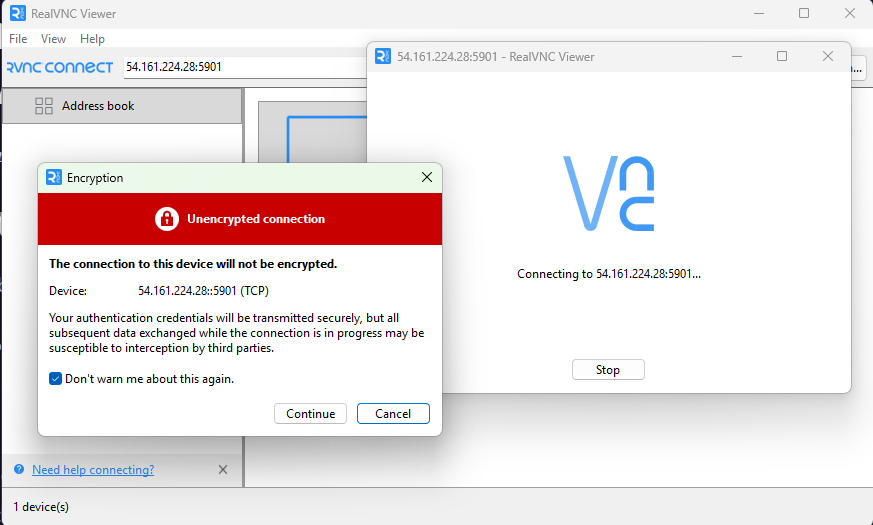
- Access: Remote desktop via VNC on TCP port
5901 - Connection:
- macOS: Finder →
Go→Connect to Server→vnc://<IP_ADDRESS>:5901 - Windows: VNC Viewer
- macOS: Finder →
💡 Give the lab environment a couple of extra minutes to fully boot before connecting via VNC.
Part 1 - Running a Baseline C2S Compliance Scan
Why This Matters
Before hardening anything, you need a picture of your current state. The C2S profile is based on the Center for Internet Security (CIS) Level 2 recommendations adapted for RHEL. Running this scan tells you which controls are passing, which are failing, and what needs attention, without changing a single configuration.
Step 1 - Install SCAP Workbench
SCAP Workbench provides a graphical interface over the OpenSCAP engine, making it easier to select profiles, run scans, and export results. Install it with:
sudo yum install -y scap-workbenchStep 2 - Load the RHEL 7 Content
Open SCAP Workbench from:
Applications → System Tools → SCAP Workbench
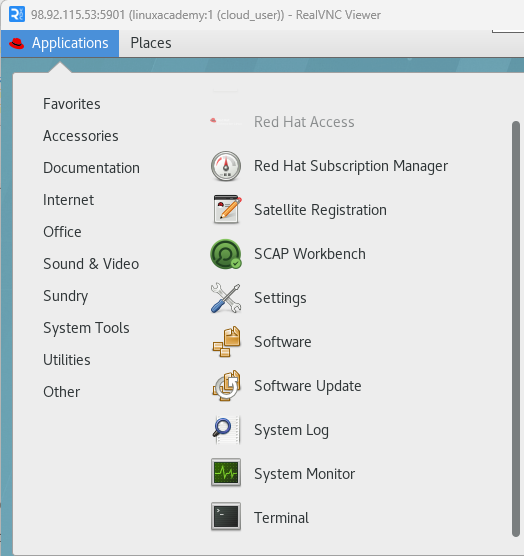
When prompted to Select content to load, choose RHEL7 and click Load Content. This loads the pre-bundled SCAP data stream, which contains all the rule definitions, checks, and remediation scripts for RHEL 7.
Step 3 - Select the C2S Profile and Run the Scan
- From the Profile dropdown, select C2S for Red Hat Enterprise Linux 7
- Set the Target to Local Machine
- Click Scan
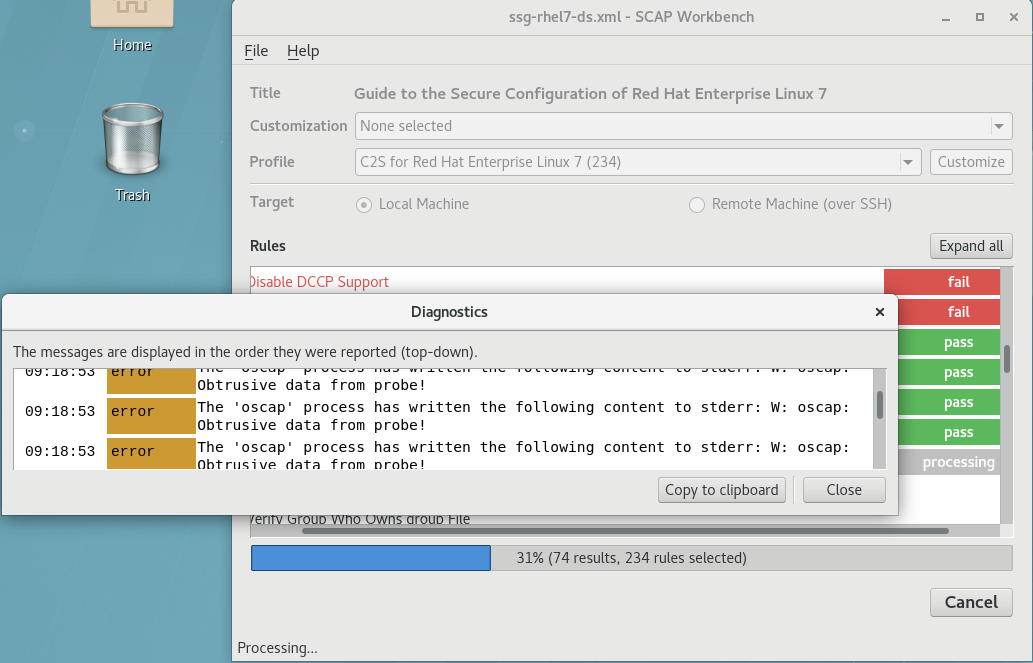
The scanner iterates through each rule in the profile, checking things like SSH configuration, password policies, audit logging settings, and firewall rules, and marks each as pass, fail, or notchecked.
Once complete, close the Diagnostics window.
Step 4 - Export the Results as an HTML Report
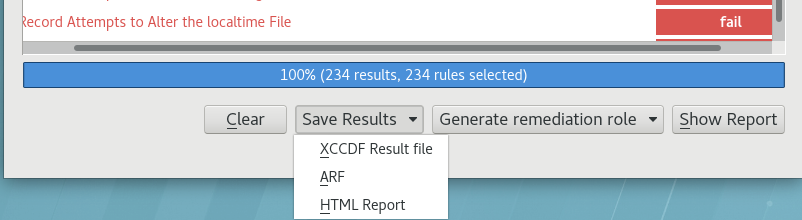
Click Save Results → HTML Report, name the file scan_results.html, and save it.
Step 5 - View the Report
Open Firefox and navigate to:
file:///home/cloud_user/scan_results.html
The HTML report gives a clear breakdown of the scan: a summary scorecard at the top, followed by a rule-by-rule table showing pass/fail status, severity, and descriptions.
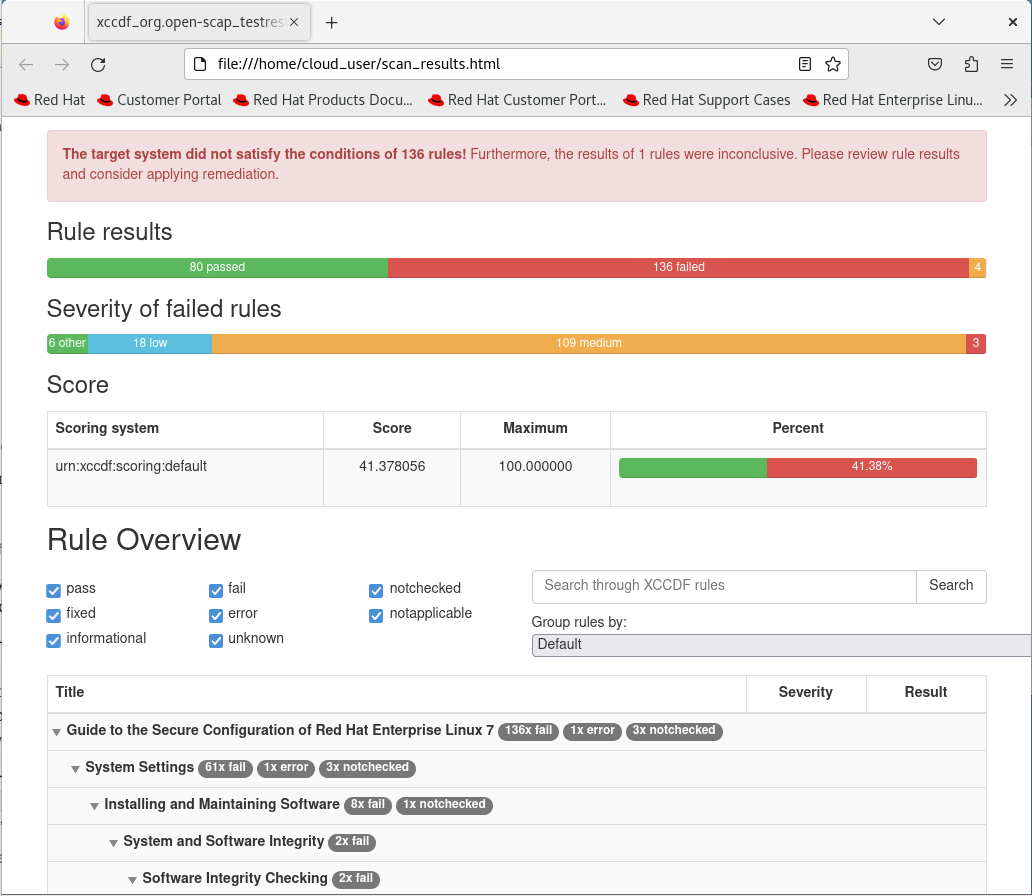
Example output - what to expect in the report:
| Rule | Result | Severity |
|---|---|---|
| Ensure SSH Protocol is set to 2 | pass | High |
Disable Telnet Service | fail | High |
| Enable Auditing for Processes Which Start Prior to auditd | pass | Medium |
| Verify firewalld Enabled | fail | Medium |
A typical first scan on an unconfigured host will show a mix of passes and failures. The value is in having a documented, repeatable baseline, not expecting perfection on the first run.
Part 2 - Creating and Running a Custom Scan Policy
Why This Matters
Pre-built profiles like C2S cover a broad set of controls, but real environments often have specific concerns. Maybe you’re focused on a particular set of services your team manages, or you want a lighter scan that targets only the rules relevant to a compliance requirement you’re actively working toward. Creating a custom profile lets you scope your scans precisely, reduce noise, and audit exactly what you care about.
Step 1 - Create a New Profile from the RHEL7 Baseline
In SCAP Workbench (with RHEL7 content loaded), click the Customize button next to the Profile dropdown.
When prompted for a New Profile ID, enter:
xccdf_org.ssgproject.custom_profile_1
^58f5d4
This ID follows the XCCDF naming convention, which ensures the profile is properly identified in exported scan results and XML files.
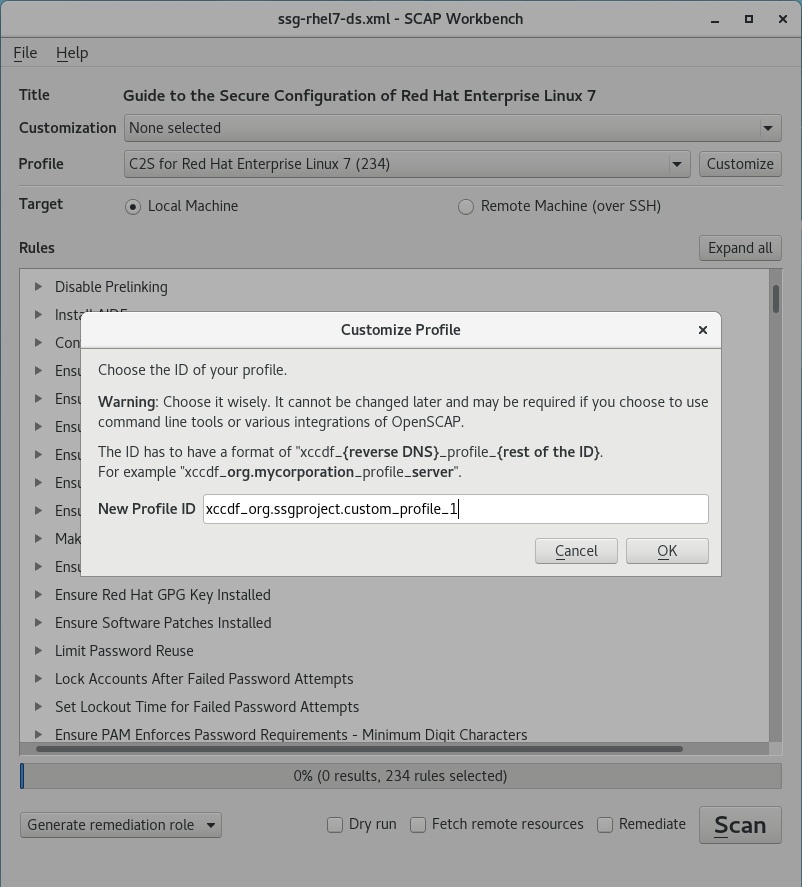
Step 2 - Select Only the Rules You Need
In the customization window:
- Click Deselect All - this clears the inherited rules from the base profile, giving you a clean slate.
- Navigate the rule tree and check only the rules relevant to your policy:
| Path | Rule |
|---|---|
| Services → Obsolete Services → Telnet | ✅ Uninstall telnet-server Package |
| Services → FTP Server → Disable vsftpd if Possible | ✅ Uninstall vsftpd Package |
| System Settings → Network Configurations and Firewalls → firewalld | ✅ Verify firewalld Enabled |
| System Settings → Network Configurations and Firewalls → firewalld | ✅ Install firewalld |
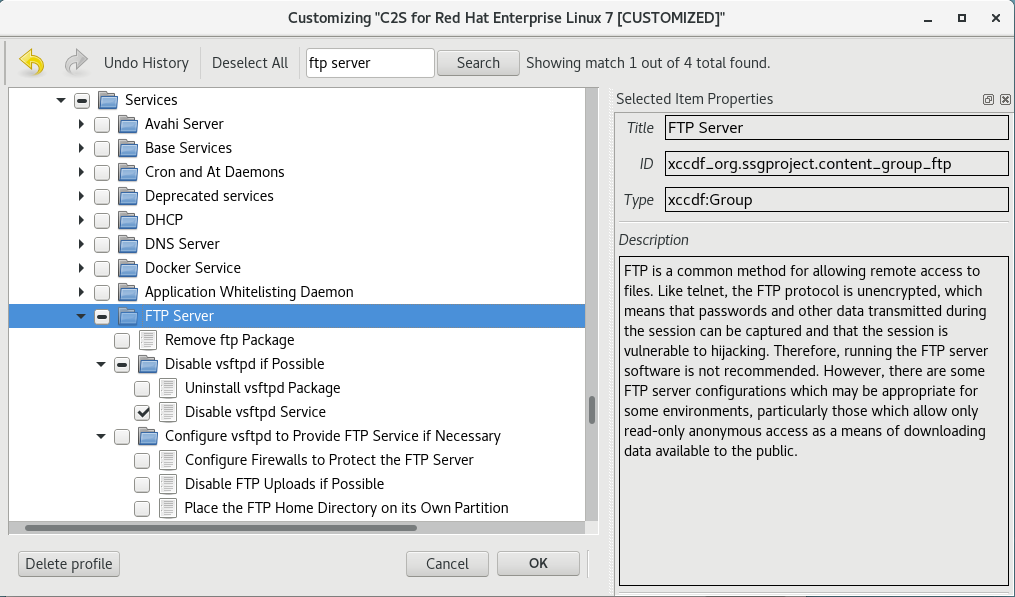
Why these rules?
- Telnet and FTP are legacy, unencrypted protocols. Their presence on a modern host is a direct security risk, credentials sent over these services are transmitted in plaintext.
- firewalld is the standard host-based firewall for RHEL. Verifying it’s installed and active ensures there’s a layer of network-level protection even if the host is misconfigured elsewhere.
Click OK to apply the customization.
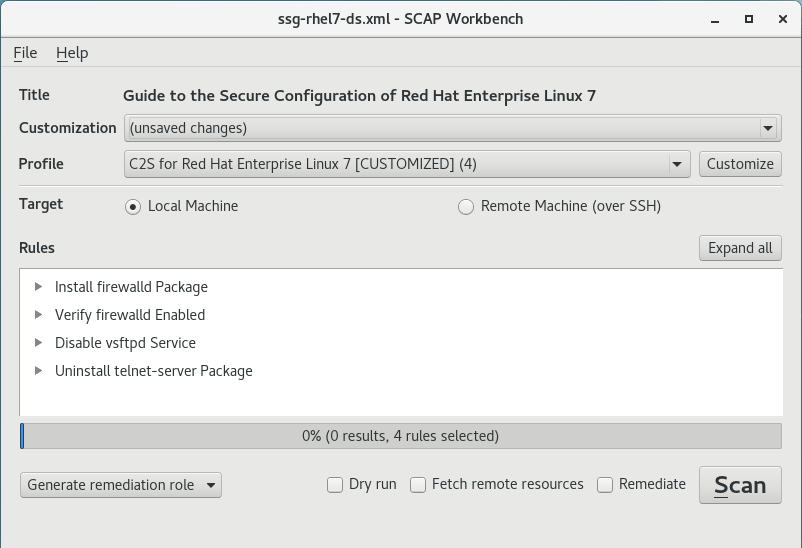
Step 3 - Save the Custom Policy as XML
Navigate to File → Save Customization Only, name the file custom_profile_1.xml, and click Save.
This exports the profile as a standalone XCCDF XML file. Saving it separately is important, it means you can version-control the policy, share it with teammates, or load it into other OpenSCAP tools independently of the base content.
Step 4 - Scan with the Custom Profile
- Set Target to Local Machine
- Click Scan
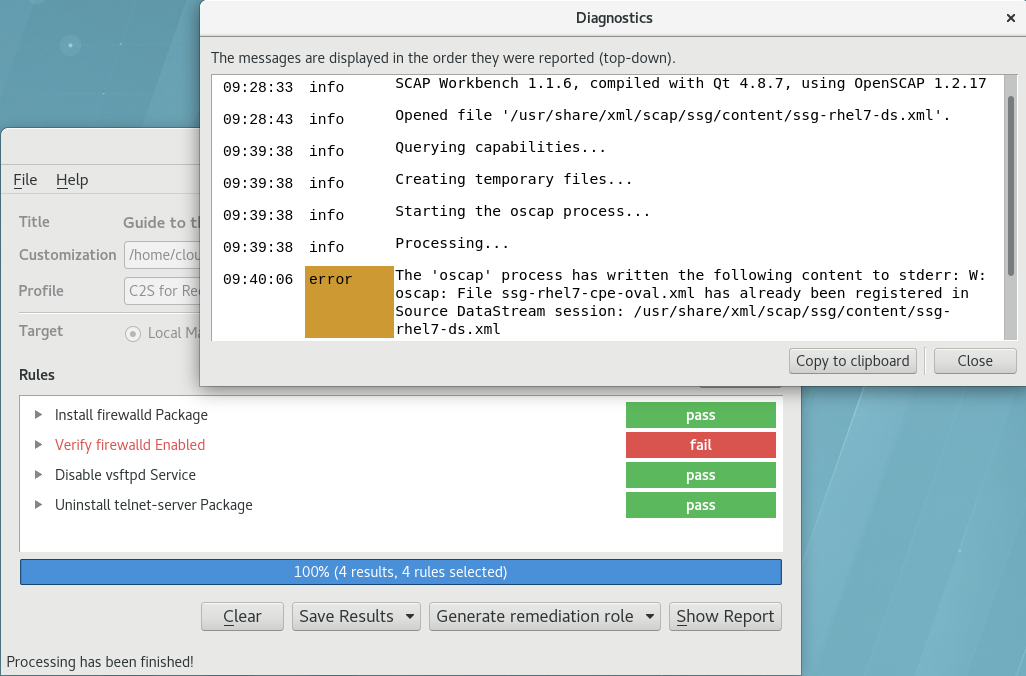
Because this profile only contains 4 rules instead of hundreds, the scan completes quickly. Close the Diagnostics window when done.
Step 5 - Export and Review the Custom Scan Report
Click Save Results → HTML Report, name it scan_results.html, and open it in Firefox.
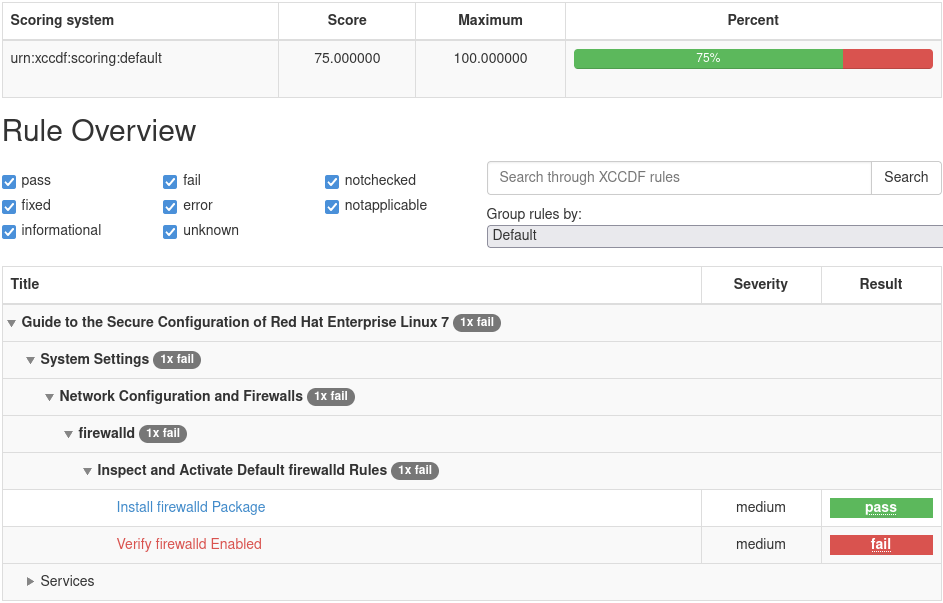
The report now reflects only your custom rules, making it easy to share a focused compliance snapshot with your team or attach to a ticket.
Example output - custom scan results:
| Rule | Result | Severity |
|---|---|---|
| Uninstall telnet-server Package | pass | High |
| Uninstall vsftpd Package | pass | High |
| Verify firewalld Enabled | fail | Medium |
| Install firewalld | fail | Medium |
In this example, the host correctly has telnet and vsftpd removed, but firewalld isn’t active, a clear, actionable remediation target.
Key Takeaways
| Concept | What I Practiced |
|---|---|
| Baseline scanning | Ran a full C2S compliance scan and reviewed an HTML results report |
| Custom policy creation | Built a scoped XCCDF profile targeting specific services and firewall rules |
| Profile export | Saved a custom profile as XML for reuse and version control |
| Reporting | Generated shareable HTML reports from both scan types |
OpenSCAP is a powerful addition to any security operations or compliance workflow. The ability to scan against industry-standard profiles out of the box, then layer in custom policies specific to your environment, makes it flexible enough for both formal audits and day-to-day hygiene checks.