(old Project 23)
In PROJECT 23, I demonstrate the deployment of an Nginx web server using Kubernetes. I explore various concepts such as ConfigMaps for managing configuration data and PersistentVolumes for data persistence.
First we need to set up Kubernetes on AWS (EKS), we will follow the same steps as described in Project 22
To confirm that the Kubernetes cluster is up and running
hector@hector-Laptop:~$ kubectl cluster-info
Kubernetes control plane is running at https://D236EDB340398719073CDF558090376C.gr7.us-east-1.eks.amazonaws.com
CoreDNS is running at https://D236EDB340398719073CDF558090376C.gr7.us-east-1.eks.amazonaws.com/api/v1/namespaces/kube-system/services/kube-dns:dns/proxy

To further debug and diagnose cluster problems, use 'kubectl cluster-info dump'.
hector@hector-Laptop:~$
PERSISTING DATA IN KUBERNETES
Environment Ready To Follow Steps
Before create a volume, lets run the nginx deployment into kubernetes without a volume. This gives us an opportunity to check config files and the nodes running the pods.
hector@hector-Laptop:~/Project23$ kubectl get pods
No resources found in default namespace.
hector@hector-Laptop:~/Project23$ kubectl apply -f nginx-pod.yaml
deployment.apps/nginx-deployment created
hector@hector-Laptop:~/Project23$ cat nginx-pod.yaml
apiVersion: apps/v1
kind: Deployment
metadata:
  name: nginx-deployment
  labels:
    tier: frontend
spec:
  replicas: 3
  selector:
    matchLabels:
      tier: frontend
  template:
    metadata:
      labels:
        tier: frontend
    spec:
      containers:
      - name: nginx
        image: nginx:latest
        ports:
        - containerPort: 80
Verify that the pod is running
hector@hector-Laptop:~/Project23$ kubectl get pods
NAME                                READY   STATUS    RESTARTS   AGE
nginx-deployment-6fdcffd8fc-j2jtt   1/1     Running   0          22s
nginx-deployment-6fdcffd8fc-l75gk   1/1     Running   0          22s
nginx-deployment-6fdcffd8fc-zxk9p   1/1     Running   0          22s
Check the logs of the pod
hector@hector-Laptop:~/Project23$ kubectl logs nginx-deployment-6fdcffd8fc-j2jtt
/docker-entrypoint.sh: /docker-entrypoint.d/ is not empty, will attempt to perform configuration
/docker-entrypoint.sh: Looking for shell scripts in /docker-entrypoint.d/
/docker-entrypoint.sh: Launching /docker-entrypoint.d/10-listen-on-ipv6-by-default.sh
10-listen-on-ipv6-by-default.sh: info: Getting the checksum of /etc/nginx/conf.d/default.conf
10-listen-on-ipv6-by-default.sh: info: Enabled listen on IPv6 in /etc/nginx/conf.d/default.conf
/docker-entrypoint.sh: Launching /docker-entrypoint.d/20-envsubst-on-templates.sh
/docker-entrypoint.sh: Launching /docker-entrypoint.d/30-tune-worker-processes.sh
/docker-entrypoint.sh: Configuration complete; ready for start up
2022/08/11 17:36:08 [notice] 1#1: using the "epoll" event method
2022/08/11 17:36:08 [notice] 1#1: nginx/1.23.1
2022/08/11 17:36:08 [notice] 1#1: built by gcc 10.2.1 20210110 (Debian 10.2.1-6)
2022/08/11 17:36:08 [notice] 1#1: OS: Linux 5.4.204-113.362.amzn2.x86_64
2022/08/11 17:36:08 [notice] 1#1: getrlimit(RLIMIT_NOFILE): 1048576:1048576
2022/08/11 17:36:08 [notice] 1#1: start worker processes
2022/08/11 17:36:08 [notice] 1#1: start worker process 31
2022/08/11 17:36:08 [notice] 1#1: start worker process 32
Exec into the pod and navigate to the nginx configuration file /etc/nginx/conf.d/default.conf
Open the config files to see the default configuration.
Information we need may include the path the “document root” (/usr/share/nginx/html) this is the directory that nginx inspects in order to serve files for incoming client requests. We will use later as a mount point
hector@hector-Laptop:~/Project23$ kubectl exec -it nginx-deployment-6fdcffd8fc-j2jtt -- bash

root@nginx-deployment-6fdcffd8fc-j2jtt:/# cat /etc/nginx/conf.d/default.conf
server {
    listen       80;
    listen  [::]:80;
    server_name  localhost;

    #access_log  /var/log/nginx/host.access.log  main;

    location / {
        root   /usr/share/nginx/html;
        index  index.html index.htm;
    }

    #error_page  404              /404.html;

    # redirect server error pages to the static page /50x.html
    #
    error_page   500 502 503 504  /50x.html;
    location = /50x.html {
        root   /usr/share/nginx/html;
    }

    # proxy the PHP scripts to Apache listening on 127.0.0.1:80
    #
    #location ~ \.php$ {
    #    proxy_pass   http://127.0.0.1;
    #}

    # pass the PHP scripts to FastCGI server listening on 127.0.0.1:9000
    #
    #location ~ \.php$ {
    #    root           html;
    #    fastcgi_pass   127.0.0.1:9000;
    #    fastcgi_index  index.php;
    #    fastcgi_param  SCRIPT_FILENAME  /scripts$fastcgi_script_name;
    #    include        fastcgi_params;
    #}

    # deny access to .htaccess files, if Apache's document root
    # concurs with nginx's one
    #
    #location ~ /\.ht {
    #    deny  all;
    #}
}

root@nginx-deployment-6fdcffd8fc-j2jtt:/#
Before we Create Volume first we have to check the AZ (Availability Zone) of the worker node where the pod is running. Those instances need to be in the same region and availability zone as the EBS volume
Note: EBS only supports a single EC2 instance mounting a volume
Below we see the internal IP of the nodes ip-192-168-138-68.ec2.internal and ip-192-168-229-214.ec2.internal
hector@hector-Laptop:~/Project23$ kubectl get pods -o wide
NAME                                READY   STATUS    RESTARTS   AGE   IP               NODE                              NOMINATED NODE   READINESS GATES
nginx-deployment-6fdcffd8fc-j2jtt   1/1     Running   0          18m   192.168.154.43   ip-192-168-138-68.ec2.internal    <none>           <none>
nginx-deployment-6fdcffd8fc-l75gk   1/1     Running   0          18m   192.168.246.1    ip-192-168-229-214.ec2.internal   <none>           <none>
nginx-deployment-6fdcffd8fc-zxk9p   1/1     Running   0          18m   192.168.190.59   ip-192-168-138-68.ec2.internal    <none>           <none>
Using describe to get information from nodes
hector@hector-Laptop:~/Project23$ kubectl describe nodes ip-192-168-138-68.ec2.internal
Name:               ip-192-168-138-68.ec2.internal
Roles:              <none>
Labels:             beta.kubernetes.io/arch=amd64
                    beta.kubernetes.io/instance-type=t3.medium
                    beta.kubernetes.io/os=linux
                    eks.amazonaws.com/capacityType=ON_DEMAND
                    eks.amazonaws.com/nodegroup=Project23
                    eks.amazonaws.com/nodegroup-image=ami-066d220fc7b27642c
                    failure-domain.beta.kubernetes.io/region=us-east-1
                    failure-domain.beta.kubernetes.io/zone=us-east-1a
                    k8s.io/cloud-provider-aws=502d7fd2fa5d65b376d4116fc6c22958
                    kubernetes.io/arch=amd64
                    kubernetes.io/hostname=ip-192-168-138-68.ec2.internal
                    kubernetes.io/os=linux
                    node.kubernetes.io/instance-type=t3.medium
                    topology.kubernetes.io/region=us-east-1
                    topology.kubernetes.io/zone=us-east-1a
Annotations:        node.alpha.kubernetes.io/ttl: 0
                    volumes.kubernetes.io/controller-managed-attach-detach: true
CreationTimestamp:  Thu, 11 Aug 2022 12:51:49 -0400
Taints:             <none>
Unschedulable:      false
Lease:
  HolderIdentity:  ip-192-168-138-68.ec2.internal
  AcquireTime:     <unset>
  RenewTime:       Thu, 11 Aug 2022 13:55:10 -0400
Conditions:
  Type             Status  LastHeartbeatTime                 LastTransitionTime                Reason                       Message
  ----             ------  -----------------                 ------------------                ------                       -------
  MemoryPressure   False   Thu, 11 Aug 2022 13:51:31 -0400   Thu, 11 Aug 2022 12:51:47 -0400   KubeletHasSufficientMemory   kubelet has sufficient memory available
  DiskPressure     False   Thu, 11 Aug 2022 13:51:31 -0400   Thu, 11 Aug 2022 12:51:47 -0400   KubeletHasNoDiskPressure     kubelet has no disk pressure
  PIDPressure      False   Thu, 11 Aug 2022 13:51:31 -0400   Thu, 11 Aug 2022 12:51:47 -0400   KubeletHasSufficientPID      kubelet has sufficient PID available
  Ready            True    Thu, 11 Aug 2022 13:51:31 -0400   Thu, 11 Aug 2022 12:52:19 -0400   KubeletReady                 kubelet is posting ready status
Addresses:
  InternalIP:   192.168.138.68
  Hostname:     ip-192-168-138-68.ec2.internal
  InternalDNS:  ip-192-168-138-68.ec2.internal
Capacity:
  attachable-volumes-aws-ebs:  25
  cpu:                         2
  ephemeral-storage:           20959212Ki
  hugepages-1Gi:               0
  hugepages-2Mi:               0
  memory:                      3967476Ki
  pods:                        17
Allocatable:
  attachable-volumes-aws-ebs:  25
  cpu:                         1930m
  ephemeral-storage:           18242267924
  hugepages-1Gi:               0
  hugepages-2Mi:               0
  memory:                      3412468Ki
  pods:                        17
System Info:
  Machine ID:                 ec2ae5d8820f8f02bdbcd3090f0ebcea
  System UUID:                ec2ae5d8-820f-8f02-bdbc-d3090f0ebcea
  Boot ID:                    8f05467e-2bb8-4130-84e8-8b5d837a1c36
  Kernel Version:             5.4.204-113.362.amzn2.x86_64
  OS Image:                   Amazon Linux 2
  Operating System:           linux
  Architecture:               amd64
  Container Runtime Version:  docker://20.10.13
  Kubelet Version:            v1.22.9-eks-810597c
  Kube-Proxy Version:         v1.22.9-eks-810597c
ProviderID:                   aws:///us-east-1a/i-0405e3476ad9160bf
Non-terminated Pods:          (4 in total)
  Namespace                   Name                                 CPU Requests  CPU Limits  Memory Requests  Memory Limits  Age
  ---------                   ----                                 ------------  ----------  ---------------  -------------  ---
  default                     nginx-deployment-6fdcffd8fc-j2jtt    0 (0%)        0 (0%)      0 (0%)           0 (0%)         19m
  default                     nginx-deployment-6fdcffd8fc-zxk9p    0 (0%)        0 (0%)      0 (0%)           0 (0%)         19m
  kube-system                 aws-node-55j85                       25m (1%)      0 (0%)      0 (0%)           0 (0%)         63m
  kube-system                 kube-proxy-xfxt5                     100m (5%)     0 (0%)      0 (0%)           0 (0%)         63m
Allocated resources:
  (Total limits may be over 100 percent, i.e., overcommitted.)
  Resource                    Requests   Limits
  --------                    --------   ------
  cpu                         125m (6%)  0 (0%)
  memory                      0 (0%)     0 (0%)
  ephemeral-storage           0 (0%)     0 (0%)
  hugepages-1Gi               0 (0%)     0 (0%)
  hugepages-2Mi               0 (0%)     0 (0%)
  attachable-volumes-aws-ebs  0          0
Events:                       <none>
hector@hector-Laptop:~/Project23$ kubectl describe nodes ip-192-168-229-214.ec2.internal
Name: ip-192-168-229-214.ec2.internal
Roles: <none>
Labels: beta.kubernetes.io/arch=amd64
beta.kubernetes.io/instance-type=t3.medium
beta.kubernetes.io/os=linux
eks.amazonaws.com/capacityType=ON_DEMAND
eks.amazonaws.com/nodegroup=Project23
eks.amazonaws.com/nodegroup-image=ami-066d220fc7b27642c
failure-domain.beta.kubernetes.io/region=us-east-1
failure-domain.beta.kubernetes.io/zone=us-east-1b
k8s.io/cloud-provider-aws=502d7fd2fa5d65b376d4116fc6c22958
kubernetes.io/arch=amd64
kubernetes.io/hostname=ip-192-168-229-214.ec2.internal
kubernetes.io/os=linux
node.kubernetes.io/instance-type=t3.medium
topology.kubernetes.io/region=us-east-1
topology.kubernetes.io/zone=us-east-1b
Annotations: node.alpha.kubernetes.io/ttl: 0
volumes.kubernetes.io/controller-managed-attach-detach: true
CreationTimestamp: Thu, 11 Aug 2022 12:51:40 -0400
Taints: <none>
Unschedulable: false
Lease:
HolderIdentity: ip-192-168-229-214.ec2.internal
AcquireTime: <unset>
RenewTime: Thu, 11 Aug 2022 13:59:36 -0400
Conditions:
Type Status LastHeartbeatTime LastTransitionTime Reason Message
---- ------ ----------------- ------------------ ------ -------
MemoryPressure False Thu, 11 Aug 2022 13:58:13 -0400 Thu, 11 Aug 2022 12:51:39 -0400 KubeletHasSufficientMemory kubelet has sufficient memory available
DiskPressure False Thu, 11 Aug 2022 13:58:13 -0400 Thu, 11 Aug 2022 12:51:39 -0400 KubeletHasNoDiskPressure kubelet has no disk pressure
PIDPressure False Thu, 11 Aug 2022 13:58:13 -0400 Thu, 11 Aug 2022 12:51:39 -0400 KubeletHasSufficientPID kubelet has sufficient PID available
Ready True Thu, 11 Aug 2022 13:58:13 -0400 Thu, 11 Aug 2022 12:52:00 -0400 KubeletReady kubelet is posting ready status
Addresses:
InternalIP: 192.168.229.214
Hostname: ip-192-168-229-214.ec2.internal
InternalDNS: ip-192-168-229-214.ec2.internal
Capacity:
attachable-volumes-aws-ebs: 25
cpu: 2
ephemeral-storage: 20959212Ki
hugepages-1Gi: 0
hugepages-2Mi: 0
memory: 3967476Ki
pods: 17
Allocatable:
attachable-volumes-aws-ebs: 25
cpu: 1930m
ephemeral-storage: 18242267924
hugepages-1Gi: 0
hugepages-2Mi: 0
memory: 3412468Ki
pods: 17
System Info:
Machine ID: ec28587c627ce365417414935ae4fb9a
System UUID: ec28587c-627c-e365-4174-14935ae4fb9a
Boot ID: 58110d2a-2a9d-4f33-9d71-acfedd49bd4c
Kernel Version: 5.4.204-113.362.amzn2.x86_64
OS Image: Amazon Linux 2
Operating System: linux
Architecture: amd64
Container Runtime Version: docker://20.10.13
Kubelet Version: v1.22.9-eks-810597c
Kube-Proxy Version: v1.22.9-eks-810597c
ProviderID: aws:///us-east-1b/i-00b40db6d5c47e304
Non-terminated Pods: (5 in total)
Namespace Name CPU Requests CPU Limits Memory Requests Memory Limits Age
--------- ---- ------------ ---------- --------------- ------------- ---
default nginx-deployment-6fdcffd8fc-l75gk 0 (0%) 0 (0%) 0 (0%) 0 (0%) 23m
kube-system aws-node-mqxms 25m (1%) 0 (0%) 0 (0%) 0 (0%) 67m
kube-system coredns-7f5998f4c-8fxj9 100m (5%) 0 (0%) 70Mi (2%) 170Mi (5%) 136m
kube-system coredns-7f5998f4c-h8sp2 100m (5%) 0 (0%) 70Mi (2%) 170Mi (5%) 136m
kube-system kube-proxy-kd4v9 100m (5%) 0 (0%) 0 (0%) 0 (0%) 67m
Allocated resources:
(Total limits may be over 100 percent, i.e., overcommitted.)
Resource Requests Limits
-------- -------- ------
cpu 325m (16%) 0 (0%)
memory 140Mi (4%) 340Mi (10%)
ephemeral-storage 0 (0%) 0 (0%)
hugepages-1Gi 0 (0%) 0 (0%)
hugepages-2Mi 0 (0%) 0 (0%)
attachable-volumes-aws-ebs 0 0
Events: <none>
Based on the describe output above our 3 PODS are running on 2 NODES with 2 AZ zone=us-east-1a and zone=us-east-1b
I’ll choose zone=us-east-1a to create a volume in AWS
- In AWS console, head over to the EC2 section and scroll down to the Elastic Block Storage menu.
- Click on Volumes
- At the top right, click on Create Volume
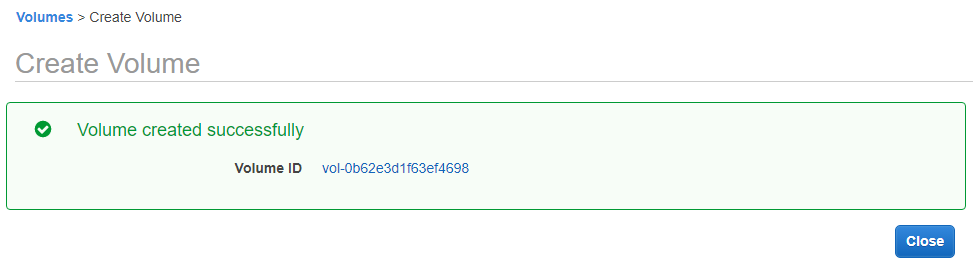
Lets see what nginx-pod.yaml looks like for our Nginx pod to persist data using awsElasticBlockStore volume.
Notice the volumeID entry contains the value of an EBS ID (the one we just created)
hector@hector-Laptop:~/Project23$ cat nginx-pod.yaml
apiVersion: apps/v1
kind: Deployment
metadata:
  name: nginx-deployment
  labels:
    tier: frontend
spec:
  replicas: 1
  selector:
    matchLabels:
      tier: frontend
  template:
    metadata:
      labels:
        tier: frontend
    spec:
      containers:
      - name: nginx
        image: nginx:latest
        ports:
        - containerPort: 80
      volumes:
      - name: nginx-volume
        # This AWS EBS volume must already exist.
        awsElasticBlockStore:
          volumeID: "vol-0b62e3d1f63ef4698"
fsType: ext4hector@hector-Laptop:~/Project23$ kubectl apply -f nginx-pod.yaml
deployment.apps/nginx-deployment configuredTo keep it simple will keep the **replicateSet **to 1
hector@hector-Laptop:~/Project23$ kubectl get pods
NAME READY STATUS RESTARTS AGE
nginx-deployment-5844d76665-gq748 1/1 Running 0 7sSo we checked the node the running pod its in and confirmed it was on east-a availability zone as the EBS we created
Getting more information from pod and deployment using describe
hector@hector-Laptop:~/Project23$ kubectl get pods
NAME READY STATUS RESTARTS AGE
nginx-deployment-5844d76665-gq748 1/1 Running 0 19mhector@hector-Laptop:~/Project23$ kubectl describe pod nginx-deployment-5844d76665-gq748
Name: nginx-deployment-5844d76665-gq748
Namespace: default
Priority: 0
Node: ip-192-168-138-68.ec2.internal/192.168.138.68
Start Time: Thu, 11 Aug 2022 15:20:00 -0400
Labels: pod-template-hash=5844d76665
tier=frontend
Annotations: kubernetes.io/psp: eks.privileged
Status: Running
IP: 192.168.150.93
IPs:
IP: 192.168.150.93
Controlled By: ReplicaSet/nginx-deployment-5844d76665
Containers:
nginx:
Container ID: docker://284c38ada44ee7a5cef34b3fd7369442f99092d745551cde05171e8f8cfb1693
Image: nginx:latest
Image ID: docker-pullable://nginx@sha256:790711e34858c9b0741edffef6ed3d8199d8faa33f2870dea5db70f16384df79
Port: 80/TCP
Host Port: 0/TCP
State: Running
Started: Thu, 11 Aug 2022 15:20:01 -0400
Ready: True
Restart Count: 0
Environment: <none>
Mounts:
/var/run/secrets/kubernetes.io/serviceaccount from kube-api-access-fgckn (ro)
Conditions:
Type Status
Initialized True
Ready True
ContainersReady True
PodScheduled True
Volumes:
nginx-volume:
Type: AWSElasticBlockStore (a Persistent Disk resource in AWS)
VolumeID: vol-0b62e3d1f63ef4698
FSType: ext4
Partition: 0
ReadOnly: false
kube-api-access-fgckn:
Type: Projected (a volume that contains injected data from multiple sources)
TokenExpirationSeconds: 3607
ConfigMapName: kube-root-ca.crt
ConfigMapOptional: <nil>
DownwardAPI: true
QoS Class: BestEffort
Node-Selectors: <none>
Tolerations: node.kubernetes.io/not-ready:NoExecute op=Exists for 300s
node.kubernetes.io/unreachable:NoExecute op=Exists for 300s
Events:
Type Reason Age From Message
---- ------ ---- ---- -------
Normal Scheduled 19m default-scheduler Successfully assigned default/nginx-deployment-5844d76665-gq748 to ip-192-168-138-68.ec2.internal
Normal Pulling 19m kubelet Pulling image "nginx:latest"
Normal Pulled 19m kubelet Successfully pulled image "nginx:latest" in 132.32775ms
Normal Created 19m kubelet Created container nginx
Normal Started 19m kubelet Started container nginx
Normal SuccessfulAttachVolume 19m attachdetach-controller AttachVolume.Attach succeeded for volume "nginx-volume"hector@hector-Laptop:~/Project23$ kubectl get deployment
NAME READY UP-TO-DATE AVAILABLE AGE
nginx-deployment 1/1 1 1 123mhector@hector-Laptop:~/Project23$ kubectl describe deployment nginx-deployment
Name: nginx-deployment
Namespace: default
CreationTimestamp: Thu, 11 Aug 2022 13:36:01 -0400
Labels: tier=frontend
Annotations: deployment.kubernetes.io/revision: 2
Selector: tier=frontend
Replicas: 1 desired | 1 updated | 1 total | 1 available | 0 unavailable
StrategyType: RollingUpdate
MinReadySeconds: 0
RollingUpdateStrategy: 25% max unavailable, 25% max surge
Pod Template:
Labels: tier=frontend
Containers:
nginx:
Image: nginx:latest
Port: 80/TCP
Host Port: 0/TCP
Environment: <none>
Mounts: <none>
Volumes:
nginx-volume:
Type: AWSElasticBlockStore (a Persistent Disk resource in AWS)
VolumeID: vol-0b62e3d1f63ef4698
FSType: ext4
Partition: 0
ReadOnly: false
Conditions:
Type Status Reason
---- ------ ------
Available True MinimumReplicasAvailable
Progressing True NewReplicaSetAvailable
OldReplicaSets: <none>
NewReplicaSet: nginx-deployment-5844d76665 (1/1 replicas created)
Events:
Type Reason Age From Message
---- ------ ---- ---- -------
Normal ScalingReplicaSet 20m deployment-controller Scaled down replica set nginx-deployment-6fdcffd8fc to 1
Normal ScalingReplicaSet 20m deployment-controller Scaled up replica set nginx-deployment-5844d76665 to 1
Normal ScalingReplicaSet 20m deployment-controller Scaled down replica set nginx-deployment-6fdcffd8fc to 0At this point, even though the pod can be used for a stateful application, the configuration is not yet complete. This is because, the volume is not yet mounted onto any specific filesystem inside the container. The directory /usr/share/nginx/html which holds the software/website code is still ephemeral, and if there is any kind of update to the index.html file, the new changes will only be there for as long as the pod is still running. If the pod dies after, all previously written data will be erased.
To complete the configuration, we will need to add another section to the deployment yaml manifest. The volumeMounts which basically answers the question “Where should this Volume be mounted inside the container?” Mounting a volume to a directory means that all data written to the directory will be stored on that volume.
hector@hector-Laptop:~/Project23$ cat nginx-pod.yaml
apiVersion: apps/v1
kind: Deployment
metadata:
name: nginx-deployment
labels:
tier: frontend
spec:
replicas: 1
selector:
matchLabels:
tier: frontend
template:
metadata:
labels:
tier: frontend
spec:
containers:
- name: nginx
image: nginx:latest
ports:
- containerPort: 80
volumeMounts:
- name: nginx-volume
mountPath: /usr/share/nginx/
volumes:
- name: nginx-volume
# This AWS EBS volume must already exist.
awsElasticBlockStore:
volumeID: " vol-07b537651bbe68be0"
fsType: ext4We apply the new configuration the old pod will be terminated while the updated one will be up and running.
hector@hector-Laptop:~/Project23$ kubectl apply -f nginx-pod.yaml
deployment.apps/nginx-deployment configuredMANAGING VOLUMES DYNAMICALLY WITH PVs AND PVCs
Notes:
Kubernetes provides API objects for storage management such that, the lower level details of volume provisioning, storage allocation, access management etc are all abstracted away from the user, and all we have to do is present manifest files that describes what we want to get done.
PersistentVolumes (PVs) are volume plugins, they are responsible for interacting with the underlying storage systems and providing the necessary functionality to manage and access volumes. PVs act as an abstraction layer between the Kubernetes cluster and the actual storage infrastructure. The concept of PV plugins allows Kubernetes to support various storage providers and technologies without tightly coupling the core platform to specific storage implementations.
Persistent Volume Claims (PVCs) in Kubernetes serve as a means for Pods to request storage resources from Persistent Volumes (PVs). A PVC acts as a user’s request for a specific amount of storage with specific access modes, indicating how the storage can be used (e.g., ReadWriteOnce, ReadOnlyMany, ReadWriteMany). Users can create PVCs manually or Kubernetes can create them automatically based on Pod specifications. When a PVC is created, it searches for available PVs that match the requested storage requirements, and upon a successful match, the PVC is bound to the PV. By using PVCs, Pods can dynamically claim the required storage resources from the available pool of PVs, ensuring that the desired storage capacity and access modes are met for the application’s persistent data needs.
In summary, PVs are the actual storage resources in the cluster, while PVCs are the requests made by Pods to use those storage resources. PVCs provide a way to dynamically provision and consume storage in a Kubernetes cluster, while PVs provide the underlying storage infrastructure.
In order for a cluster to dynamically create Persistent Volumes (PVs), which are then used by Pods for persistent storage, we need to have a StorageClass defined. The StorageClass specifies the type of storage system we plan to use, such as NFS, iSCSI, or a cloud provider-specific storage system like AWS EBS.
StorageClass is a Kubernetes resource that we define within the cluster by creating a manifest file that describes its properties and applying it to the cluster using the kubectl apply command.
Example:
kind: StorageClass
apiVersion: storage.k8s.io/v1
metadata:
  name: gp2
  annotations:
  storageclass.kubernetes.io/is-default-class: "true"
provisioner: kubernetes.io/aws-ebs
parameters:
  type: gp2
  fsType: ext4
If the cluster is based on Google’s GKE or Azure’s AKS, then the storage class will be different.
Notes: Lifecycle of a **PV** and **PVC**
PVs are resources in the cluster. PVCs are requests for those resources and also act as claim checks to the resource. The interaction between PVs and PVCs follows this lifecycle:
-
Provisioning: There are two ways PVs may be provisioned: statically or dynamically.
- Static/Manual Provisioning: A cluster administrator creates a number of PVs using a manifest file which will contain all the details of the real storage. PVs are not scoped to namespaces, they a clusterwide wide resource, therefore the PV will be available for use when requested. PVCs on the other hand are namespace scoped.
- Dynamic: When there is no PV matching a PVC’s request, then based on the available StorageClass, a dynamic PV will be created for use by the PVC. If there is not StorageClass, then the request for a PV by the PVC will fail.
-
Binding: PVCs are bound to specifiv PVs. This binding is exclusive. A PVC to PV binding is a one-to-one mapping. Claims will remain unbound indefinitely if a matching volume does not exist. Claims will be bound as matching volumes become available. For example, a cluster provisioned with many 50Gi PVs would not match a PVC requesting 100Gi. The PVC can be bound when a 100Gi PV is added to the cluster.
-
Using: Pods use claims as volumes. The cluster inspects the claim to find the bound volume and mounts that volume for a Pod. For volumes that support multiple access modes, the user specifies which mode is desired when using their claim as a volume in a Pod. Once a user has a claim and that claim is bound, the bound PV belongs to the user for as long as they need it. Users schedule Pods and access their claimed PVs by including a persistentVolumeClaim section in a Pod’s volumes block
-
Storage Object in Use Protection: The purpose of the Storage Object in Use Protection feature is to ensure that PersistentVolumeClaims (PVCs) in active use by a Pod and PersistentVolume (PVs) that are bound to PVCs are not removed from the system, as this may result in data loss.
Note: PVC is in active use by a Pod when a Pod object exists that is using the PVC. If a user deletes a PVC in active use by a Pod, the PVC is not removed immediately. PVC removal is postponed until the PVC is no longer actively used by any Pods. Also, if an admin deletes a PV that is bound to a PVC, the PV is not removed immediately. PV removal is postponed until the PV is no longer bound to a PVC.
-
Reclaiming: When a user is done with their volume, they can delete the PVC objects from the API that allows reclamation of the resource. The reclaim policy for a PersistentVolume tells the cluster what to do with the volume after it has been released of its claim. Currently, volumes can either be Retained, Recycled, or Deleted.
- Retain: The Retain reclaim policy allows for manual reclamation of the resource. When the PersistentVolumeClaim is deleted, the PersistentVolume still exists and the volume is considered “released”. But it is not yet available for another claim because the previous claimant’s data remains on the volume.
- Delete: For volume plugins that support the Delete reclaim policy, deletion removes both the PersistentVolume object from Kubernetes, as well as the associated storage asset in the external infrastructure, such as an AWS EBS. Volumes that were dynamically provisioned inherit the reclaim policy of their StorageClass, which defaults to Delete
NOTES:
- When PVCs are created with a specific size, it cannot be expanded except the storageClass is configured to allow expansion with the allowVolumeExpansion field is set to true in the manifest YAML file. This is “unset” by default in EKS.
- When a PV has been provisioned in a specific availability zone, only pods running in that zone can use the PV. If a pod spec containing a PVC is created in another AZ and attempts to reuse an already bound PV, then the pod will remain in pending state and report volume node affinity conflict. Anytime you see this message, this will help you to understand what the problem is.
- PVs are not scoped to namespaces, they a clusterwide wide resource. PVCs on the other hand are namespace scoped.
Learn more about the different types of persistent volumes here
In Amazon Elastic Kubernetes Service (EKS), the default StorageClass that is configured as part of the EKS installation is called gp2. The gp2 StorageClass is based on Amazon Elastic Block Store (EBS).
hector@hector-Laptop:~$ kubectl get storageclass
NAME            PROVISIONER             RECLAIMPOLICY   VOLUMEBINDINGMODE      ALLOWVOLUMEEXPANSION   AGE
gp2 (default)   kubernetes.io/aws-ebs   Delete          WaitForFirstConsumer   false                  21m
Now lets create some persistence for our nginx deployment. We will use one of two approaches.
Approach 1
Create a manifest file for a PVC
hector@hector-Laptop:~$ nano nginx-volume-claim.ymlnginx-volume-claim.yml
apiVersion: v1
kind: PersistentVolumeClaim
metadata:
  name: nginx-volume-claim
spec:
  accessModes:
    - ReadWriteOnce
  resources:
    requests:
      storage: 2Gi
  storageClassName: gp2
This will create the PVC with the name nginx-volume-claim.
hector@hector-Laptop:~$ kubectl apply -f nginx-volume-claim.yml
persistentvolumeclaim/nginx-volume-claim created
The STATUS will show as Pending initially.
hector@hector-Laptop:~$ kubectl get pvc
NAME                 STATUS    VOLUME   CAPACITY   ACCESS MODES   STORAGECLASS   AGE
nginx-volume-claim   Pending                                      gp2            23s
hector@hector-Laptop:~$
If the status is Pending, it means that the PVC is waiting to be bound to a PersistentVolume (PV). To troubleshoot this, run a describe command on the PVC to get more information about its status.
Look for the Message section in the output. In this case, we will see a message stating that the PVC is waiting for the first consumer to be created before binding.
hector@hector-Laptop:~/Project23$ kubectl describe pvc nginx-volume-claim
Name:          nginx-volume-claim
Namespace:     default
StorageClass:  gp2
Status:        Pending
Volume:
Labels:        <none>
Annotations:   <none>
Finalizers:    [kubernetes.io/pvc-protection]
Capacity:
Access Modes:
VolumeMode:    Filesystem
Used By:       <none>
Events:
  Type    Reason                Age                   From                         Message
  ----    ------                ----                  ----                         -------
  Normal  WaitForFirstConsumer  99s (x26 over 7m52s)  persistentvolume-controller  waiting for first consumer to be created before binding
The waiting for first consumer to be created before binding is a configuration setting from the storageClass VolumeBindingMode.
The issue in this case was the unavailability of nodes in the cluster for scheduling Pods.
Troubleshooted this issue following these steps:
Checked the Deployment status:
hector@hector-Laptop:~/Project23$ kubectl get deployments
NAME               READY   UP-TO-DATE   AVAILABLE   AGE
nginx-deployment   0/1     1            0           6m28s
The desired number of Pods was not ready, it indicates an issue with Pod creation.
Verify the status of the Pods:
hector@hector-Laptop:~/Project23$ kubectl get pods
NAME                                READY   STATUS    RESTARTS   AGE
nginx-deployment-7676f8b4d9-m5v2t   0/1     Pending   0          4m58s
The Pods were in a pending state, it suggests a problem with Pod scheduling.
Describe the Pod to identify the specific issue:
hector@hector-Laptop:~/Project23$ kubectl describe nginx-deployment-7676f8b4d9-m5v2t
	Events:
	  Type     Reason            Age                  From               Message
	  ----     ------            ----                 ----               -------
	  Warning  FailedScheduling  55s (x5 over 5m23s)  default-scheduler  no nodes available to schedule pods
Looked for events or messages that provide information about the problem. In this case, the issue was the unavailability of nodes in the cluster to schedule the Pods.
Took the necessary steps to provision additional nodes.
After provisioning the missing nodes, the Deployment should become ready:
hector@hector-Laptop:~/Project23$ kubectl get deployments
NAME               READY   UP-TO-DATE   AVAILABLE   AGE
nginx-deployment   1/1     1            1           29m
The Persistent Volume (PV) is associated with the Persistent Volume Claim (PVC) for storage allocation:
hector@hector-Laptop:~/Project23$ kubectl get pv
NAME                                       CAPACITY   ACCESS MODES   RECLAIM POLICY   STATUS   CLAIM                        STORAGECLASS   REASON   AGE
pvc-aa96611c-aba1-42c4-b079-243af9ae7212   2Gi        RWO            Delete           Bound    default/nginx-volume-claim   gp2                     4m54s
The next step is to apply the deployment configuration to create the Nginx deployment to configure the Pod spec to use the PVC
hector@hector-Laptop:~/Project23$ cat nginxdeployment.yml
apiVersion: apps/v1
kind: Deployment
metadata:
  name: nginx-deployment
  labels:
    tier: frontend
spec:
  replicas: 1
  selector:
    matchLabels:
      tier: frontend
  template:
    metadata:
      labels:
        tier: frontend
    spec:
      containers:
      - name: nginx
        image: nginx:latest
        ports:
        - containerPort: 80
        volumeMounts:
        - name: nginx-volume-claim
          mountPath: "/tmp/dare"
      volumes:
      - name: nginx-volume-claim
        persistentVolumeClaim:
          claimName: nginx-volume-claim
The configuration also includes the specification for mounting the persistent volume claim (nginx-volume-claim) to the pod’s container at the path /tmp/dare. This allows the pod to access and utilize the persistent storage provided by the PVC.
hector@hector-Laptop:~/Project23$ kubectl apply -f nginxdeployment.yml
deployment.apps/nginx-deployment unchangedhector@hector-Laptop:~/Project23$ kubectl get pv
NAME CAPACITY ACCESS MODES RECLAIM POLICY STATUS CLAIM STORAGECLASS REASON AGE
pvc-aa96611c-aba1-42c4-b079-243af9ae7212 2Gi RWO Delete Bound default/nginx-volume-claim gp2 11mEC2 > Elastic Block Store > Volumes

I used the same service configuration file (nginx-service.yaml) from Project 22 to define the Nginx service. Here’s the content of the configuration file:
hector@hector-Laptop:~/Project23$ cat nginx-service.yaml
apiVersion: v1
kind: Service
metadata:
  name: nginx-service
spec:
  type: LoadBalancer
  selector:
    tier: frontend
  ports:
    - protocol: TCP
      port: 80
      targetPort: 80
Creating the Nginx service based on the provided configuration file
hector@hector-Laptop:~/Project23$ kubectl apply -f nginx-service.yaml
service/nginx-service created
Verifing the creation of the service
hector@hector-Laptop:~/Project23$ kubectl get svc
NAME            TYPE           CLUSTER-IP      EXTERNAL-IP                                                               PORT(S)        AGE
kubernetes      ClusterIP      10.100.0.1      <none>                                                                    443/TCP        4h47m
nginx-service   LoadBalancer   10.100.54.132   a69047daa62674e7392375d178cb0a9b-1787659259.us-east-1.elb.amazonaws.com   80:31491/TCP   14s
Accessing the Nginx service using the provided external IP. We can use a web browser or a command-line tool like Lynx to access the service.
hector@hector-Laptop:~/Project23$ lynx a69047daa62674e7392375d178cb0a9b-1787659259.us-east-1.elb.amazonaws.com Here is the output obtained when using the lynx command:

PCONFIGMAP
Using configMaps for persistence is not something to consider for data storage. Rather it is a way to manage configuration files and ensure they are not lost as a result of Pod replacement. To demonstrate this, we will use the HTML file that came with Nginx. This file can be found in /usr/share/nginx/html/index.html directory.
Lets go through the below process so that we can see an example of a configMap use case.
- Remove the volumeMounts and PVC sections of the manifest and use kubectl to apply the configuration
hector@hector-Laptop:~/Project23$ cat nginxdeployment.yml
apiVersion: apps/v1
kind: Deployment
metadata:
  name: nginx-deployment
  labels:
    tier: frontend
spec:
  replicas: 1
  selector:
    matchLabels:
      tier: frontend
  template:
    metadata:
      labels:
        tier: frontend
    spec:
      containers:
      - name: nginx
        image: nginx:latest
        ports:
        - containerPort: 80
Applying the configuation
hector@hector-Laptop:~/Project23$ kubectl apply -f nginxdeployment.yml
deployment.apps/nginx-deployment configured- We get the cluster IP to confirm the nginx is working
hector@hector-Laptop:~/Project23$ kubectl get service
NAME            TYPE           CLUSTER-IP       EXTERNAL-IP                                                              PORT(S)        AGE
kubernetes      ClusterIP      10.100.0.1       <none>                                                                   443/TCP        5h31m
nginx-service   LoadBalancer   10.100.182.155   aab8c1f0d166c4dfba6efab2c8126f6f-785035398.us-east-1.elb.amazonaws.com   80:30460/TCP   8m50s
Using *lynx to access the page we ensure that we are able to see the “Welcome to nginx” page

hector@hector-Laptop:~/Project23$ kubectl get pods
NAME                                READY   STATUS    RESTARTS   AGE
nginx-deployment-5b98d885c7-xdn7h 1/1 Running 0 4m43s- exec into the running container and copy the contents of index.html, we will need it to create a configmap.
hector@hector-Laptop:~/Project23$ kubectl exec -it nginx-deployment-5b98d885c7-xdn7h -- bash
root@nginx-deployment-5b98d885c7-xdn7h:/# cat /usr/share/nginx/html/index.html
<!DOCTYPE html>
<html>
<head>
<title>Welcome to nginx!</title>
<style>
html { color-scheme: light dark; }
body { width: 35em; margin: 0 auto;
font-family: Tahoma, Verdana, Arial, sans-serif; }
</style>
</head>
<body>
<h1>Welcome to nginx!</h1>
<p>If you see this page, the nginx web server is successfully installed and
working. Further configuration is required.</p>

<p>For online documentation and support please refer to
<a href="http://nginx.org/">nginx.org</a>.<br/>
Commercial support is available at
<a href="http://nginx.com/">nginx.com</a>.</p>

<p><em>Thank you for using nginx.</em></p>
</body>
</html>
root@nginx-deployment-5b98d885c7-xdn7h:/#
Creating configmap manifest
hector@hector-Laptop:~/Project23$ cat nginx-configmap.yaml
apiVersion: v1
kind: ConfigMap
metadata:
  name: website-index-file
data:
  # file to be mounted inside a volume
  index-file: |
    <!DOCTYPE html>
    <html>
    <head>
    <title>Welcome to nginx!</title>
    <style>
    html { color-scheme: light dark; }
    body { width: 35em; margin: 0 auto;
    font-family: Tahoma, Verdana, Arial, sans-serif; }
    </style>
    </head>
    <body>
    <h1>Welcome to nginx!</h1>
    <p>If you see this page, the nginx web server is successfully installed and
    working. Further configuration is required.</p>

    <p>For online documentation and support please refer to
    <a href="http://nginx.org/">nginx.org</a>.<br/>
    Commercial support is available at
    <a href="http://nginx.com/">nginx.com</a>.</p>

    <p><em>Thank you for using nginx.</em></p>
    </body>
    </html>
Apply the new manifest file
hector@hector-Laptop:~/Project23$ kubectl apply -f nginx-configmap.yaml
configmap/website-index-file created
Update the deployment file to use the configmap in the volumeMounts section
hector@hector-Laptop:~/Project23$ cat nginx-pod-with-cm.yaml
apiVersion: apps/v1
kind: Deployment
metadata:
  name: nginx-deployment
  labels:
    tier: frontend
spec:
  replicas: 1
  selector:
    matchLabels:
      tier: frontend
  template:
    metadata:
      labels:
        tier: frontend
    spec:
      containers:
      - name: nginx
        image: nginx:latest
        ports:
        - containerPort: 80
        volumeMounts:
          - name: config
            mountPath: /usr/share/nginx/html
            readOnly: true
      volumes:
      - name: config
        configMap:
          name: website-index-file
          items:
          - key: index-file
path: index.htmlhector@hector-Laptop:~/Project23$ kubectl apply -f nginx-pod-with-cm.yaml
deployment.apps/nginx-deployment createdhector@hector-Laptop:~/Project23$ kubectl get pods
NAME READY STATUS RESTARTS AGE
nginx-deployment-7dcdfbd66f-m527b 1/1 Running 0 2m3sNow the index.html file is no longer ephemeral because it is using a configMap that has been mounted onto the filesystem. This is now evident when we exec into the pod and list the /usr/share/nginx/html directory
hector@hector-Laptop:~/Project23$ kubectl exec -it nginx-deployment-7dcdfbd66f-m527b -- bash
root@nginx-deployment-7dcdfbd66f-m527b:/# ls -ltr  /usr/share/nginx/html
total 0
lrwxrwxrwx 1 root root 17 Aug 11 21:29 index.html -> ..data/index.html
root@nginx-deployment-7dcdfbd66f-m527b:/#
We can now see that the index.html is now a soft link to ../data
Now if we make any change to the content of the html file through the configMap, and restart the pod, all our changes will persist. Lets try that:
List the available configmaps. We can either use kubectl get configmap or kubectl get cm
hector@hector-Laptop:~/Project23$ kubectl get configmap
NAME                 DATA   AGE
kube-root-ca.crt     1      5h50m
website-index-file   1      9m16s
We will update configMap by modiying the kubernetes object directly (can also be done by updating the manifest file). To update the object we use kubectl edit cm website-index-file (It will open up the default text editor configured in the system to use. We Update the content as we like.)
hector@hector-Laptop:~/Project23$ kubectl edit cm website-index-file
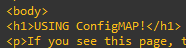
configmap/website-index-file editedIn our case I have udpated the heading to say ”USING ConfigMAP!”
Once again to get the ClusterIP and access it via lynx
hector@hector-Laptop:~/Project23$ kubectl get service
NAME            TYPE           CLUSTER-IP       EXTERNAL-IP                                                              PORT(S)        AGE
kubernetes      ClusterIP      10.100.0.1       <none>                                                                   443/TCP        5h54m
nginx-service   LoadBalancer   10.100.182.155   aab8c1f0d166c4dfba6efab2c8126f6f-785035398.us-east-1.elb.amazonaws.com   80:30460/TCP   32m
Without restarting the pod, the site should be loaded automatically.

Updating a ConfigMap’s data will cause its changes to be seen by pods using it, whether those pods are restarted or not.