==(old Project 14)==
ANSIBLE ROLES FOR CI ENVIRONMENT
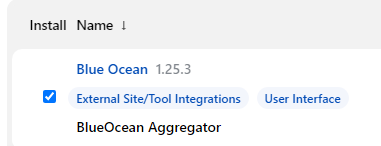
Install & Open Blue Ocean Jenkins Plugin
Manage Jenkins > Plugin Manager
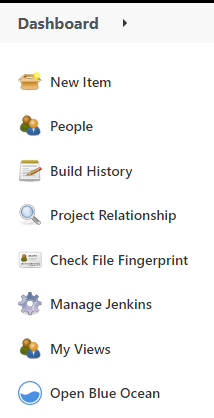
Now I can see the Blue Ocean icon in the Dashboard
Creating Access Token in Github
Settings > Developer settings > Personal access tokens , button Generate new token
Under Note "jenkins-access-token"read:user
Select Scopes we put repo and on user select user:email user, read:user

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
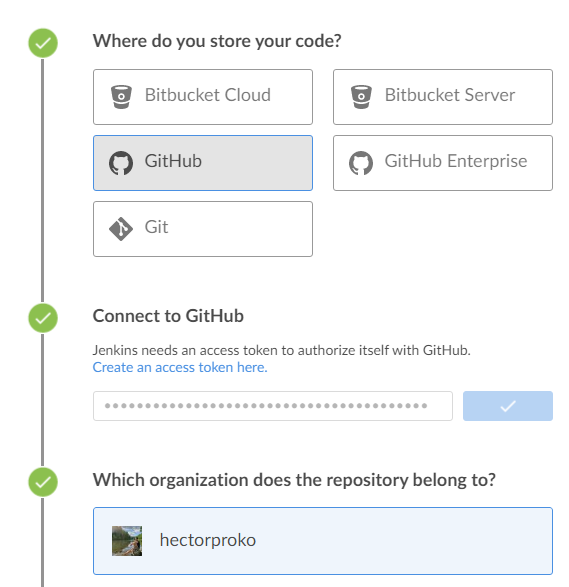
Created repo ansible-project
Attn:
Later on I stop using this repo and replace it with ansible-config-mgt
At this point it tries to find a Jenkinsfile does not find it and prompts you to a page to generate one
I’ll ignore it and click Administration
Now in the Dashboard we see the (newly created pipeline) job. It takes the name of your GitHub repository ansible-project
Created a Jenkinsfile (inside dir deploy in our repo) that I will gradually build by first adding a Build stage with this code snippet
pipeline {
    agent any
stages {
    stage('Build') {
      steps {
        script {
          sh 'echo "Building Stage"'
        }
      }
    }
    }
}
Click ansible-project to see additional options
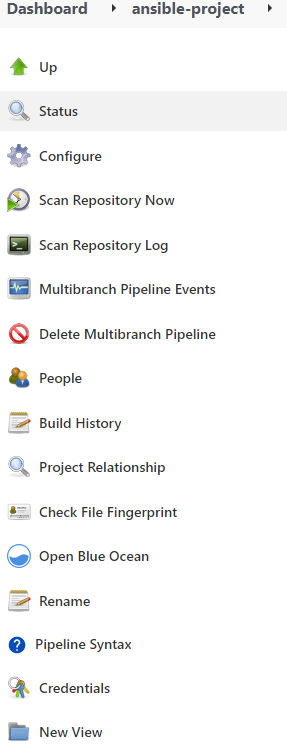
I will change the config of the job by clicking button Configure
click tab Build Configuration
Here I specify the path of the Jenkinsfile
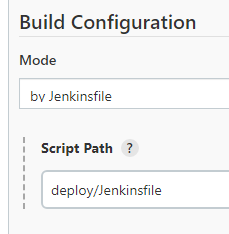
Click Save
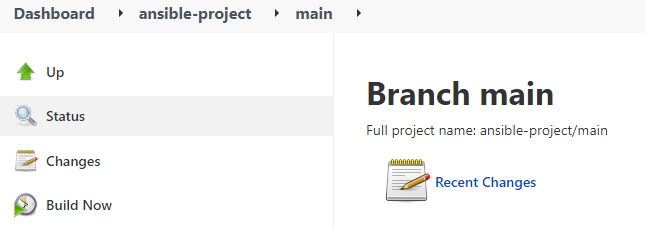
I’m prompted back to ansible-project we get to pick branches we pick the only one main
Click Build Now to test
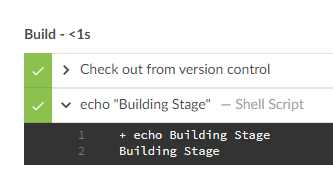
If we check the Console Output of this build we see the intended message
...
...
[Pipeline] sh
+ echo Building Stage
Building Stage
[Pipeline] }
...
...
I just triggered the job from Jenkins GUI we could do it from Blue Ocean as well
The log from Ocean Blue is easier on the eyes
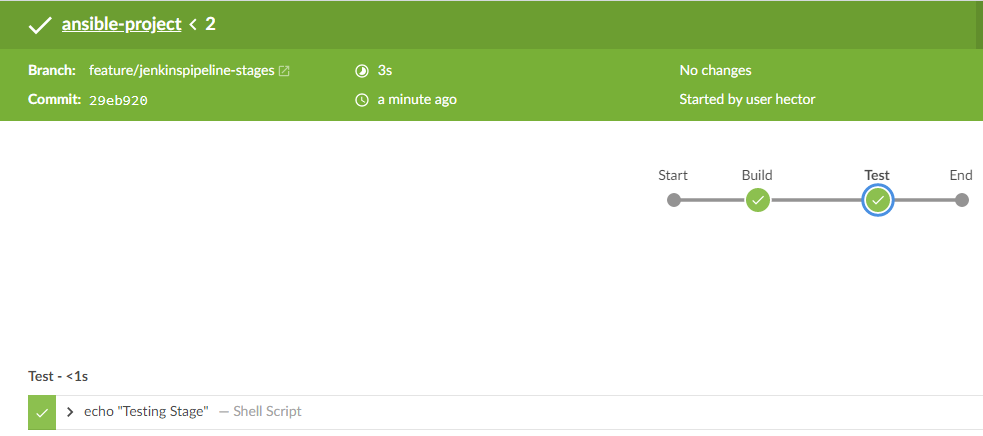
To appreciate the multibranch options I’ll create another branch and name it feature/jenkinspipeline-stages
In this new branch the Jenkinsfile will have an additional stage Test
stage('Test') {
  steps {
    script {
      sh 'echo "Testing Stage"'
    }
  }
}
For the new branch to show up Navigate to the ansible-project dashboard and click on ”Scan repository now”

In Blue Ocean, I can now see how the Jenkinsfile caused a new step to appear in the pipeline
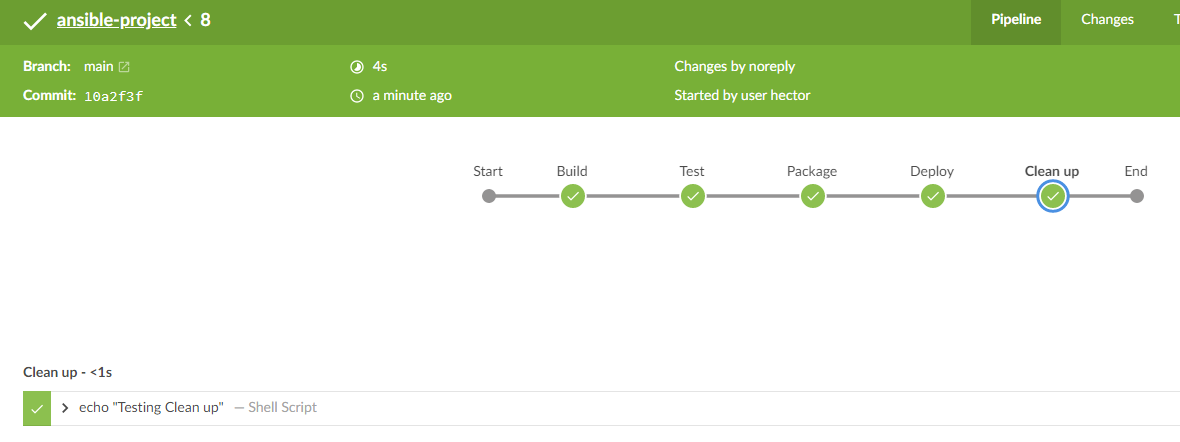
Took this idea further and created more stages in feature/jenkinspipeline-stages
Tested the branch with new stages in Blue Ocean branch feature/jenkinspipeline-stages
Created a pull request to merge feature/jenkinspipeline-stages to main
Tested the job in Ocean Blue using main. I can see additional stages displayed
RUNNING ANSIBLE PLAYBOOK FROM JENKINS
Installed ansible plug-in
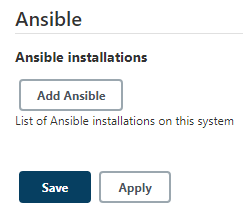
Manage Jenkins > Global Tool Configuration
I point Jenkins to my Ansible installation
Finding my Jenkins installation path
ubuntu@ip-172-31-94-159:~$ which ansible
/usr/bin/ansible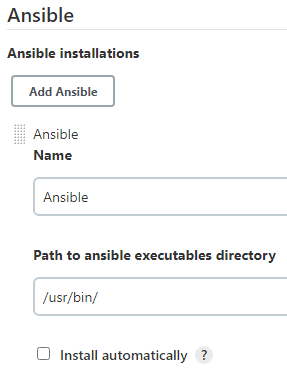
I used the Pipeline Syntax link to go to the Snippet Generator to generate the code I put in the Jenkinsfile
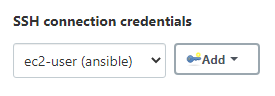
I start with creating SSH connection credentials
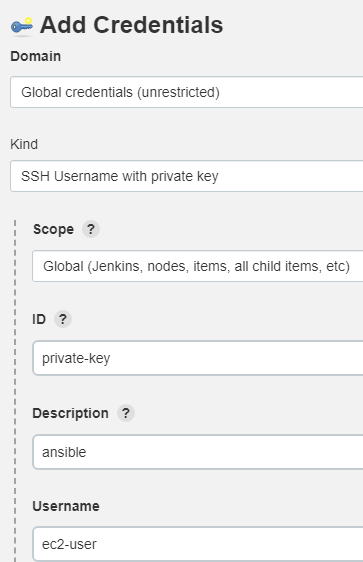
I enter the contents of my .pem key directly

Button Add
I’ll put the ansible.cfg file alongside Jenkinsfile in the deploy directory.
The goal is for ansible-project job (pipeline) to run site.yml
The pipeline configuration lives in a repo so all the job ansible-project does is download the instructions and execute them. The configuration itself doesn’t exist in Jenkins
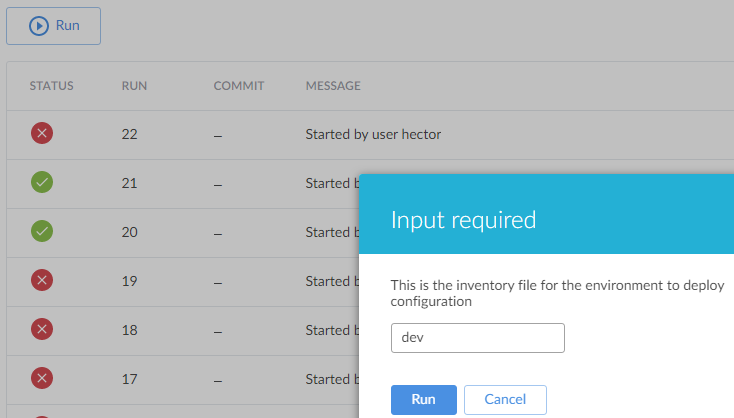
For now I’m going to parameterize (ask for input) part of the pipeline code using snippet
pipeline {
    agent any
	parameters {
      string(name: 'inventory', defaultValue: 'dev',  description: 'This is the inventory file for the environment to deploy configuration')
    }
Example of parameter when running job in Blue Ocean
Attn: Changed ansible-project job repo to ansible-config-mgt
Uploaded ansible.cfg to ansible-config-mgt
So the ansible.cfg can’t have roles_path because we are trying to generate a path relative to the Jenkins workspace which changes with branch name. If it already contains a role_path you get error
The addition of roles_path is done on Jenkinsfile stage Prepare Ansible For Execution with sed -i "3 a roles_path=${WORKSPACE}/roles" ${WORKSPACE}/deploy/ansible.cfg
Creating PullRequest to going HisJekinsfile to main
CI/CD PIPELINE FOR TODO APPLICATION
Install Antifactory manually
#Install Gnupg2 package
sudo apt-get install gnupg2 -y
#Next, download and add the GPG key(had to switch to user root to install sudo wasn’t enough)
sudo wget -qO - https://api.bintray.com/orgs/jfrog/keys/gpg/public.key | apt-key add -
#Add the JFrog Artifactory repository
echo "deb https://jfrog.bintray.com/artifactory-debs bionic main" | tee /etc/apt/sources.list.d/jfrog.list
#Update the repository
apt-get update -y
#Install JFrog Artifactory
apt-get install jfrog-artifactory-oss -y
#start the Artifactory service and enable it to start at system reboot with the following command:
systemctl start artifactory
systemctl enable artifactory
#Verify the status of Artifactory
systemctl status artifactory
Install PHP
sudo apt install -y zip libapache2-mod-php phploc php-{xml,bcmath,bz2,intl,gd,mbstring,mysql,zip}Issue: Ansible-Jenkins instance stopped working after installing artifactory.
Solution: Changed instance from t2.small to t2.medium. (created an image of the old instance to launch new instance)
https://github.com/hectorproko/php-todo
Install PHP, its dependencies and Composer tool
sudo apt install -y zip libapache2-mod-php phploc php-{xml,bcmath,bz2,intl,gd,mbstring,mysql,zip}ubuntu@ip-172-31-22-63:~$ php -r "copy('https://getcomposer.org/installer', 'composer-setup.php');"
ubuntu@ip-172-31-22-63:~$ ls
2plays.yml ansible-config-artifact common.yml composer-setup.php daro.io.pem daro.ioJenkins.pem hello key snap
ubuntu@ip-172-31-22-63:~$ php -r "if (hash_file('sha384', 'composer-setup.php') === '906a84df04cea2aa72f40b5f787e49f22d4c2f19492ac310e8cba5b96ac8b64115ac402c8cd292b8a03482574915d1a8') { echo 'Installer verified'; } else { echo 'Installer corrupt'; unlink('composer-setup.php'); } echo PHP_EOL;"
Installer verified
ubuntu@ip-172-31-22-63:~$ php composer-setup.php
All settings correct for using Composer
Downloading...
Composer (version 2.3.5) successfully installed to: /home/ubuntu/composer.phar
Use it: php composer.pharInstall Jenkins plugins


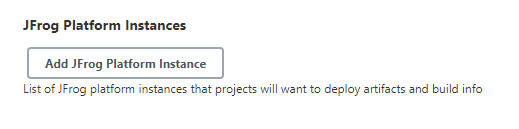
Configure the server ID, URL and Credentials, run Test Connection.
Manage Jenkins > Configure System
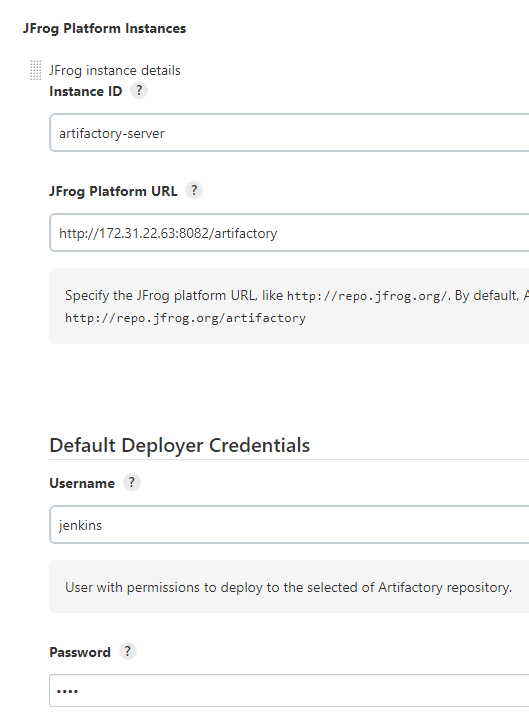
I have a user jenkins and can log in with password 0679
Used default credentials: user admin password password. Once prompted changed default credentials
Skipped Set based URL, Configure Default Proxy, Create Repositories
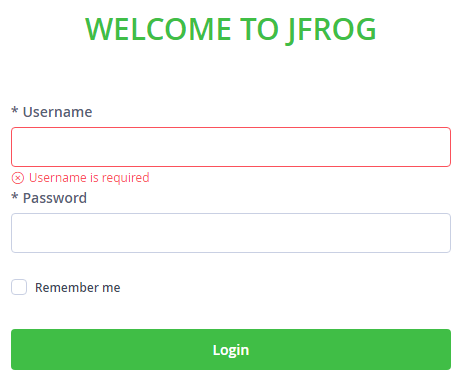
In Identity and Access > Users
Created a new user hector

Now we put this user in Jenkins (Remember to open port 8082)
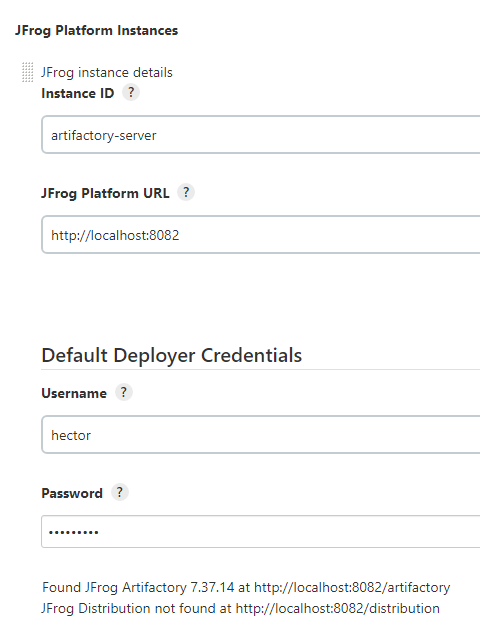
JFrog Distribution is a complementary product to JFrog Artifactory and is run as a separate installation as a set of microservices.
INTEGRATE ARTIFACTORY REPOSITORY WITH JENKINS
Created Jenkinsfile in Jenkinsfile with snippet:
	pipeline {
    agent any
	stages {
	stage("Initial cleanup") {
          steps {
            dir("${WORKSPACE}") {
              deleteDir()
            }
          }
        }
	stage('Checkout SCM') {
      steps {
            git branch: 'main', url: 'https://github.com/hectorproko/php-todo.git'
      }
    }
	stage('Prepare Dependencies') {
      steps {
             sh 'mv .env.sample .env'
             sh 'composer install'
             sh 'php artisan migrate'
             sh 'php artisan db:seed'
             sh 'php artisan key:generate'
      }
    }
  }
}
On the database server (NFS), created database homestead and user homestead
[ec2-user@ip-172-31-81-201 ~]$ sudo mysql
Welcome to the MySQL monitor.  Commands end with ; or \g.
Your MySQL connection id is 8
Server version: 8.0.26 Source distribution

Copyright (c) 2000, 2021, Oracle and/or its affiliates.

Oracle is a registered trademark of Oracle Corporation and/or its
affiliates. Other names may be trademarks of their respective
owners.

Type 'help;' or '\h' for help. Type '\c' to clear the current input statement.

mysql> show databases;
+--------------------+
| Database           |
+--------------------+
| information_schema |
| mysql              |
| performance_schema |
| sys                |
| tooling            |
+--------------------+
5 rows in set (0.03 sec)

mysql> Create database homestead;
Query OK, 1 row affected (0.02 sec)

mysql> CREATE USER 'homestead'@'%' IDENTIFIED BY 'sePret^i';
Query OK, 0 rows affected (0.03 sec)

mysql> GRANT ALL PRIVILEGES ON * . * TO 'homestead'@'%';
Query OK, 0 rows affected (0.00 sec)

mysql> show databases;
+--------------------+
| Database           |
+--------------------+
| homestead          |
| information_schema |
| mysql              |
| performance_schema |
| sys                |
| tooling            |
+--------------------+
6 rows in set (0.01 sec)

mysql>
Updated the database connectivity requirements in the file .env
DB_HOST=127.0.0.1 #Need to put remote server
DB_DATABASE=homestead
DB_USERNAME=homestead
DB_PASSWORD=sePret^i
Installed composer on instance sudo apt install composer
compose need to for this to work
+ php artisan migrate
Migration table created successfully.
Migrated: 2014_10_12_000000_create_users_table
Migrated: 2014_10_12_100000_create_password_resets_table
Migrated: 2015_10_27_141258_create_tasks_table
[Pipeline] sh
+ php artisan db:seed
[Pipeline] sh
+ php artisan key:generate
Application key [Vvnp0EfkhlkxAyTTjHI5Xggp0U9NE6In] set successfully.
Ansible-jenkins instance did not have mysql-client, installed it
sudo apt install mysql-client-core-8.0Stage code analysis
For PHP the most commonly tool used for code quality analysis is phploc.
The data produced by phploc can be ploted onto graphs in Jenkins.
Add the code analysis step in Jenkinsfile. The output of the data will be saved in build/logs/phploc.csv file.
Works and generates the file
stage('Code Analysis') {
steps {
sh 'phploc app/ --log-csv build/logs/phploc.csv'
}
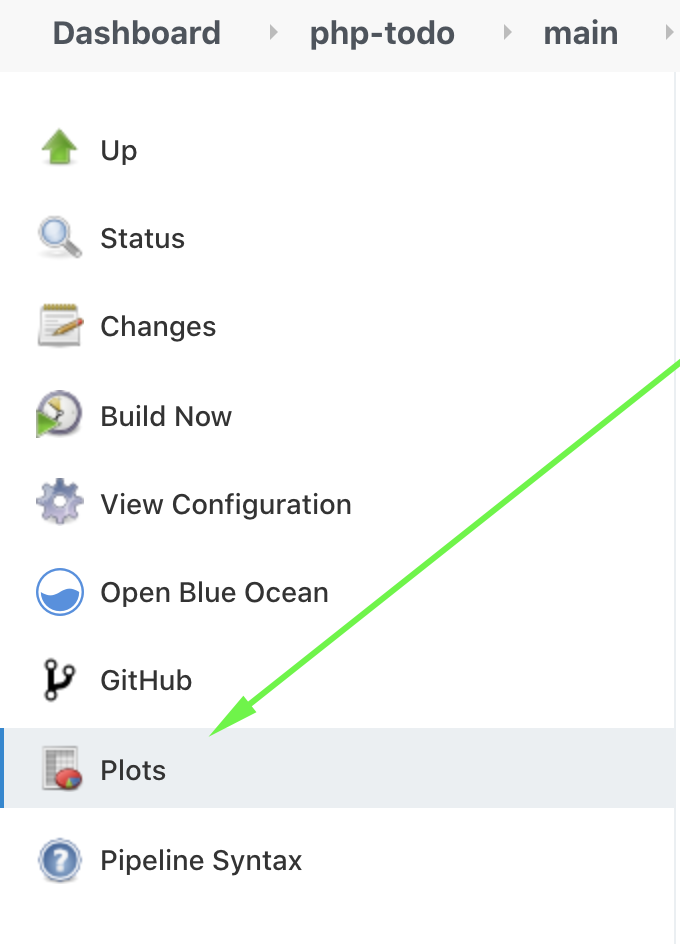
}stage(‘Plot Code Coverage Report’)
Now we see the button Plot on the job, as result of putting this piece of code in the Jenkinsfile
Creating job in Jenkins named php-todo (configured with Jenkinsfile
)
Job needs could be configured from Ocean Blue
Or from the regular GUI and pick Multibranch Pipeline the job now has the tab Build Configuration. So each type of New Item has different Tabs.


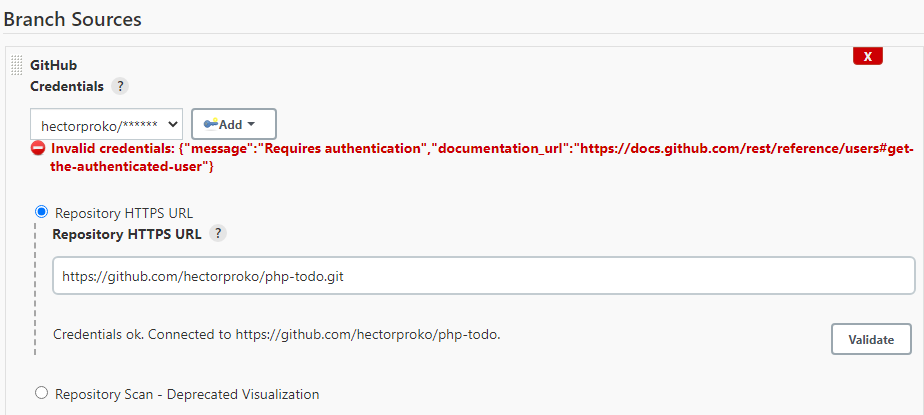
Even though getting error here, validation button worked. The error disappears afterwards
Testing stage Package Artifact which zips the contents of a dir/php-todo
stage ('Package Artifact') {
  steps {
    sh 'zip -qr ${WORKSPACE}/php-todo.zip ${WORKSPACE}/*'
}
ubuntu@ip-172-31-89-170:/var/lib/jenkins/workspace$ ls php-todo_main
ExcludeFiles LICENSE.txt app bootstrap build.xml composer.lock dat
abase package.json phpunit.xml resources sonar.properties tests
Jenkinsfile README.md artisan build composer.json config gul
pfile.js php-todo.zip public server.php storage vendorWhen we ls in the workspace path we confirm the zip file php-todo.zip is present. Next, we Publish the resulted artifact into Artifactory
Adding another stage Upload Artifact to Artifactory. This stage uploads the artifact to artifactory.
		stage ('Upload Artifact to Artifactory') {
		          steps {
		            script {
		                 def server = Artifactory.server 'artifactory-server'
		                 def uploadSpec = """{
		                    "files": [
		                      {
		                       "pattern": "php-todo.zip",
		                       "target": "php-todo-Repo/php-todo",
		                       "props": "type=zip;status=ready"

		                       }
		                    ]
		                 }"""

		                 server.upload spec: uploadSpec
		               }
		            }

		        }
Before we can upload anything we need to create a repo php-todo-Repo in artifactory
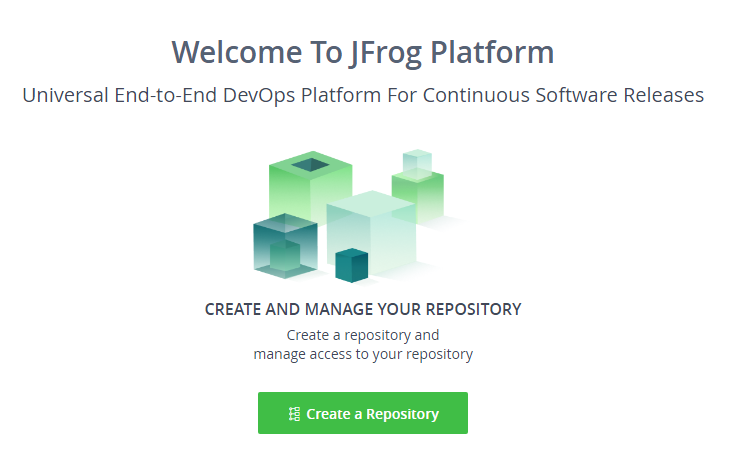
I access artifacotry using browser http://3.220.20.204:8082/ (Elastic IP and needed port)
Creating repository
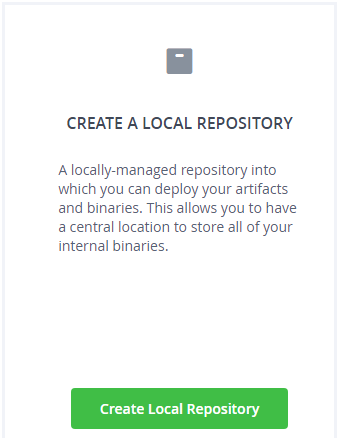
Select Package Type (Genetic)

Named it php-todo-Repo
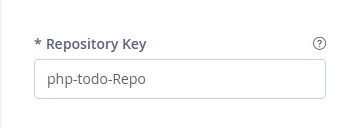
Click Create Local Repository
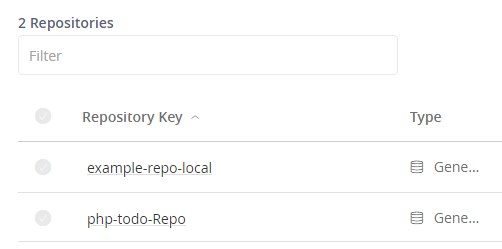
Message:
All repositories were created successfully
Your next step is to add users who can access the repository
Button: Add Users Skipped we already created a hector user with Administer Platform role
Now that it is created confirm the identifier of the repo is present in the code/stage
Piece of code on upload stage
"target": "php-todo-Repo/php-todo",
When we run the job to test the stage we confirm the Artifact is there in the repo
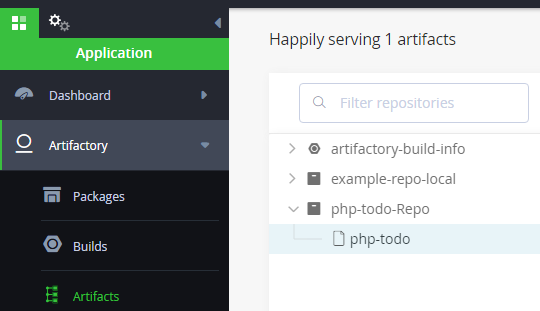
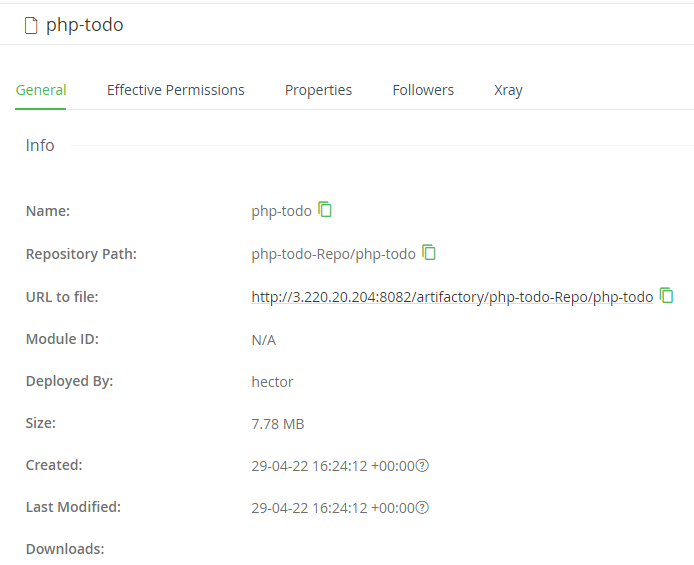
Can also use the path of the URL http://3.220.20.204:8082/ui/repos/tree/General/php-todo-Repo
Added stage Deploy to Dev Environment
stage ('Deploy to Dev Environment') {
  steps {
    build job: 'ansible-project/main', parameters: [[$class: 'StringParameterValue', name: 'env', value: 'uat']], propagate: false, wait: true
  }
}
php-todo executed successfully and this stage with execute another job ansible-project and pass it the parameter needed.
In the example above the value is uat which refers to the name of the inventory file containing (demo) uat servers that Ansible will target
Screenshot of all the stages

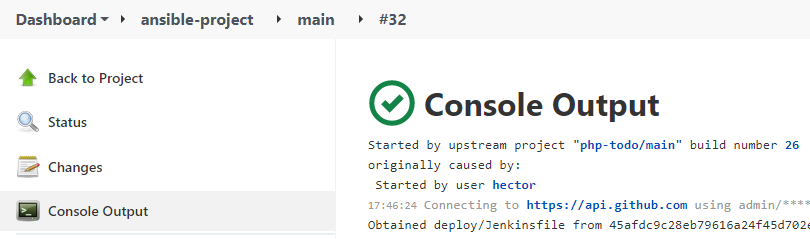
Now php-todo job goes through all the stages and triggers ansible-project (here we see triggered by upstream project “php-todo/main”)
ANSIBLE INVENTORY
Path ansible-config-mgt/inventory
uat.ini the one we are currently using in our samples
[uat-webservers]
172.31.81.182 ansible_ssh_user='ec2-user'
172.31.89.227 ansible_ssh_user='ec2-user'
[lb]
172.31.91.121 ansible_ssh_user='ubuntu'
[todo]
172.31.81.182 ansible_ssh_user='ec2-user'
172.31.89.227 ansible_ssh_user='ec2-user'
SONARQUBE INSTALLATION
Before we start getting hands on with SonarQube configuration, it is incredibly important to understand a few concepts:
• Software Quality – The degree to which a software component, system or process meets specified requirements based on user needs and expectations.
• Software Quality Gates – Quality gates are basically acceptance criteria which are usually presented as a set of predefined quality criteria that a software development project must meet in order to proceed from one stage of its lifecycle to the next one.
SonarQube is a tool that can be used to create quality gates for software projects, and the ultimate goal is to be able to ship only quality software code.
Despite that DevOps CI/CD pipeline helps with fast software delivery, it is of the same importance to ensure the quality of such delivery. Hence, we will need SonarQube to set up Quality gates. In this project we will use predefined Quality Gates (also known as The Sonar Way ). Software testers and developers would normally work with project leads and architects to create custom quality gates.
Install SonarQube on Ubuntu 20.04 With PostgreSQL as Backend Database
Provisioned instance c4x.large Ubuntu
Here is a manual approach to installation. Below is a step by step guide how to install SonarQube 7.9.3 version. It has a strong prerequisite to have Java installed since the tool is Java-based.
We will make some Linux Kernel configuration changes to ensure optimal performance of the tool – we will increase vm.max_map_count, file discriptor and ulimit.
Tune Linux Kernel
This can be achieved by making session changes which does not persist beyond the current session terminal. (Seems like the first two are made permanent in /etc/sysctl.conf)
sudo sysctl -w vm.max_map_count=262144  #it writes to `sysctl.conf`)
sudo sysctl -w fs.file-max=65536
ulimit -n 65536
ulimit -u 262144
To make a permanent change, edit the file /etc/security/limits.conf (ulimit part) and append the below
sonarqube   -   nofile   65536
sonarqube   -   nproc    262144
Before installing, let us update and upgrade system packages:
sudo apt-get update -y
sudo apt-get upgrade -y
Install wget and unzip packages
sudo apt-get install wget unzip -yInstall OpenJDK and Java Runtime Environment (JRE) 11
sudo apt-get install openjdk-11-jdk -y
sudo apt-get install openjdk-11-jre -y
Set default JDK – To set default JDK or switch to OpenJDK enter below command:
sudo update-alternatives --config javaIf you have multiple versions of Java installed, you should see a list like below:
#I only have one option
ubuntu@ip-172-31-89-89:~$  sudo update-alternatives --config java
There is only one alternative in link group java (providing /usr/bin/java): /usr/lib/jvm/java-11-openjdk-amd64/bin/java
Nothing to configure
Taking note of version:
ubuntu@ip-172-31-89-89:~$ java -version
openjdk version "11.0.15" 2022-04-19
OpenJDK Runtime Environment (build 11.0.15+10-Ubuntu-0ubuntu0.20.04.1)
OpenJDK 64-Bit Server VM (build 11.0.15+10-Ubuntu-0ubuntu0.20.04.1, mixed mode, sharing)
ubuntu@ip-172-31-89-89:~$f
Install and Setup PostgreSQL 10 Database for SonarQube
The command below will add PostgreSQL repo to the repo list:
sudo sh -c 'echo "deb http://apt.postgresql.org/pub/repos/apt/ `lsb_release -cs`-pgdg main" >> /etc/apt/sources.list.d/pgdg.list'Download PostgreSQL software
wget -q https://www.postgresql.org/media/keys/ACCC4CF8.asc -O - | sudo apt-key add - Install PostgreSQL Database Server
sudo apt-get -y install postgresql postgresql-contribStart PostgreSQL Database Server
sudo systemctl start postgresqlEnable it to start automatically at boot time
sudo systemctl enable postgresqlChange the password for default postgres user
sudo passwd postgresSwitch to the postgres user
su - postgresCreate a new user by typing (createuser is a PostgreSQL command not Linux, so we are just creating a role sonar in PostgreSQL. )
createuser sonarSwitch to the PostgreSQL shell
psqlSet a password for the newly created user for SonarQube database
ALTER USER sonar WITH ENCRYPTED password 'sonar';Create a new database for PostgreSQL database by running:
CREATE DATABASE sonarqube OWNER sonar;Grant all privileges to sonar user on sonarqube Database.
grant all privileges on DATABASE sonarqube to sonar;Exit from the psql shell:
\qSwitch back to the sudo user by running the exit command.
ExitInstall SonarQube on Ubuntu
Navigate to the tmp directory to temporarily download the installation files
cd /tmp && sudo wget https://binaries.sonarsource.com/Distribution/sonarqube/sonarqube-7.9.3.zipUnzip the archive setup to /opt directory
sudo unzip sonarqube-7.9.3.zip -d /optMove extracted setup to /opt/sonarqube directory (rename)
sudo mv /opt/sonarqube-7.9.3 /opt/sonarqubeCONFIGURE SONARQUBE AND JENKINS FOR QUALITY GATE

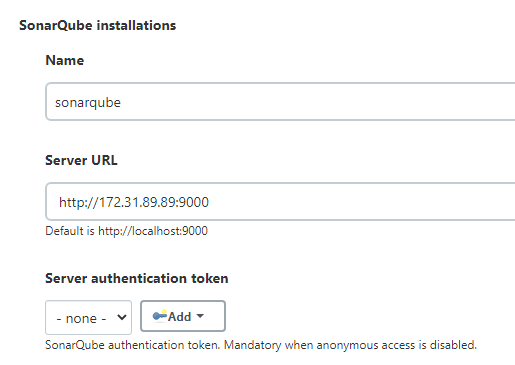
Sonar privateIP 172.31.89.89
Here we adding the server
Manage Jenkins > Configure System

Requires that we generate a token
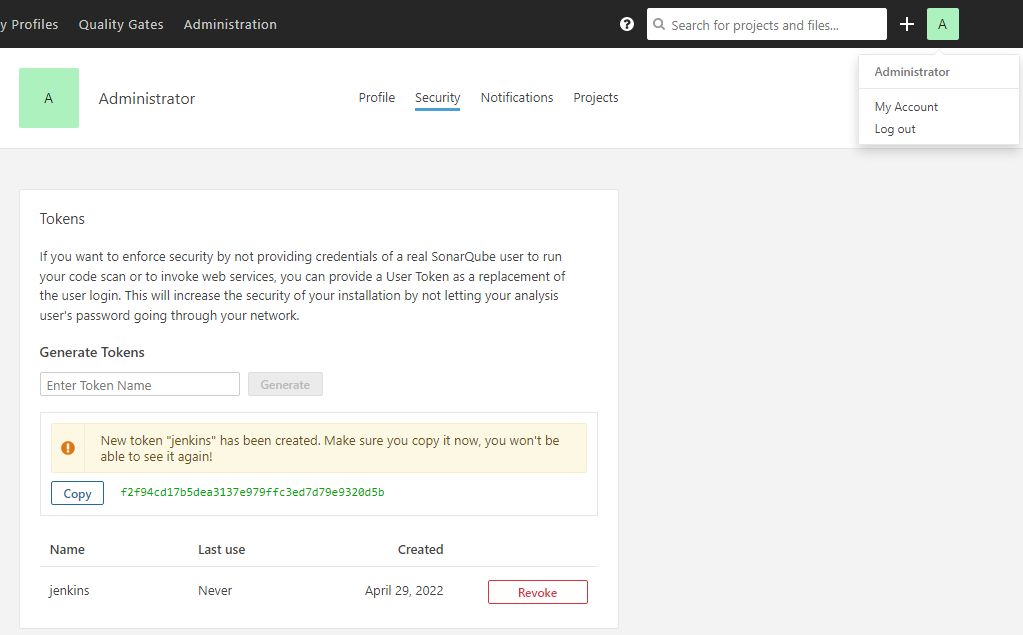
Token: f2f94cd17b5dea3137e979ffc3ed7d79e9320d5b
Creating webhook
http://3.220.20.204/sonarqube-webhook/ (Elastic IP of Jenkins)
In the Secret I put jenkins
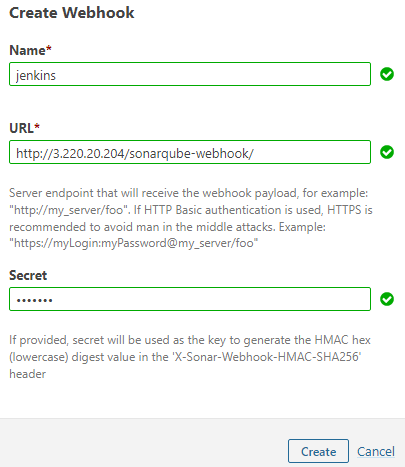
We get

Setup SonarQube scanner from Jenkins – Global Tool Configuration
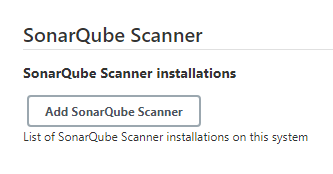
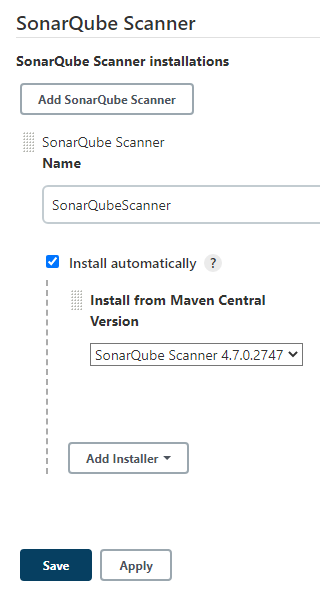
The path /var/lib/jenkins/tools/hudson.plugins.sonar.SonarRunnerInstallation/SonarQubeScanner/conf/ get generated after SonarQube Scanner Installation which occurs after running the job. So we let it run/fail so it generates what we need sonar-scanner.properties
Added SonarQube Quality Gate let see if it creates the tools folder
Below is the snippet for a Quality Gate stage in Jenkinsfile.
stage('SonarQube Quality Gate') {
  environment {
    scannerHome = tool 'SonarQubeScanner'
  }
  steps {
    withSonarQubeEnv('sonarqube') {
      sh "${scannerHome}/bin/sonar-scanner"
    }
  }
}
As expected it failed but it did add the tools directory
Error: (Need to create the project in SonarQube server)
ERROR: Error during SonarScanner execution
ERROR: You must define the following mandatory properties for 'Unknown': sonar.projectKey
ERROR:
ERROR: Re-run SonarScanner using the -X switch to enable full debug logging.
Part where tools is created:
Unpacking https://repo1.maven.org/maven2/org/sonarsource/scanner/cli/sonar-scanner-cli/4.7.0.2747/sonar-scanner-cli-4.7.0.2747.zip to /var/lib/jenkins/tools/hudson.plugins.sonar.SonarRunnerInstallation/SonarQubeScanner on Jenkins

Before editing: sonar-scanner.properties
/var/lib/jenkins/tools/hudson.plugins.sonar.SonarRunnerInstallation/SonarQubeScanner/conf/sonar-scanner.properties
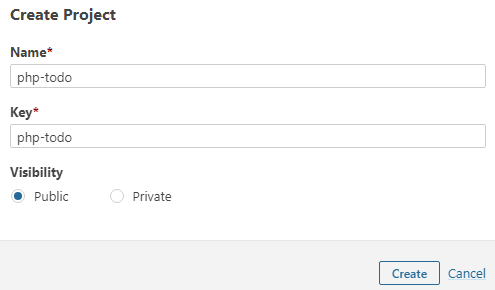
Going to create projectKey
The name and key are the same for simplicity,right now we don’t have one at all that’s the error above, cant find it.
The error above is because we don’t have anything in the configuration file
Now we edit /var/lib/jenkins/tools/hudson.plugins.sonar.SonarRunnerInstallation/SonarQubeScanner/conf/sonar-scanner.properties
Add configuration related to php-todo project
sonar.host.url=http://<SonarQube-Server-IP-address>:9000
sonar.projectKey=php-todo
#----- Default source code encoding
sonar.sourceEncoding=UTF-8
sonar.php.exclusions=**/vendor/**
sonar.php.coverage.reportPaths=build/logs/clover.xml
sonar.php.tests.reportPath=build/logs/junit.xml
My changes
#----- Default SonarQube server
sonar.host.url=http://172.31.89.89:9000 #Private IP
sonar.projectKey=php-todo #<< key we created
#----- Default source code encoding
sonar.sourceEncoding=UTF-8
sonar.php.exclusions=**/vendor/**
sonar.php.coverage.reportPaths=build/logs/clover.xml
sonar.php.tests.reportPath=build/logs/junit.xmlIssue: When running the job got this issue: ERROR: Error when running: 'node -v'. Is Node.js available during analysis? No CSS files will be analyzed.
Solution: sudo apt install nodejs

Everything works things are deploy but page displays
