(old LAMP )
LAMP STACK IMPLEMENTATION
A technology stack is a set of frameworks and tools used to develop a software product. Here we will implement a LAMP which consits of Linux, Apache, MySQL, PHP|Python|Perl.
Technologies/Tools used:
- AWS (EC2)
- Ubuntu Server 20.04 LTS
- Apache
- MySQL
- PHP
- GitBash
Before we start we need to have an environment to work with. I will we using my AWS account to create an EC2 instance with an Ubuntu Server.
-
First thing I’m going to do when I log in to AWS is look for the EC2 services. There are various methods to navigate to it, here I’m using the search bar

-
Once you navigate to the EC2 page look for a Launch instance button

-
You will then be prompted to pick an OS Image. I will be using Ubuntu Server 20.04 LTS (HVM), SSD Volume. Once done click Select
-
I will pick the t2.micro instace type

-
I will leave default settings and click Review and Launch

-
As you can see we have a Security Group applied to the instance by default which allows SSH connections

-
After reviewing you can launch your instancing by clicking

-
We are prompted to create or use an existing Key Pair. I will be creating a new one. I will use this .pem key to SSH into the instance later on.

-
Once you have downloaded your key launch intance

-
To go to the instances dashboard

-
If your instance is up and running you will see something like this

-
To find information on how to connect click on your Instance ID
-
In the top-right corner you should see the button Connect, click on it

-
Look for the SSH client tab

-
Under Example you’ll find an ssh command with eveything you need to connect to the instance from a terminal
Examaple:
ssh -i "daro.io.pem" ubuntu@ec2-3-216-90-84.compute-1.amazonaws.comMake sure when you run the command that your current working directory in the terminal is where your KeyPair/.pem is located because in the above example I’m using a relative path to point to my key
- A successful log-in

INSTALLING APACHE AND UPDATING THE FIREWALL
We will install Apache using Ubuntu’s package manager apt Update list of packages in package manager
sudo apt udpateTo install apache2 package
sudo apt install apache2Alternatively you can put everything together in one line
sudo apt update && sudo apt install apache2 -yThe -y puts yes whenever the systems asks during install
To make sure Apache is running
systemctl status apache2-
Now we are going to add a rule to our Security Group to allow Inbound HTTP requests
- Navigate to your intances dashboard and select your instance by cliking the empty box

- Look for the Security tab

- Click on top of your Security Group
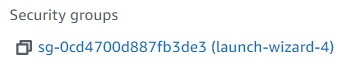
Keep in mind yours might look different - Under the tab Inbound Rules click Edit inbound rules button

- Click Add rule

- Pick type HTTP and source 0.0.0.0/0 meaning all IPs, you can also use drop-down menu Anywhere-IPv4
- Save it

- Navigate to your intances dashboard and select your instance by cliking the empty box
-
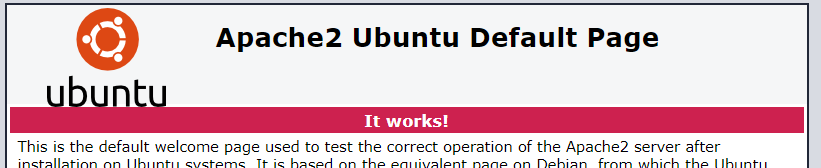
You should now be able to see Apache’s dummy page
INSTALLING MYSQL
- We will again use apt to install this software
sudo apt install mysql-server- When prompted, confirm installation by typing Y, and then ENTER.
- Once installation is done we will run a script that removes some insecure default settings and lock down access to your database system. To start the interactive script run:
sudo mysql_secure_installationAnd follow the wizard like questions
-
Will ask if you want to configure the VALIDATE PASSWORD PLUGIN. I’ll put yes for an additioanl layer of security

Keep answering the questions till the end -
When you’re finished, test if you’re able to log in to the MySQL console by typing:
sudo mysqlYou should see
mysql> - To exit type exit
mysql> exit
Bye
INSTALLING PHP
- Using previous method we are going to isntall 3 packages for php
sudo apt install php libapache2-mod-php php-mysql -y- Once installation is done confirm you indeed have php intalled by checkig the version
php -v- At this point you have a fully operational LAMP
CREATING A VIRTUAL HOST FOR YOUR WEBSITE USING APACHE
-
Virtual host allows you to have multiple websites located on a single machine and users of the websites will not even notice it.
-
Apache on Ubuntu 20.04 has one server block enabled by default that is configured to serve documents from the /var/www/html directory. We will leave this configuration as is and will add our own directory next next to the default one. Create the directory for projectlamp using mkdir command as follows:
sudo mkdir /var/www/projectlamp-
Next, we’ll assign ownership of the directory with our current system user:
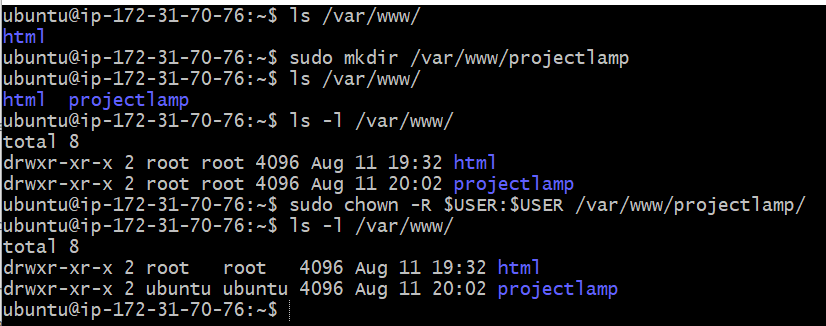
Here you can see the steps from creation of folder to ownership change. Notice my current user was ubuntu -
We are going to create a new configuration fiel in Apache’s sites-available directory using command-line editor vi
sudo vi /etc/apache2/sites-available/projectlamp.conf- This will create a new blank file. Paste in the following configuration by hitting on i on the keyboard to enter the insert mode, and paste the text:
<VirtualHost *:80>
    ServerName projectlamp
    ServerAlias www.projectlamp
    ServerAdmin webmaster@localhost
    DocumentRoot /var/www/projectlamp
    ErrorLog ${APACHE_LOG_DIR}/error.log
    CustomLog ${APACHE_LOG_DIR}/access.log combined
</VirtualHost>
To save file:
- Hit the esc button on the keyboard
- Type :
- Type wq. w for write and q for quit
- Hit ENTER to save the file
- Use ls command to see the new file in the sites-available directory
sudo ls /etc/apache2/sites-available000-default.conf default-ssl.conf projectlamp.conf <Output
-
With this VirtualHost configuration, we’re telling Apache to serve projectlamp using /var/www/projectlampl as its web root directory.
-
We are using a2ensite command to enable the new virtual host:
sudo a2ensite projectlamp
- To avoid inteference we’ll disable apache’s default website using a2dissite command
sudo a2dissite 000-default
- To make sure your configuration file doesn’t contain syntax errors, run:
sudo apache2ctl configtestSyntax OK
- Finally, reload Apache so these changes take effect:
sudo systemctl reload apache2- Now we will create a page insdie the web root /var/www/projectlamp
sudo echo 'Hello LAMP from hostname' $(curl -s http://169.254.169.254/latest/meta-data/public-hostname) 'with public IP' $(curl -s http://169.254.169.254/latest/meta-data/public-ipv4) > /var/www/projectlamp/index.html- Now if you go to your browser and navigate to the page with the pulic IP or DNS you’ll see a page

ENABLE PHP ON THE WEBSITE
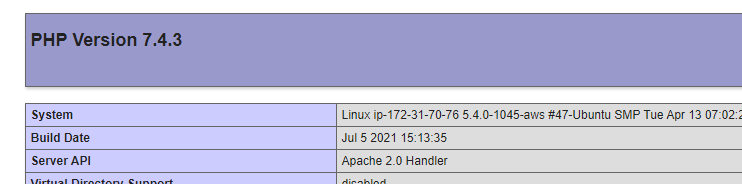
- Finally, we will create a PHP script in our custom location to test that PHP is correctly installed and configured on your server. we will create a new file index.php
vim /var/www/projectlamp/index.phpThis will open a blank file. Add the following PHP code, inside the file:
<?php
phpinfo();
Save and close the file
-
Before we test this php code make sure index.html is not present inside of /var/www/projectlamp by default Apache gives precendence to index.html over index.php when looking for page.
-
Once removed open your browser and navigate to you page using public IP or DNS
-
Your site is now displaying senstive information to the world so once done delete index.php
sudo rm /var/www/projectlamp/index.php