Module 6: S3 Website Hosting Assignment
Problem Statement: You work for XYZ Corporation. Their application requires a storage service that can store files and publicly share them if required. Implement S3 for the same.
Tasks To Be Performed:
- Use the created bucket in the previous task to host static websites, upload an index.html file and error.html page.
- Add a lifecycle rule for the bucket: a. Transition from Standard to Standard-IA in 60 days b. Expiration in 200 days
1. Set Up the S3 Bucket for Static Website Hosting:
Step 1: I logged into the AWS Management Console and navigated to the S3 dashboard.
Step 2: Since I’m using the bucket I created in the previous task, I clicked on its name my-test-bucket-unique-name to access its settings.
Step 3: I headed over to the “Properties” tab.
Step 4: I scrolled down to find the “Static website hosting” box and clicked on Edit.
Step 5: I specified ‘index.html’ for the Index document and ‘error.html’ for the Error document. This means any visitor to my website’s root URL will be served the ‘index.html’ file, and any errors will direct them to ‘error.html’.
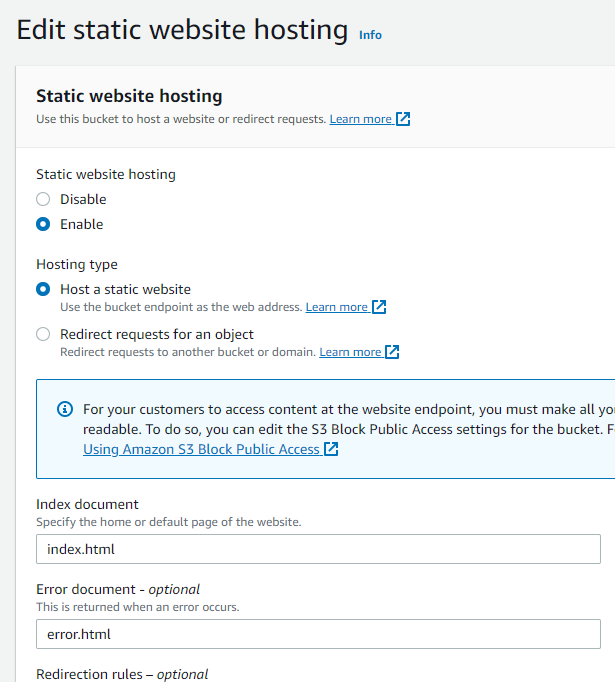
Step 6: I noted down the endpoint URL provided by AWS, as this will be the URL for the hosted static website.
http://my-test-bucket-unique-name.s3-website-us-east-1.amazonaws.com2. Upload index.html and error.html:
Step 1: I clicked the “Upload” button inside the bucket.
Step 2: Using the “Add files” option, I selected and uploaded the index.html and error.html files from my computer.
Index:
<!DOCTYPE html>
<html lang="en">
<head>
<meta charset="UTF-8">
<meta http-equiv="X-UA-Compatible" content="IE=edge">
<meta name="viewport" content="width=device-width, initial-scale=1.0">
<title>XYZ Corporation</title>
<style>
body {
font-family: Arial, sans-serif;
text-align: center;
padding: 50px;
}
</style>
</head>
<body>
<h1>Welcome to XYZ Corporation</h1>
<p>This is the main landing page for XYZ Corporation's static website hosted on Amazon S3.</p>
</body>
</html>
error.html
<!DOCTYPE html>
<html lang="en">
<head>
<meta charset="UTF-8">
<meta http-equiv="X-UA-Compatible" content="IE=edge">
<meta name="viewport" content="width=device-width, initial-scale=1.0">
<title>Error - XYZ Corporation</title>
<style>
body {
font-family: Arial, sans-serif;
text-align: center;
padding: 50px;
color: red;
}
</style>
</head>
<body>
<h1>Error!</h1>
<p>Sorry, the page you are looking for could not be found.</p>
<p><a href="index.html">Return to Home</a></p>
</body>
</html>
Step 3: After both files were added, I clicked the “Upload” button to finalize the upload process.
-
Access the Bucket URL:
http://my-test-bucket-unique-name.s3-website-us-east-1.amazonaws.com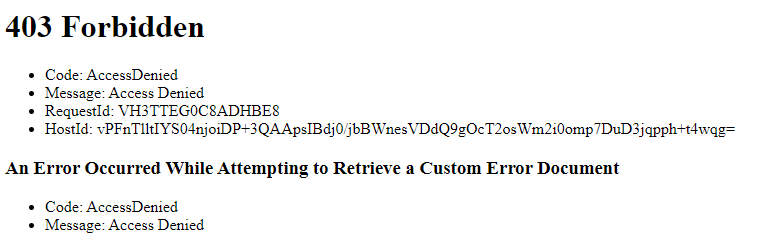 We get access denied
 -
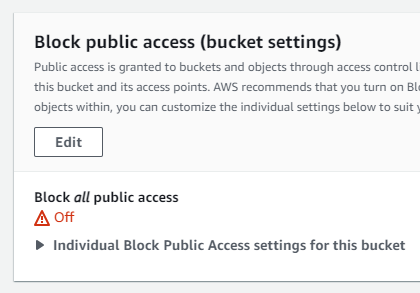
Modify Public Access Settings:
- Navigated to the bucket settings. Inside the bucket, moved to the “Permissions” tab.
- Selected “Block public access (bucket settings)“.
- Clicked on “Edit”.
- Unchecked “Block all public access” to allow changes to individual object permissions.
- Update the Bucket Policy:
- While still in the “Permissions” tab of the bucket, selected “Bucket Policy”.
- Inserted the following policy to grant public read access to the
index.htmlanderror.html:
{
    "Version": "2012-10-17",
    "Statement": [
        {
            "Effect": "Allow",
            "Principal": "*",
            "Action": "s3:GetObject",
            "Resource": [
                "arn:aws:s3:::my-test-bucket-unique-name/index.html",
                "arn:aws:s3:::my-test-bucket-unique-name/error.html"
            ]
        }
    ]
}
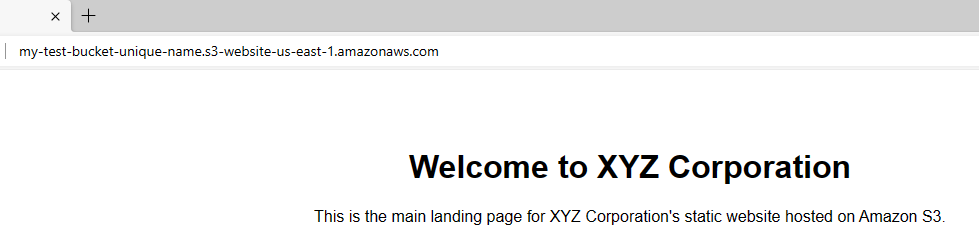
- Verify the Changes:
- Access the website again using the provided URL.
Success
3. Setting Up Lifecycle Rule for the Bucket:
Step 1: Still inside my bucket’s settings, I navigated to the “Management” tab.
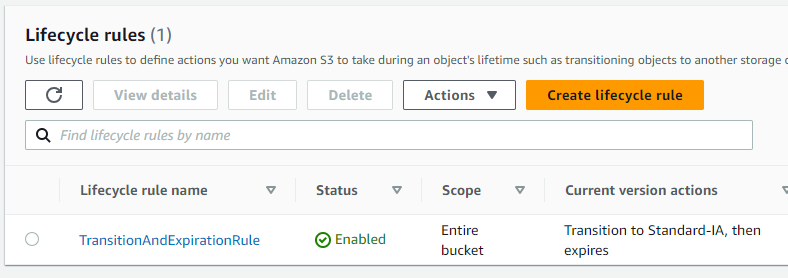
Step 2: I clicked on the “Create lifecycle rule” button.
Step 3: I gave the lifecycle rule a name, “TransitionAndExpirationRule”.
Step 4: I made sure to select “Apply to all objects in the bucket” for scope.
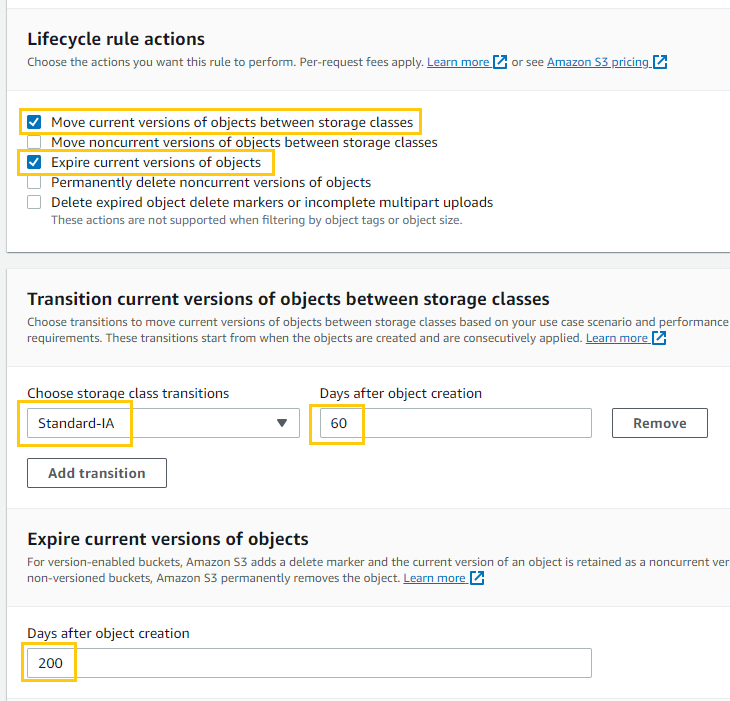
Step 5: Now, for the actions:
a. Transition to Standard-IA Storage:
- I checked the option that read “Move current versions of objects between storage classes.”
- When prompted under “Choose storage class transitions”, I set “days after object creation” to the desired value.
- I clicked on “Add transition.”
b. Object Expiry after 200 Days:
- I spotted the “Expire current versions of objects” option and checked it.
- I wanted to ensure objects were deleted after a set time, so I specified “200” days for their automatic deletion.
Step 6: I took a moment to review everything. Satisfied, I clicked “Create rule”.
With these steps, I’ve converted my S3 bucket into a host for a static website and set a lifecycle rule to manage the storage and expiration of my objects. I can now access my static website using the endpoint URL provided by AWS.