Module 7: Redshift Assignment
Problem Statement: You work for XYZ Corporation. Their application requires a database service that can store data which can be retrieved if required. Implement suitable service for the same.
While migrating, you are asked to perform the following tasks:
- Create a Redshift data warehouse.
- Using the query editor: a. Load some data b. Query the data
1. Setting up a Redshift Cluster:
Step 1: I logged into the AWS Management Console and navigated to the Amazon Redshift service.
Step 2: On the Redshift dashboard, I clicked on the “Create cluster” button.
Step 3: I followed the setup wizard, providing the necessary details:
- Cluster Identifier: A unique name for my cluster
redshift-cluster-1. - Database Name, User & Password: As required for my application.
- Node Type & Number: Based on the size and performance needs.
Step 4: After configuring additional settings like VPC, IAM roles, etc., I clicked on the “Create cluster” button.
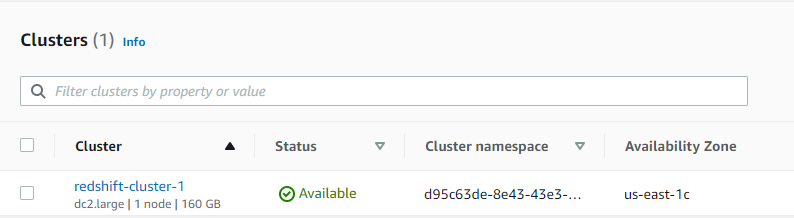
Step 5: I waited a few minutes for AWS to provision and set up the Redshift cluster. Once the status changed to “Available,” the cluster was ready to use.

2. Using the Query Editor:
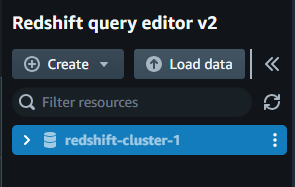
Step 1: From the Redshift dashboard, I clicked on my newly created cluster’s name.
Step 2: I clicked on the “Go to query editor” option.
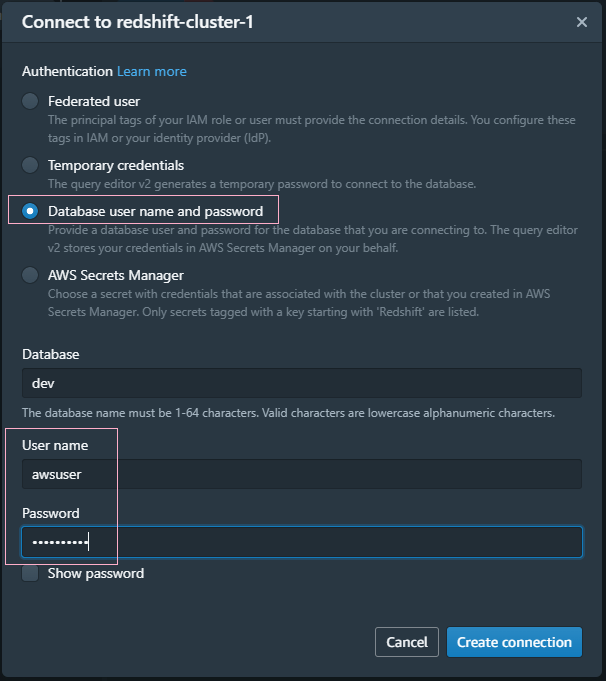
 Step 3: Before executing any queries, I had to connect to my database. I entered the database name, database user, and the password that I specified during the cluster creation.
Step 4: Loading Data from Local Workstation:
Prerequisite
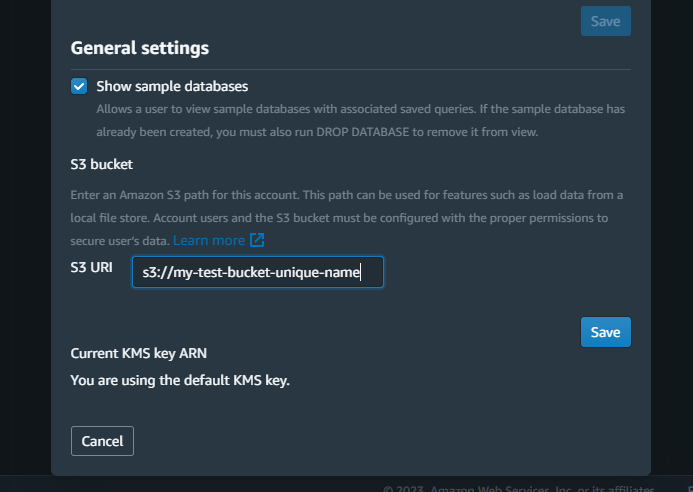
Step 1: Create an S3 Bucket: I realized I needed an S3 bucket to stage my data for Redshift. So, I headed over to the S3 console and used old bucket
my-test-bucket-unique-name. This would be used for staging my data before it’s loaded into Redshift.Step 2: Configure the Staging Bucket in My Redshift Settings:
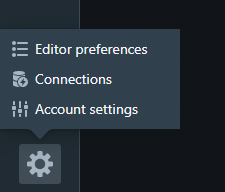
I went to the account settings in my Redshift console.
From there, I searched for the section that lets me set up or configure a staging S3 bucket.
I then entered the name of the S3 bucket I just created.
Otherwise we get error:

Within the Query Editor, I noticed an “Load data”.
- I clicked on the “Load data” button.
- A file picker dialog appeared, allowing me to select a file from my local workstation.
- I selected the desired CSV file from my local machine.
- I clicked on “Next”.
![[Pasted image 20230929215523.png|]]
File data.csv contains:
id,name,age,city
1,Alice,25,New York
2,Bob,30,London
3,Carol,35,Paris
4,Dave,40,Tokyo
5,Eve,45,Sydney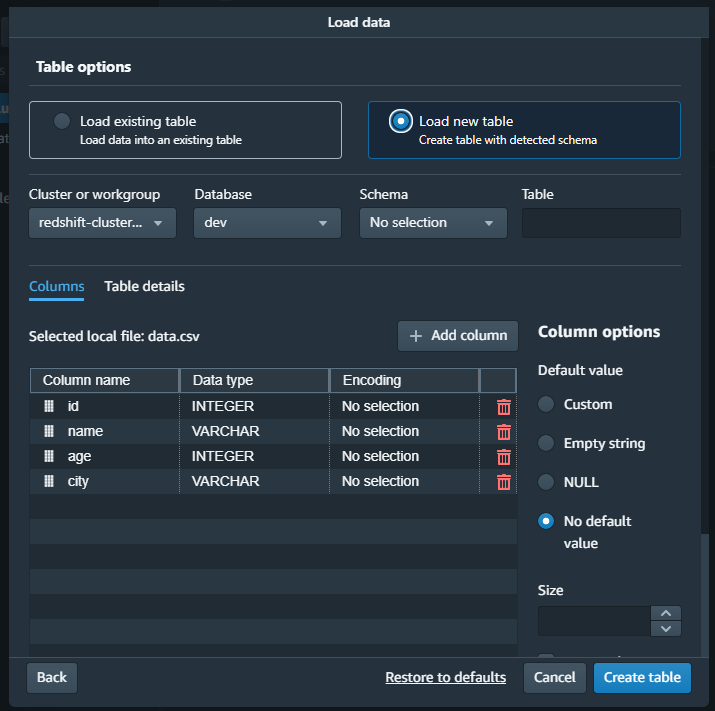
Step 5: Querying Data:
With the data now loaded into Redshift, I executed my query:
SELECT * FROM my_table LIMIT 4;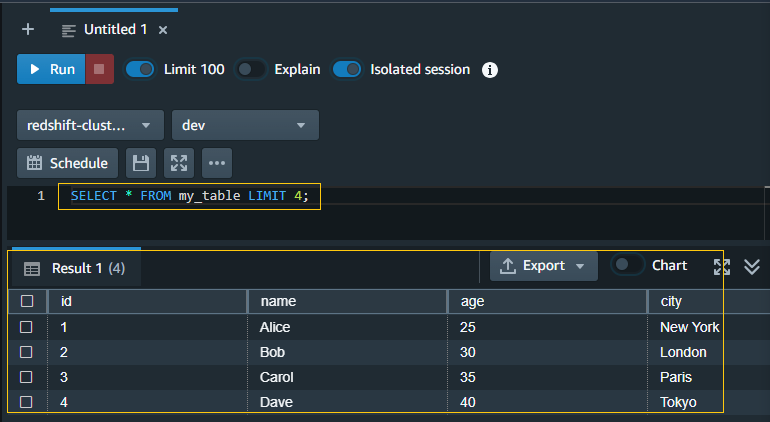 This fetches the first 4 rows from the “my_table” table.