(old Project 21)
Description
This project demonstrates setting up a Kubernetes cluster from scratch to showcase a comprehensive understanding of the technology. It includes installing and configuring Kubernetes control plane components, worker nodes, and networking. The instructions are for a Linux-based environment.
Technologies/Tools used:
- Linux-based operating system.
- AWS resources provisioning (VPC, subnets, security groups).
- Kubernetes control plane components (masters) and worker nodes.
- Networking setup for control plane and worker nodes.
- Testing cluster connectivity and troubleshooting.
- Configuration of Kubernetes worker node components and network policies.
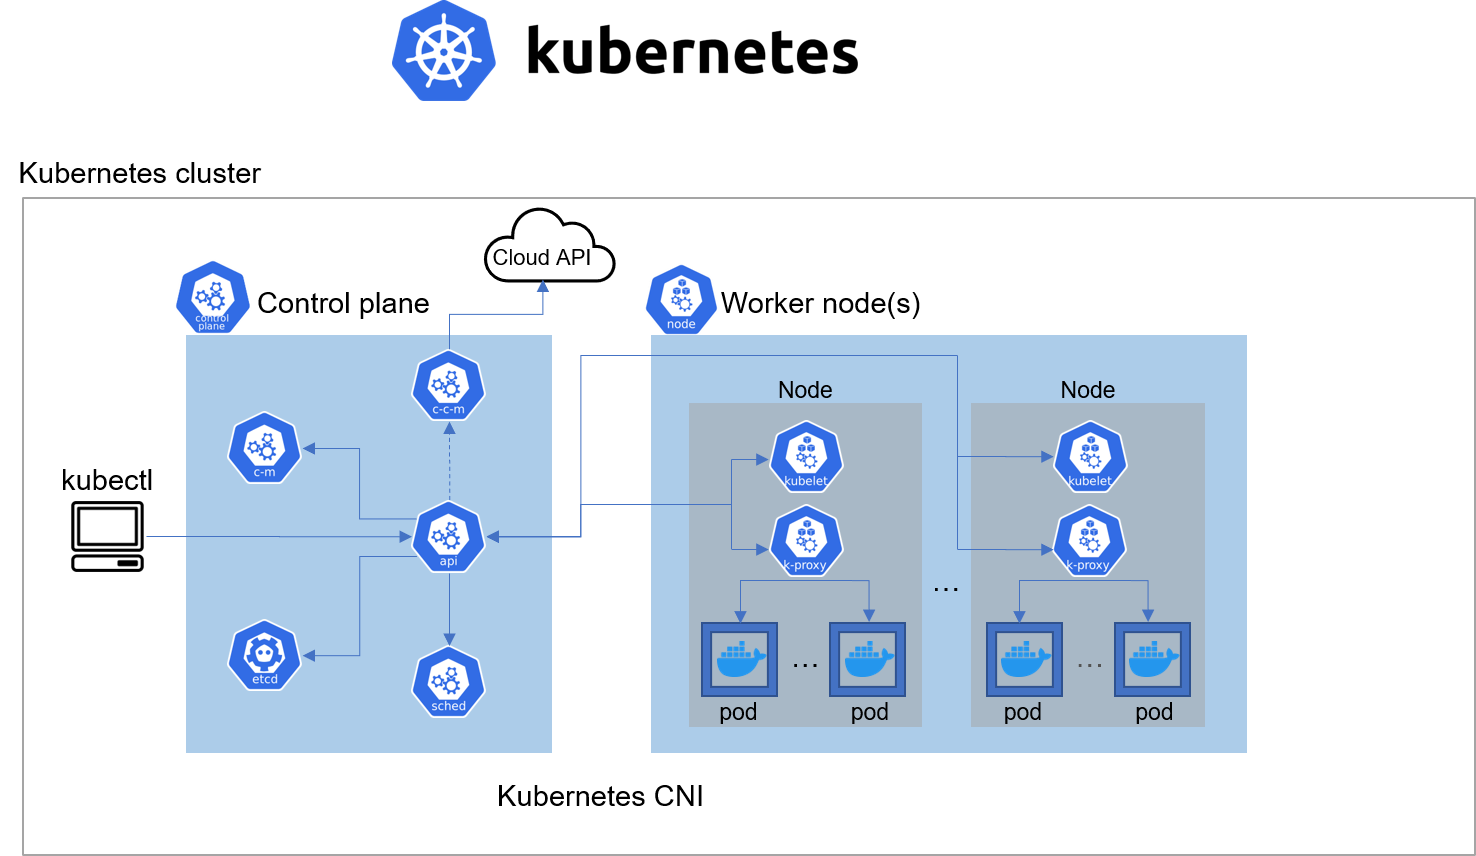
Kubernetes Architecture
Install Client Tools Before Bootstrapping the Cluster
Install and Configure AWS CLI
We will utilize the existing AWS CLI setup (from Project 15), which has already been configured, along with the DevOps account and a user Terraform (used in AUTOMATE-INFRASTRUCTURE-WITH-IAC-USING-TERRAFORM-PART-1-to-4 ).
Installing kubectl
Commands
hector@hector-Laptop:~$ chmod +x kubectl

hector@hector-Laptop:~$ ls -a | grep kubectl
kubectl

hector@hector-Laptop:~$ ls -l | grep kubectl
-rwxrwxr-x  1 hector hector 46436352 Apr  8  2021 kubectl

hector@hector-Laptop:~$ sudo mv kubectl /usr/local/bin/
[sudo] password for hector:

hector@hector-Laptop:~$ kubectl version --client
Client Version: version.Info{Major:"1", Minor:"21", GitVersion:"v1.21.0", GitCommit:"cb303e613a121a29364f75cc67d3d580833a7479", GitTreeState:"clean", BuildDate:"2021-04-08T16:31:21Z", GoVersion:"go1.16.1", Compiler:"gc", Platform:"linux/amd64"}
Install CFSSL and CFSSLJSON
CFSSL (CloudFlare’s PKI/TLS toolkit) and CFSSLJSON are tools developed by Cloudflare for managing public key infrastructure (PKI) and X.509 certificates.
- CFSSL is a command-line tool and a server for signing, verifying, and bundling X.509 certificates.
- CFSSLJSON is a utility that provides a JSON-based interface to CFSSL.
Commands
hector@hector-Laptop:~$ wget -q --show-progress --https-only --timestamping \
>   https://storage.googleapis.com/kubernetes-the-hard-way/cfssl/1.4.1/linux/cfssl \
>   https://storage.googleapis.com/kubernetes-the-hard-way/cfssl/1.4.1/linux/cfssljson
cfssl               100%[===================>]  14.15M  2.53MB/s    in 5.7s
cfssljson           100%[===================>]   9.05M  1.99MB/s    in 5.2s

hector@hector-Laptop:~$ ls -l | grep cfssl
-rw-rw-r--  1 hector hector 14842064 Jul 18  2020 cfssl
-rw-rw-r--  1 hector hector  9495504 Jul 18  2020 cfssljson

hector@hector-Laptop:~$ chmod +x cfssl cfssljson

hector@hector-Laptop:~$ ls -l | grep cfssl
-rwxrwxr-x  1 hector hector 14842064 Jul 18  2020 cfssl
-rwxrwxr-x  1 hector hector  9495504 Jul 18  2020 cfssljson

hector@hector-Laptop:~$ sudo mv cfssl cfssljson /usr/local/bin/
[sudo] password for hector:
hector@hector-Laptop:~$ ls -l | grep cfssl
Step 1 – Configure Network Infrastructure
AWS Cloud Resources for Kubernetes Cluster
Provision EC2 instances manually using AWS CLI for in-depth knowledge. Later, this can be automated with Terraform.
1. Creating a directory named
k8s-cluster-from-ground-up:
Commands
hector@hector-Laptop:~$ mkdir k8s-cluster-from-ground-up`
Virtual Private Cloud – VPC
2. Create a VPC and store the ID in a variable VPC_ID.
Commands
hector@hector-Laptop:~$ VPC_ID=$(aws ec2 create-vpc \
> --cidr-block 172.31.0.0/16 \
> --output text --query 'Vpc.VpcId'
> )
3. Tag the VPC with a name.
Commands
hector@hector-Laptop:~$ NAME=k8s-cluster-from-ground-up #Create variable

hector@hector-Laptop:~$ aws ec2 create-tags \
>   --resources ${VPC_ID} \
>   --tags Key=Name,Value=${NAME}
Domain Name System – DNS
4. Enable DNS support for the VPC.
Commands
hector@hector-Laptop:~$ aws ec2 modify-vpc-attribute \
> --vpc-id ${VPC_ID} \
> --enable-dns-support '{"Value": true}'
5. Enable DNS support for hostnames.
Commands
hector@hector-Laptop:~$ aws ec2 modify-vpc-attribute \
> --vpc-id ${VPC_ID} \
> --enable-dns-hostnames '{"Value": true}'
6. Set the required AWS Region:
AWS_REGION=us-east-1.
7. Configure DHCP Options Set:
By default, AWS assigns EC2 instances fully qualified domain names (FQDNs) like ip-172-50-197-106.eu-central-1.compute.internal. This step customizes the domain name used by instances in the VPC to something more meaningful for the project (e.g., ip-172-50-197-106.$AWS_REGION.hector.compute.internal) and ensures that DNS resolution uses Amazon’s provided DNS server.
Commands
hector@hector-Laptop:~$ DHCP_OPTION_SET_ID=$(aws ec2 create-dhcp-options \
>   --dhcp-configuration \
>     "Key=domain-name,Values=$AWS_REGION.hector.compute.internal" \
>     "Key=domain-name-servers,Values=AmazonProvidedDNS" \
>   --output text --query 'DhcpOptions.DhcpOptionsId')
8. Taging the DHCP Option set to make the domain name appear:
Commands
hector@hector-Laptop:~$ aws ec2 create-tags \
>   --resources ${DHCP_OPTION_SET_ID} \
>   --tags Key=Name,Value=${NAME}

9. Associate the DHCP Option set with the VPC:
Commands
hector@hector-Laptop:~$ aws ec2 associate-dhcp-options \
>   --dhcp-options-id ${DHCP_OPTION_SET_ID} \
>   --vpc-id ${VPC_ID}
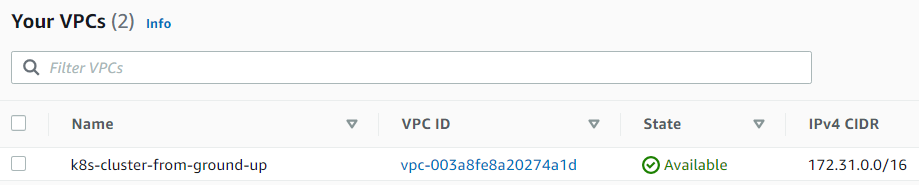
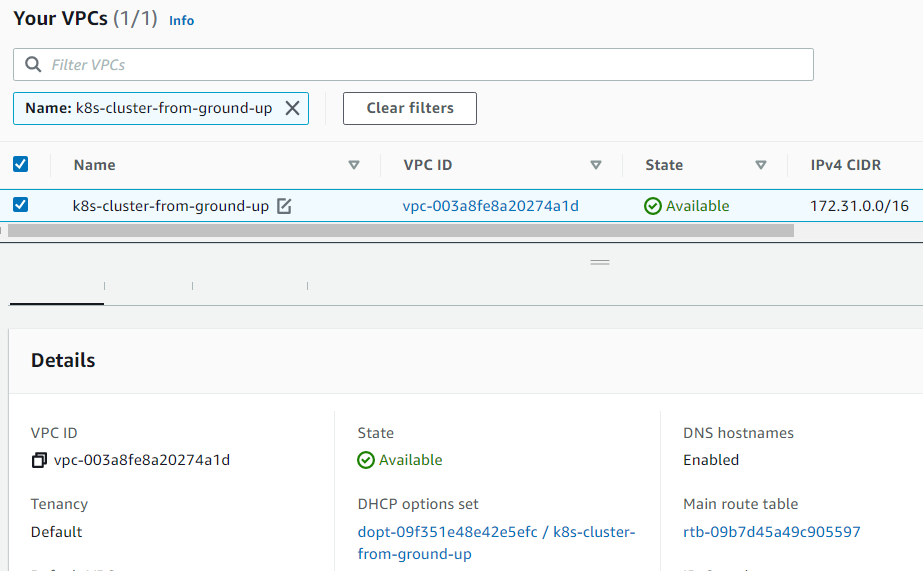
VPC > Your VPCs
VPC is now associated with the above DHCP options set ID
10. Creating the Subnet:
Commands
hector@hector-Laptop:~$ SUBNET_ID=$(aws ec2 create-subnet \
>   --vpc-id ${VPC_ID} \
>   --cidr-block 172.31.0.0/24 \
>   --output text --query 'Subnet.SubnetId')
Note Tagging to name it
hector@hector-Laptop:~$ aws ec2 create-tags \
>   --resources ${SUBNET_ID} \
>   --tags Key=Name,Value=${NAME}
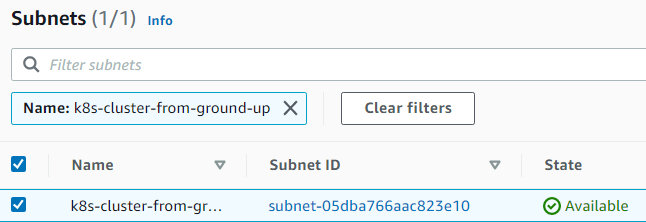
VPC > Subnets
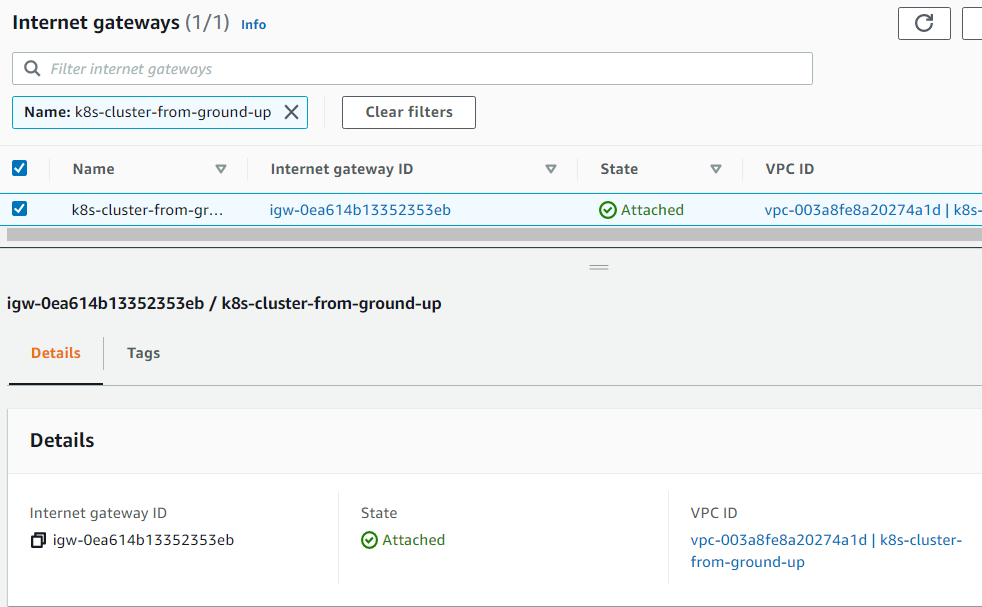
11. Creating the Internet Gateway (IGW) and attaching it to the VPC:
Commands
hector@hector-Laptop:~$ INTERNET_GATEWAY_ID=$(aws ec2 create-internet-gateway \
>   --output text --query 'InternetGateway.InternetGatewayId')

#Tagging to name it
hector@hector-Laptop:~$ aws ec2 create-tags \
>   --resources ${INTERNET_GATEWAY_ID} \
>   --tags Key=Name,Value=${NAME}

#Attaching
hector@hector-Laptop:~$ aws ec2 attach-internet-gateway \
>   --internet-gateway-id ${INTERNET_GATEWAY_ID} \
>   --vpc-id ${VPC_ID}
VPC ID vpc-003a8fe8a20274a1d
VPC > Internet gateways
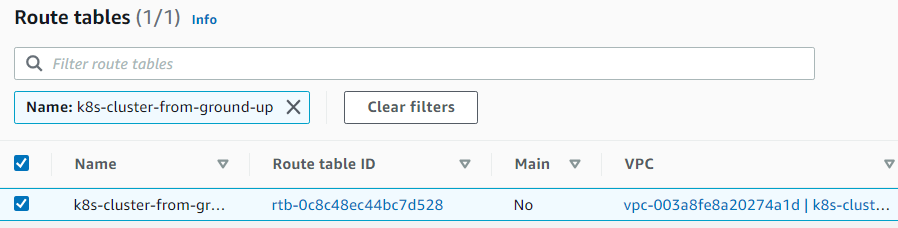
12. Routes
Creating route tables, associating the route table to subnet, and creating a route to allow external traffic to the Internet through the Internet Gateway.
Commands
hector@hector-Laptop:~$ ROUTE_TABLE_ID=$(aws ec2 create-route-table \
>   --vpc-id ${VPC_ID} \
>   --output text --query 'RouteTable.RouteTableId')

#Tagging to name it
hector@hector-Laptop:~$ aws ec2 create-tags \
>   --resources ${ROUTE_TABLE_ID} \
>   --tags Key=Name,Value=${NAME}

#Associating
hector@hector-Laptop:~$ aws ec2 associate-route-table \
>   --route-table-id ${ROUTE_TABLE_ID} \
>   --subnet-id ${SUBNET_ID}
{
    "AssociationId": "rtbassoc-0127a282e2bedeec0",
    "AssociationState": {
        "State": "associated"
    }
}

#Creating route
hector@hector-Laptop:~$ aws ec2 create-route \
>   --route-table-id ${ROUTE_TABLE_ID} \
>   --destination-cidr-block 0.0.0.0/0 \
>   --gateway-id ${INTERNET_GATEWAY_ID}
{
    "Return": true
}
VPC > Route tables
SECURITY GROUPS
13. Configure security groups:
Creating the security group and store its ID in a variable
hector@hector-Laptop:~$ SECURITY_GROUP_ID=$(aws ec2 create-security-group \
>   --group-name ${NAME} \
>   --description "Kubernetes cluster security group" \
>   --vpc-id ${VPC_ID} \
>   --output text --query 'GroupId')
Creating a NAME tag for the security group
hector@hector-Laptop:~$ aws ec2 create-tags \
>   --resources ${SECURITY_GROUP_ID} \
>   --tags Key=Name,Value=${NAME}
Authorize inbound traffic for master nodes ports.
Configure the security group to allow inbound TCP traffic within the subnet for ports used by the Kubernetes master nodes (specifically ports 2379–2380, used by etcd for communication).
hector@hector-Laptop:~$ aws ec2 authorize-security-group-ingress \
>     --group-id ${SECURITY_GROUP_ID} \
>     --ip-permissions IpProtocol=tcp,FromPort=2379,ToPort=2380,IpRanges='[{CidrIp=172.31.0.0/24}]'
{
    "Return": true,
    "SecurityGroupRules": [
        {
            "SecurityGroupRuleId": "sgr-0fdd63e60afe82980",
            "GroupId": "sg-0a9ee15e7bc3faf61",
            "GroupOwnerId": "199055125796",
            "IsEgress": false,
            "IpProtocol": "tcp",
            "FromPort": 2379,
            "ToPort": 2380,
            "CidrIpv4": "172.31.0.0/24"
        }
    ]
}
Authorize inbound traffic for worker nodes ports.
Configure the security group to allow inbound TCP traffic within the subnet for ports used by Kubernetes worker nodes (ports 30000–32767, used for NodePort services).
hector@hector-Laptop:~$ aws ec2 authorize-security-group-ingress \
>     --group-id ${SECURITY_GROUP_ID} \
>     --ip-permissions IpProtocol=tcp,FromPort=30000,ToPort=32767,IpRanges='[{CidrIp=172.31.0.0/24}]'
{
    "Return": true,
    "SecurityGroupRules": [
        {
            "SecurityGroupRuleId": "sgr-08c0785dd4c3d1add",
            "GroupId": "sg-0a9ee15e7bc3faf61",
            "GroupOwnerId": "199055125796",
            "IsEgress": false,
            "IpProtocol": "tcp",
            "FromPort": 30000,
            "ToPort": 32767,
            "CidrIpv4": "172.31.0.0/24"
        }
    ]
}
Authorize inbound for Kubernetes API Server on port 6443.
Configure the security group to allow inbound TCP traffic on port 6443, enabling external access to the Kubernetes API Server.
hector@hector-Laptop:~$ aws ec2 authorize-security-group-ingress \
>   --group-id ${SECURITY_GROUP_ID} \
>   --protocol tcp \
>   --port 6443 \
>   --cidr 0.0.0.0/0
{
    "Return": true,
    "SecurityGroupRules": [
        {
            "SecurityGroupRuleId": "sgr-0105bda399b098396",
            "GroupId": "sg-0a9ee15e7bc3faf61",
            "GroupOwnerId": "199055125796",
            "IsEgress": false,
            "IpProtocol": "tcp",
            "FromPort": 6443,
            "ToPort": 6443,
            "CidrIpv4": "0.0.0.0/0"
        }
    ]
}
Authorize inbound for SSH from anywhere
(not to be done in production. Limit access ONLY to IPs or CIDR that MUST connect)
hector@hector-Laptop:~$ aws ec2 authorize-security-group-ingress \
>   --group-id ${SECURITY_GROUP_ID} \
>   --protocol tcp \
>   --port 22 \
>   --cidr 0.0.0.0/0
{
    "Return": true,
    "SecurityGroupRules": [
        {
            "SecurityGroupRuleId": "sgr-0b646d465f5257b56",
            "GroupId": "sg-0a9ee15e7bc3faf61",
            "GroupOwnerId": "199055125796",
            "IsEgress": false,
            "IpProtocol": "tcp",
            "FromPort": 22,
            "ToPort": 22,
            "CidrIpv4": "0.0.0.0/0"
        }
    ]
}
Authorize ICMP ingress.
hector@hector-Laptop:~$ aws ec2 authorize-security-group-ingress \
>   --group-id ${SECURITY_GROUP_ID} \
>   --protocol icmp \
>   --port -1 \
>   --cidr 0.0.0.0/0
{
    "Return": true,
    "SecurityGroupRules": [
        {
            "SecurityGroupRuleId": "sgr-0f3b453bf36f5ad8c",
            "GroupId": "sg-0a9ee15e7bc3faf61",
            "GroupOwnerId": "199055125796",
            "IsEgress": false,
            "IpProtocol": "icmp",
            "FromPort": -1,
            "ToPort": -1,
            "CidrIpv4": "0.0.0.0/0"
        }
    ]
}
VPC > Security > Security groups

14. Creating a Network Load Balancer:
Commands
hector@hector-Laptop:~$ LOAD_BALANCER_ARN=$(aws elbv2 create-load-balancer \
> --name ${NAME} \
> --subnets ${SUBNET_ID} \
> --scheme internet-facing \
> --type network \
> --output text --query 'LoadBalancers[].LoadBalancerArn')
EC2 > Load Balancing > Load Balancers

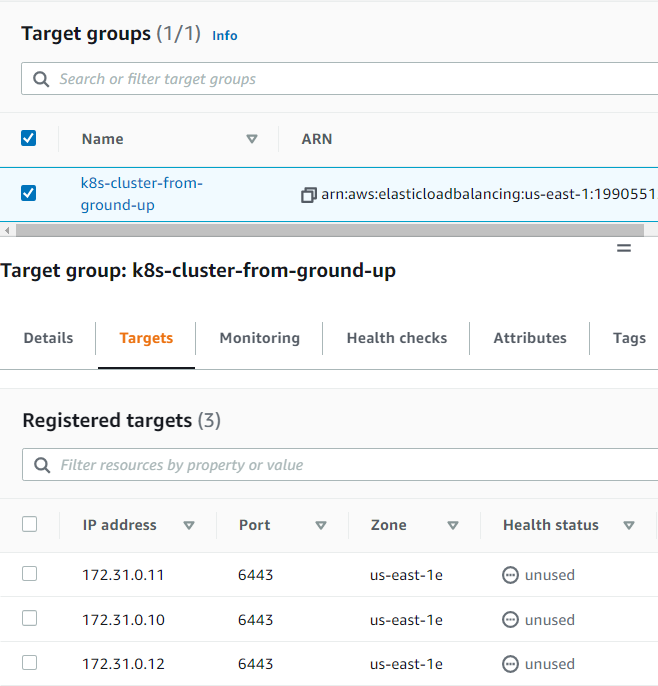
15. Creating a Target Group:
(For now it will be unhealthy because there are no targets yet)
Commands
hector@hector-Laptop:~$ TARGET_GROUP_ARN=$(aws elbv2 create-target-group \
>   --name ${NAME} \
>   --protocol TCP \
>   --port 6443 \
>   --vpc-id ${VPC_ID} \
>   --target-type ip \
>   --output text --query 'TargetGroups[].TargetGroupArn')
EC2 > Load Balancing > Target Groups

16. Registering targets:
(Just like above, no real targets. We will just put the IP addresses so that, when the nodes become available, they will be used as targets.)
Commands
hector@hector-Laptop:~$ aws elbv2 register-targets \
>   --target-group-arn ${TARGET_GROUP_ARN} \
>   --targets Id=172.31.0.1{0,1,2}
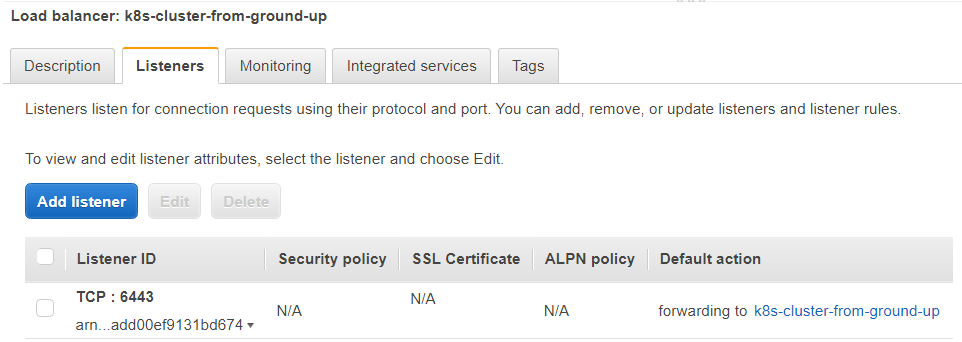
17. Create Listener for Kubernetes API Server
Configure a listener on the Network Load Balancer to forward TCP traffic on port 6443 to the target group containing the Kubernetes master nodes (enabling external access to the Kubernetes API Server).
Create a listener for port 6443
hector@hector-Laptop:~$ aws elbv2 create-listener \
> --load-balancer-arn ${LOAD_BALANCER_ARN} \
> --protocol TCP \
> --port 6443 \
> --default-actions Type=forward,TargetGroupArn=${TARGET_GROUP_ARN} \
> --output text --query 'Listeners[].ListenerArn'
arn:aws:elasticloadbalancing:us-east-1:199055125796:listener/net/k8s-cluster-from-ground-up/a09ad605b1edac82/add00ef9131bd674
18. Get the Kubernetes Public address:
Obtain the public DNS name of the internet-facing Network Load Balancer, which serves as the public IP endpoint for the Kubernetes API Server.
Commands
hector@hector-Laptop:~$ KUBERNETES_PUBLIC_ADDRESS=$(aws elbv2 describe-load-balancers \
> --load-balancer-arns ${LOAD_BALANCER_ARN} \
> --output text --query 'LoadBalancers[].DNSName')

#Just revealing the address
hector@hector-Laptop:~$ echo $KUBERNETES_PUBLIC_ADDRESS
k8s-cluster-from-ground-up-a09ad605b1edac82.elb.us-east-1.amazonaws.com
Step 2 - Create Compute Resources
1. Getting an AMI for EC2 instances:
(needed to install Command-line JSON processor jq sudo apt install jq)
Amazon Machine Image (AMI)
hector@hector-Laptop:~$ IMAGE_ID=$(aws ec2 describe-images --owners 099720109477 \
>   --filters \
>   'Name=root-device-type,Values=ebs' \
>   'Name=architecture,Values=x86_64' \
>   'Name=name,Values=ubuntu/images/hvm-ssd/ubuntu-xenial-16.04-amd64-server-*' \
>   | jq -r '.Images|sort_by(.Name)[-1]|.ImageId')

# Confirming var contents
hector@hector-Laptop:~$ echo $IMAGE_ID
ami-0b0ea68c435eb488d
2. Creating SSH Key-Pair:
Commands
hector@hector-Laptop:~$ mkdir -p ssh

hector@hector-Laptop:~$ aws ec2 create-key-pair \
>   --key-name ${NAME} \
>   --output text --query 'KeyMaterial' \
>   > ssh/${NAME}.id_rsa
chmod 600 ssh/${NAME}.id_rsa

hector@hector-Laptop:~$ chmod 600 ssh/${NAME}.id_rsa

#Confirming key was created
hector@hector-Laptop:~$ ls ssh
k8s-cluster-from-ground-up.id_rsa
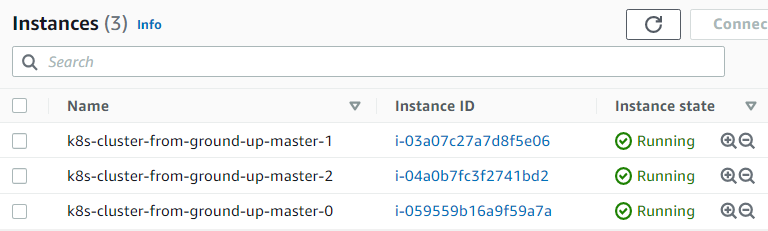
3. Creating 3 Master nodes (EC2 Instances) for the Control Plane:
(Note – Using t2.micro instead of t2.small as t2.micro is covered by AWS free tier)
Commands
hector@hector-Laptop:~$ for i in 0 1 2; do
>   instance_id=$(aws ec2 run-instances \
>     --associate-public-ip-address \
>     --image-id ${IMAGE_ID} \
>     --count 1 \
>     --key-name ${NAME} \
>     --security-group-ids ${SECURITY_GROUP_ID} \
>     --instance-type t2.micro \
>     --private-ip-address 172.31.0.1${i} \
>     --user-data "name=master-${i}" \
>     --subnet-id ${SUBNET_ID} \
>     --output text --query 'Instances[].InstanceId')
>   aws ec2 modify-instance-attribute \
>     --instance-id ${instance_id} \
>     --no-source-dest-check
>   aws ec2 create-tags \
>     --resources ${instance_id} \
>     --tags "Key=Name,Value=${NAME}-master-${i}"
> done
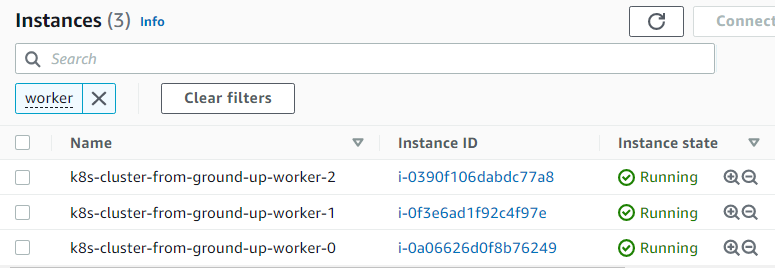
4. Creating 3 worker nodes (EC2 Instances):
Commands
hector@hector-Laptop:~$ for i in 0 1 2; do
>   instance_id=$(aws ec2 run-instances \
>     --associate-public-ip-address \
>     --image-id ${IMAGE_ID} \
>     --count 1 \
>     --key-name ${NAME} \
>     --security-group-ids ${SECURITY_GROUP_ID} \
>     --instance-type t2.micro \
>     --private-ip-address 172.31.0.2${i} \
>     --user-data "name=worker-${i}|pod-cidr=172.20.${i}.0/24" \
>     --subnet-id ${SUBNET_ID} \
>     --output text --query 'Instances[].InstanceId')
>   aws ec2 modify-instance-attribute \
>     --instance-id ${instance_id} \
>     --no-source-dest-check
>   aws ec2 create-tags \
>     --resources ${instance_id} \
>     --tags "Key=Name,Value=${NAME}-worker-${i}"
> done
Step 3 - Prepare the Self-Signed Certificate Authority and Generate TLS Certificates
The following components on master nodes require TLS certificates for secure communication:
- kube-controller-manager
- kube-scheduler
- etcd
- kube-apiserver
The following components on worker nodes require TLS certificates:
- kubelet
- kube-proxy
Set Up Certificate Authority for PKI
Provision a Public Key Infrastructure (PKI) using cfssl to create a Certificate Authority (CA) that will generate TLS certificates for all the individual components.
Creating a directory and
cdinto it:hector@hector-Laptop:~$ mkdir ca-authority && cd ca-authority
Generating the CA configuration file, Root Certificate, and Private key:
hector@hector-Laptop:~/ca-authority$ {
> cat > ca-config.json <<EOF
> {
>   "signing": {
>     "default": {
>       "expiry": "8760h"
>     },
>     "profiles": {
>       "kubernetes": {
>         "usages": ["signing", "key encipherment", "server auth", "client auth"],
>         "expiry": "8760h"
>       }
>     }
>   }
> }
> EOF
> cat > ca-csr.json <<EOF
> {
>   "CN": "Kubernetes",
>   "key": {
>     "algo": "rsa",
>     "size": 2048
>   },
>   "names": [
>     {
>       "C": "US",
>       "L": "Florida",
>       "O": "Kubernetes",
>       "OU": "Hector DEVOPS",
>       "ST": "Miami"
>     }
>   ]
> }
> EOF
> cfssl gencert -initca ca-csr.json | cfssljson -bare ca
> }
2022/06/08 14:17:28 [INFO] generating a new CA key and certificate from CSR
2022/06/08 14:17:28 [INFO] generate received request
2022/06/08 14:17:28 [INFO] received CSR
2022/06/08 14:17:28 [INFO] generating key: rsa-2048
2022/06/08 14:17:28 [INFO] encoded CSR
2022/06/08 14:17:28 [INFO] signed certificate with serial number 595938750693050736385532716166856798624679790798
Created files:
ca-config.json
Defines certificate signing profiles and expiry (8760 hours, ~1 year).
ca-csr.json
Specifies CA details, including:
- CN: Common Name (“Kubernetes”)
- algo: Algorithm (“rsa”)
- size: Key size (2048 bits)
- C: Country (“US”)
- L: Locality (“Florida”)
- ST: State (“Miami”)
- O: Organization (“Kubernetes”)
- OU: Organizational Unit (“Hector DEVOPS”)
The 3 important files here are:
ca.pem: Root Certificate
ca-key.pem: Private Key
ca.csr: Certificate Signing Request
Generating TLS Certificates For Client and Server
We need to provision Client/Server certificates for all the components. It is a must to have encrypted communication within the cluster.
In the context of the cluster:
- server are the master nodes running the
api-servercomponent. - client is every other component that needs to communicate with the
api-server.kube-controller-managerkube-scheduleretcdkubeletkube-proxyKubernetes Admin User
Now we have a certificate for the Root CA, we can begin to request more certificates which the different Kubernetes components (clients and server) will use for encrypted communication.
1. Kubernetes API-Server Certificate and Private Key
The certificate for the Api-server must have IP addresses, DNS names, and a Load Balancer address included.
Generating the Certificate Signing Request (CSR), Private Key and the Certificate for the Kubernetes Master Nodes.
Commands
hector@hector-Laptop:~/ca-authority$ {
> cat > master-kubernetes-csr.json <<EOF
> {
>   "CN": "kubernetes",
>    "hosts": [
>    "127.0.0.1",
>    "172.31.0.10",
>    "172.31.0.11",
>    "172.31.0.12",
>    "ip-172-31-0-10",
>    "ip-172-31-0-11",
>    "ip-172-31-0-12",
>    "ip-172-31-0-10.${AWS_REGION}.compute.internal",
>    "ip-172-31-0-11.${AWS_REGION}.compute.internal",
>    "ip-172-31-0-12.${AWS_REGION}.compute.internal",
>    "${KUBERNETES_PUBLIC_ADDRESS}",
>    "kubernetes",
>    "kubernetes.default",
>    "kubernetes.default.svc",
>    "kubernetes.default.svc.cluster",
>    "kubernetes.default.svc.cluster.local"
>   ],
>   "key": {
>     "algo": "rsa",
>     "size": 2048
>   },
>   "names": [
>     {
>       "C": "US",
>       "L": "Florida",
>       "O": "Kubernetes",
>       "OU": "Hector DEVOPS",
>       "ST": "Miami"
>     }
>   ]
> }
> EOF
> cfssl gencert \
>   -ca=ca.pem \
>   -ca-key=ca-key.pem \
>   -config=ca-config.json \
>   -profile=kubernetes \
>   master-kubernetes-csr.json | cfssljson -bare master-kubernetes
> }
2022/06/08 14:23:17 [INFO] generate received request
2022/06/08 14:23:17 [INFO] received CSR
2022/06/08 14:23:17 [INFO] generating key: rsa-2048
2022/06/08 14:23:17 [INFO] encoded CSR
2022/06/08 14:23:17 [INFO] signed certificate with serial number 547649748408320050103723158040590516113896364808
hector@hector-Laptop:~/ca-authority$
Creating the (Client) Certificates
Kube Proxy
Controller Manager
Kubelet
K8s admin user
Note
kube-schedulerClient Certificate and Private Keyhector@hector-Laptop:~/ca-authority$ { > cat > kube-scheduler-csr.json <<EOF > { > "CN": "system:kube-scheduler", > "key": { > "algo": "rsa", > "size": 2048 > }, > "names": [ > { > "C": "US", > "L": "Florida", > "O": "system:kube-scheduler", > "OU": "Hector DEVOPS", > "ST": "Miami" > } > ] > } > EOF > cfssl gencert \ > -ca=ca.pem \ > -ca-key=ca-key.pem \ > -config=ca-config.json \ > -profile=kubernetes \ > kube-scheduler-csr.json | cfssljson -bare kube-scheduler > } 2022/06/08 14:27:53 [INFO] generate received request 2022/06/08 14:27:53 [INFO] received CSR 2022/06/08 14:27:53 [INFO] generating key: rsa-2048 2022/06/08 14:27:53 [INFO] encoded CSR 2022/06/08 14:27:53 [INFO] signed certificate with serial number 622069761468098043960394959246888396290159189426 2022/06/08 14:27:53 [WARNING] This certificate lacks a "hosts" field. This makes it unsuitable for websites. For more information see the Baseline Requirements for the Issuance and Management of Publicly-Trusted Certificates, v.1.1.6, from the CA/Browser Forum (https://cabforum.org); specifically, section 10.2.3 ("Information Requirements"). hector@hector-Laptop:~/ca-authority$We can ignore the warning message
Note
kube-proxyClient Certificate and Private Keyhector@hector-Laptop:~/ca-authority$ cat > kube-proxy-csr.json <<EOF > { > "CN": "system:kube-proxy", > "key": { > "algo": "rsa", > "size": 2048 > }, > "names": [ > { > "C": "US", > "L": "Florida", > "O": "system:node-proxier", > "OU": "Hector DEVOPS", > "ST": "Miami" > } > ] > } > EOF hector@hector-Laptop:~/ca-authority$ cfssl gencert \ > -ca=ca.pem \ > -ca-key=ca-key.pem \ > -config=ca-config.json \ > -profile=kubernetes \ > kube-proxy-csr.json | cfssljson -bare kube-proxy 2022/06/08 14:45:22 [INFO] generate received request 2022/06/08 14:45:22 [INFO] received CSR 2022/06/08 14:45:22 [INFO] generating key: rsa-2048 }2022/06/08 14:45:22 [INFO] encoded CSR 2022/06/08 14:45:22 [INFO] signed certificate with serial number 176112969599687911110401190660797659018781968094 2022/06/08 14:45:22 [WARNING] This certificate lacks a "hosts" field. This makes it unsuitable for websites. For more information see the Baseline Requirements for the Issuance and Management of Publicly-Trusted Certificates, v.1.1.6, from the CA/Browser Forum (https://cabforum.org); specifically, section 10.2.3 ("Information Requirements").
Note
kube-controller-managerClient Certificate and Private Keyhector@hector-Laptop:~/ca-authority$ { > cat > kube-controller-manager-csr.json <<EOF > { > "CN": "system:kube-controller-manager", > "key": { > "algo": "rsa", > "size": 2048 > }, > "names": [ > { > "C": "US", > "L": "Florida", > "O": "system:kube-controller-manager", > "OU": "Hector DEVOPS", > "ST": "Miami" > } > ] > } > EOF > cfssl gencert \ > -ca=ca.pem \ > -ca-key=ca-key.pem \ > -config=ca-config.json \ > -profile=kubernetes \ > kube-controller-manager-csr.json | cfssljson -bare kube-controller-manager > } 2022/06/08 15:50:39 [INFO] generate received request 2022/06/08 15:50:39 [INFO] received CSR 2022/06/08 15:50:39 [INFO] generating key: rsa-2048 2022/06/08 15:50:39 [INFO] encoded CSR 2022/06/08 15:50:39 [INFO] signed certificate with serial number 279440487414994410215011560698903695611018498249 2022/06/08 15:50:39 [WARNING] This certificate lacks a "hosts" field. This makes it unsuitable for websites. For more information see the Baseline Requirements for the Issuance and Management of Publicly-Trusted Certificates, v.1.1.6, from the CA/Browser Forum (https://cabforum.org); specifically, section 10.2.3 ("Information Requirements"). hector@hector-Laptop:~/ca-authority$
Note Refactoring end
5. kubelet Client Certificate and Private Key
Kubernetes requires that the hostname of each worker node is included in the client certificate.
Also, Kubernetes uses a special-purpose authorization mode called Node Authorizer, that specifically authorizes API requests made by kubelet services. In order to be authorized by the Node Authorizer, kubelets must use a credential that identifies them as being in the system:nodes group, with a username of system:node:<nodeName>. Hence the "CN": "system:node:${instance_hostname}", in the below code.
Therefore, the certificate to be created must comply to these requirements. In the below example, there are 3 worker nodes, hence we will use bash to loop through a list of the worker nodes’ hostnames, and based on each index, the respective Certificate Signing Request (CSR), private key and client certificates will be generated.
Note
kubeletClient Certificate and Private Keyhector@hector-Laptop:~/ca-authority$ for i in 0 1 2; do > instance="${NAME}-worker-${i}" > instance_hostname="ip-172-31-0-2${i}" > cat > ${instance}-csr.json <<EOF > { > "CN": "system:node:${instance_hostname}", > "key": { > "algo": "rsa", > "size": 2048 > }, > "names": [ > { > "C": "US", > "L": "Florida", > "O": "system:nodes", > "OU": "Hector DEVOPS", > "ST": "Miami" > } > ] > } > EOF > external_ip=$(aws ec2 describe-instances \ > --filters "Name=tag:Name,Values=${instance}" \ > --output text --query 'Reservations[].Instances[].PublicIpAddress') > internal_ip=$(aws ec2 describe-instances \ > --filters "Name=tag:Name,Values=${instance}" \ > --output text --query 'Reservations[].Instances[].PrivateIpAddress') > cfssl gencert \ > -ca=ca.pem \ > -ca-key=ca-key.pem \ > -config=ca-config.json \ > -hostname=${instance_hostname},${external_ip},${internal_ip} \ > -profile=kubernetes \ > ${NAME}-worker-${i}-csr.json | cfssljson -bare ${NAME}-worker-${i} > done 2022/06/08 20:38:25 [INFO] generate received request 2022/06/08 20:38:25 [INFO] received CSR 2022/06/08 20:38:25 [INFO] generating key: rsa-2048 2022/06/08 20:38:25 [INFO] encoded CSR 2022/06/08 20:38:25 [INFO] signed certificate with serial number 88068063509947593848109566279871873559554569039 2022/06/08 20:38:27 [INFO] generate received request 2022/06/08 20:38:27 [INFO] received CSR 2022/06/08 20:38:27 [INFO] generating key: rsa-2048 2022/06/08 20:38:27 [INFO] encoded CSR 2022/06/08 20:38:27 [INFO] signed certificate with serial number 582231254599715575847880223126164829455969326988 2022/06/08 20:38:28 [INFO] generate received request 2022/06/08 20:38:28 [INFO] received CSR 2022/06/08 20:38:28 [INFO] generating key: rsa-2048 2022/06/08 20:38:30 [INFO] encoded CSR 2022/06/08 20:38:30 [INFO] signed certificate with serial number 205507639545489712146564463937190119075761906061 hector@hector-Laptop:~/ca-authority$
Note
kubernetes admin user'sClient Certificate and Private Keyhector@hector-Laptop:~/ca-authority$ { > cat > admin-csr.json <<EOF > { > "CN": "admin", > "key": { > "algo": "rsa", > "size": 2048 > }, > "names": [ > { > "C": "US", > "L": "Florida", > "O": "system:masters", > "OU": "Hector DEVOPS", > "ST": "Miami" > } > ] > } > EOF > cfssl gencert \ > -ca=ca.pem \ > -ca-key=ca-key.pem \ > -config=ca-config.json \ > -profile=kubernetes \ > admin-csr.json | cfssljson -bare admin > } 2022/06/08 20:49:35 [INFO] generate received request 2022/06/08 20:49:35 [INFO] received CSR 2022/06/08 20:49:35 [INFO] generating key: rsa-2048 2022/06/08 20:49:35 [INFO] encoded CSR 2022/06/08 20:49:35 [INFO] signed certificate with serial number 140984123270054335235966735745247869171088770273 2022/06/08 20:49:35 [WARNING] This certificate lacks a "hosts" field. This makes it unsuitable for websites. For more information see the Baseline Requirements for the Issuance and Management of Publicly-Trusted Certificates, v.1.1.6, from the CA/Browser Forum (https://cabforum.org); specifically, section 10.2.3 ("Information Requirements"). hector@hector-Laptop:~/ca-authority$
Another pair of certificate and private key we need to generate is for the Token Controller (a part of the Kubernetes Controller Manager kube-controller-manager responsible for generating and signing service account tokens which are used by pods or other resources to establish connectivity to the api-server.
Service Accounts official documentation
We create the last set of files, and we are done with PKIs
Token Controller Certificate and Private Key
hector@hector-Laptop:~/ca-authority$ {
> cat > service-account-csr.json <<EOF
> {
>   "CN": "service-accounts",
>   "key": {
>     "algo": "rsa",
>     "size": 2048
>   },
>   "names": [
>     {
>       "C": "US",
>       "L": "Florida",
>       "O": "Kubernetes",
>       "OU": "Hector DEVOPS",
>       "ST": "Miami"
>     }
>   ]
> }
> EOF
> cfssl gencert \
>   -ca=ca.pem \
>   -ca-key=ca-key.pem \
>   -config=ca-config.json \
>   -profile=kubernetes \
>   service-account-csr.json | cfssljson -bare service-account
> }
2022/06/08 21:09:08 [INFO] generate received request
2022/06/08 21:09:08 [INFO] received CSR
2022/06/08 21:09:08 [INFO] generating key: rsa-2048
2022/06/08 21:09:09 [INFO] encoded CSR
2022/06/08 21:09:09 [INFO] signed certificate with serial number 117554976092240248700077848849651368992033028376
2022/06/08 21:09:09 [WARNING] This certificate lacks a "hosts" field. This makes it unsuitable for
websites. For more information see the Baseline Requirements for the Issuance and Management
of Publicly-Trusted Certificates, v.1.1.6, from the CA/Browser Forum (https://cabforum.org);
specifically, section 10.2.3 ("Information Requirements").
hector@hector-Laptop:~/ca-authority$
STEP 4 – DISTRIBUTING THE CLIENT AND SERVER CERTIFICATES
Now we send all the client and server certificates to their respective instances.
Beginning with the worker nodes we will copy the following files securely using scp utility
- Root CA certificate – ca.pem
- X509 Certificate for each worker node
- Private Key of the certificate for each worker node
Worker Nodes (for-loop)
hector@hector-Laptop:~/ca-authority$ for i in 0 1 2; do
>   instance="${NAME}-worker-${i}"
>   external_ip=$(aws ec2 describe-instances \
>     --filters "Name=tag:Name,Values=${instance}" \
>     --output text --query 'Reservations[].Instances[].PublicIpAddress')
>   scp -i ../ssh/${NAME}.id_rsa \
>     ca.pem ${instance}-key.pem ${instance}.pem ubuntu@${external_ip}:~/; \
> done
The authenticity of host '3.90.65.208 (3.90.65.208)' can't be established.
ECDSA key fingerprint is SHA256:NR3IjdAA33E/5ZSy37qSl25w+Ei1uQuxBaakkuXnyX0.
Are you sure you want to continue connecting (yes/no/[fingerprint])? yes
Warning: Permanently added '3.90.65.208' (ECDSA) to the list of known hosts.
ca.pem                                                                          100% 1342    25.8KB/s   00:00
k8s-cluster-from-ground-up-worker-0-key.pem                                     100% 1679    30.9KB/s   00:00
k8s-cluster-from-ground-up-worker-0.pem                                         100% 1505    25.5KB/s   00:00
The authenticity of host '34.227.92.141 (34.227.92.141)' can't be established.
ECDSA key fingerprint is SHA256:P3cCnXigFCnAzo4O00bEVHY5T11M7UPm25hbNMIBuC4.
Are you sure you want to continue connecting (yes/no/[fingerprint])? yes
Warning: Permanently added '34.227.92.141' (ECDSA) to the list of known hosts.
ca.pem                                                                          100% 1342    23.0KB/s   00:00
k8s-cluster-from-ground-up-worker-1-key.pem                                     100% 1675    30.4KB/s   00:00
k8s-cluster-from-ground-up-worker-1.pem                                         100% 1505    24.1KB/s   00:00
The authenticity of host '100.25.137.116 (100.25.137.116)' can't be established.
ECDSA key fingerprint is SHA256:+G7SV9/P0jp0N6aDE8wZ0zOBKKiHazKipfFA7btq8Fo.
Are you sure you want to continue connecting (yes/no/[fingerprint])? yes
Warning: Permanently added '100.25.137.116' (ECDSA) to the list of known hosts.
ca.pem                                                                          100% 1342    24.5KB/s   00:00
k8s-cluster-from-ground-up-worker-2-key.pem                                     100% 1675    28.7KB/s   00:00
k8s-cluster-from-ground-up-worker-2.pem                                         100% 1505    24.1KB/s   00:00
hector@hector-Laptop:~/ca-authority$
For master nodes only the api-server related files will be sent over the master nodes
Master or Controller node (for-loop)
hector@hector-Laptop:~/ca-authority$ for i in 0 1 2; do
> instance="${NAME}-master-${i}" \
>   external_ip=$(aws ec2 describe-instances \
>     --filters "Name=tag:Name,Values=${instance}" \
>     --output text --query 'Reservations[].Instances[].PublicIpAddress')
>   scp -i ../ssh/${NAME}.id_rsa \
>     ca.pem ca-key.pem service-account-key.pem service-account.pem \
>     master-kubernetes.pem master-kubernetes-key.pem ubuntu@${external_ip}:~/;
> done
The authenticity of host '100.26.49.196 (100.26.49.196)' can't be established.
ECDSA key fingerprint is SHA256:/4rGAImFx/BZwNaqt1ykQGmzYIQXm5m7E5xCzwMD7F0.
Are you sure you want to continue connecting (yes/no/[fingerprint])? yes
Warning: Permanently added '100.26.49.196' (ECDSA) to the list of known hosts.
ca.pem                                                                          100% 1342    14.8KB/s   00:00
ca-key.pem                                                                      100% 1679    19.7KB/s   00:00
service-account-key.pem                                                         100% 1675    16.0KB/s   00:00
service-account.pem                                                             100% 1432    19.8KB/s   00:00
master-kubernetes.pem                                                           100% 1862    18.7KB/s   00:00
master-kubernetes-key.pem                                                       100% 1679    20.0KB/s   00:00
The authenticity of host '54.210.195.212 (54.210.195.212)' can't be established.
ECDSA key fingerprint is SHA256:QGJXM4aYn5FUC6nEwy/ggnEJkPc1gCPW7Vtr2J7niAI.
Are you sure you want to continue connecting (yes/no/[fingerprint])? yes
Warning: Permanently added '54.210.195.212' (ECDSA) to the list of known hosts.
ca.pem                                                                          100% 1342    17.6KB/s   00:00
ca-key.pem                                                                      100% 1679    18.0KB/s   00:00
service-account-key.pem                                                         100% 1675    12.6KB/s   00:00
service-account.pem                                                             100% 1432    24.0KB/s   00:00
master-kubernetes.pem                                                           100% 1862    23.1KB/s   00:00
master-kubernetes-key.pem                                                       100% 1679    26.5KB/s   00:00
The authenticity of host '54.237.87.176 (54.237.87.176)' can't be established.
ECDSA key fingerprint is SHA256:qgV+75d1s0XOw3YEfo5byFg8zo876/Fqm5rLddsZnzE.
Are you sure you want to continue connecting (yes/no/[fingerprint])? yes
Warning: Permanently added '54.237.87.176' (ECDSA) to the list of known hosts.
ca.pem                                                                          100% 1342     8.9KB/s   00:00
ca-key.pem                                                                      100% 1679    17.1KB/s   00:00
service-account-key.pem                                                         100% 1675    13.7KB/s   00:00
service-account.pem                                                             100% 1432    10.5KB/s   00:00
master-kubernetes.pem                                                           100% 1862    16.2KB/s   00:00
master-kubernetes-key.pem                                                       100% 1679    27.3KB/s   00:00
hector@hector-Laptop:~/ca-authority$
Client Certificates
kube-proxy
kube-controller-manager
kube-scheduler
kubelet (on worker nodes)
will be used to generate client authentication configuration files later.
Server Certificates
These are used by components that serve requests and need to prove their identity to clients.
Worker nodes:
- Each worker node gets its own X.509 certificate and private key.
- These are used by the Kubelet to authenticate itself to the API server.
- The API server may also initiate communication with the Kubelet to:
- Fetch logs
- Execute commands (e.g.,
kubectl exec) - Get metrics Master nodes:
master-kubernetes.pemandmaster-kubernetes-key.pemare used by the API server to authenticate itself to clients (likekubectl,kubelet, etc.).
STEP 5 - USE KUBECTL TO GENERATE KUBERNETES CONFIGURATION FILES FOR AUTHENTICATION
In this step we will create some files known as kubeconfig, which enable Kubernetes clients to locate (e.g., IP or hostname and Port) and authenticate (Certificate of token entries) to the Kubernetes API Servers.
We will need a client tool called kubectl to do this.
Now we generate kubeconfig files for the kubelet, kube-controller-manager, kube-proxy, and kube-scheduler clients and then the admin user.
First, we create a few environment variables for reuse by multiple commands.
KUBERNETES_API_SERVER_ADDRESS=$(aws elbv2 describe-load-balancers --load-balancer-arns ${LOAD_BALANCER_ARN} --output text --query 'LoadBalancers[].DNSName')1. Generating kubelet kubeconfig file
Because each certificate has the node’s DNS name or IP Address configured at the time the certificate was generated, the client certificate configured for each node (running kubelet) is used to generate the kubeconfig. It also ensures that the appropriate authorization is applied to that node through the Node Authorizer
We run the command below in the directory where all the certificates were generated. In my case ca-authority
(for-loop)
hector@hector-Laptop:~/ca-authority$ for i in 0 1 2; do
> instance="${NAME}-worker-${i}"
> instance_hostname="ip-172-31-0-2${i}"
> # Set the kubernetes cluster in the kubeconfig file
>   kubectl config set-cluster ${NAME} \
>     --certificate-authority=ca.pem \
>     --embed-certs=true \
>     --server=https://$KUBERNETES_API_SERVER_ADDRESS:6443 \
>     --kubeconfig=${instance}.kubeconfig
> # Set the cluster credentials in the kubeconfig file
>   kubectl config set-credentials system:node:${instance_hostname} \
>     --client-certificate=${instance}.pem \
>     --client-key=${instance}-key.pem \
>     --embed-certs=true \
>     --kubeconfig=${instance}.kubeconfig
> # Set the context in the kubeconfig file
>   kubectl config set-context default \
>     --cluster=${NAME} \
>     --user=system:node:${instance_hostname} \
>     --kubeconfig=${instance}.kubeconfig
> kubectl config use-context default --kubeconfig=${instance}.kubeconfig
> done
Cluster "k8s-cluster-from-ground-up" set.
User "system:node:ip-172-31-0-20" set.
Context "default" created.
Switched to context "default".
Cluster "k8s-cluster-from-ground-up" set.
User "system:node:ip-172-31-0-21" set.
Context "default" created.
Switched to context "default".
Cluster "k8s-cluster-from-ground-up" set.
User "system:node:ip-172-31-0-22" set.
Context "default" created.
Switched to context "default".
hector@hector-Laptop:~/ca-authority$
Newly generated kubeconfig files
hector@hector-Laptop:~/ca-authority$ ls -ltr *.kubeconfig
-rw------- 1 hector hector 6511 Jun  8 21:25 k8s-cluster-from-ground-up-worker-0.kubeconfig
-rw------- 1 hector hector 6507 Jun  8 21:25 k8s-cluster-from-ground-up-worker-1.kubeconfig
-rw------- 1 hector hector 6507 Jun  8 21:25 k8s-cluster-from-ground-up-worker-2.kubeconfig
Kubeconfig file is used to organize information about clusters, users, namespaces and authentication mechanisms. By default, kubectl looks for a file named config in the $HOME/.kube directory. You can specify other kubeconfig files by setting the KUBECONFIG environment variable or by setting the --kubeconfig flag.
kubeconfig files documentation
Context (my case default) part of kubeconfig file defines three main parameters: cluster, namespace and user. We can save several different contexts with any convenient names and switch between them when needed.
kubectl config use-context <context-name>
2. Generating kube-proxy kubeconfig
Note
set-cluster,set-credentials,set-contexthector@hector-Laptop:~/ca-authority$ { > kubectl config set-cluster ${NAME} \ > --certificate-authority=ca.pem \ > --embed-certs=true \ > --server=https://${KUBERNETES_API_SERVER_ADDRESS}:6443 \ > --kubeconfig=kube-proxy.kubeconfig > > kubectl config set-credentials system:kube-proxy \ > --client-certificate=kube-proxy.pem \ > --client-key=kube-proxy-key.pem \ > --embed-certs=true \ > --kubeconfig=kube-proxy.kubeconfig > > kubectl config set-context default \ > --cluster=${NAME} \ > --user=system:kube-proxy \ > --kubeconfig=kube-proxy.kubeconfig > kubectl config use-context default --kubeconfig=kube-proxy.kubeconfig > } Cluster "k8s-cluster-from-ground-up" set. User "system:kube-proxy" set. Context "default" created. Switched to context "default".
3. Generating Kube-Controller-Manager kubeconfig
The --server is set to use 127.0.0.1 because this component runs on the API-Server so there is no point routing through the Load Balancer.
Note
set-cluster,set-credentials,set-contexthector@hector-Laptop:~/ca-authority$ { > kubectl config set-cluster ${NAME} \ > --certificate-authority=ca.pem \ > --embed-certs=true \ > --server=https://127.0.0.1:6443 \ > --kubeconfig=kube-controller-manager.kubeconfig > kubectl config set-credentials system:kube-controller-manager \ > --client-certificate=kube-controller-manager.pem \ > --client-key=kube-controller-manager-key.pem \ > --embed-certs=true \ > --kubeconfig=kube-controller-manager.kubeconfig > kubectl config set-context default \ > --cluster=${NAME} \ > --user=system:kube-controller-manager \ > --kubeconfig=kube-controller-manager.kubeconfig > kubectl config use-context default --kubeconfig=kube-controller-manager.kubeconfig > } Cluster "k8s-cluster-from-ground-up" set. User "system:kube-controller-manager" set. Context "default" created. Switched to context "default". hector@hector-Laptop:~/ca-authority$
4. Generating Kube-Scheduler Kubeconfig
Note
set-cluster,set-credentials,set-contexthector@hector-Laptop:~/ca-authority$ { > kubectl config set-cluster ${NAME} \ --certificate-authority=ca.pem \ > --certificate-authority=ca.pem \ > --embed-certs=true \ > --server=https://127.0.0.1:6443 \ > --kubeconfig=kube-scheduler.kubeconfig > kubectl config set-credentials system:kube-scheduler \ > --client-certificate=kube-scheduler.pem \ > --client-key=kube-scheduler-key.pem \ > --embed-certs=true \ > --kubeconfig=kube-scheduler.kubeconfig > kubectl config set-context default \ > --cluster=${NAME} \ > --user=system:kube-scheduler \ > --kubeconfig=kube-scheduler.kubeconfig > kubectl config use-context default --kubeconfig=kube-scheduler.kubeconfig > } Cluster "k8s-cluster-from-ground-up" set. User "system:kube-scheduler" set. Context "default" created. Switched to context "default". hector@hector-Laptop:~/ca-authority$
5. Generating kubeconfig file for the admin user
Note
set-cluster,set-credentials,set-contexthector@hector-Laptop:~/ca-authority$ { > kubectl config set-cluster ${NAME} \ > --certificate-authority=ca.pem \ > --embed-certs=true \ > --server=https://${KUBERNETES_API_SERVER_ADDRESS}:6443 \ > --kubeconfig=admin.kubeconfig > kubectl config set-credentials admin \ > --client-certificate=admin.pem \ > --client-key=admin-key.pem \ > --embed-certs=true \ > --kubeconfig=admin.kubeconfig > kubectl config set-context default \ > --cluster=${NAME} \ > --user=admin \ > --kubeconfig=admin.kubeconfig > kubectl config use-context default --kubeconfig=admin.kubeconfig > } Cluster "k8s-cluster-from-ground-up" set. User "admin" set. Context "default" created. Switched to context "default". hector@hector-Laptop:~/ca-authority$
Distributing the files to their respective servers, using scp and a for loop
Worker
hector@hector-Laptop:~/ca-authority$ for i in 0 1 2; do
>   instance="${NAME}-worker-${i}"
>   external_ip=$(aws ec2 describe-instances \
>     --filters "Name=tag:Name,Values=${instance}" \
>     --output text --query 'Reservations[].Instances[].PublicIpAddress')
>   scp -i ../ssh/${NAME}.id_rsa \
>   ${instance}.kubeconfig kube-proxy.kubeconfig ubuntu@${external_ip}:~/; \
> done
k8s-cluster-from-ground-up-worker-0.kubeconfig                                                              100% 6511   101.2KB/s   00:00
kube-proxy.kubeconfig                                                                                       100% 6342   100.6KB/s   00:00
k8s-cluster-from-ground-up-worker-1.kubeconfig                                                              100% 6507   102.2KB/s   00:00
kube-proxy.kubeconfig                                                                                       100% 6342   103.5KB/s   00:00
k8s-cluster-from-ground-up-worker-2.kubeconfig                                                              100% 6507   105.6KB/s   00:00
kube-proxy.kubeconfig                                                                                       100% 6342    96.1KB/s   00:00
hector@hector-Laptop:~/ca-authority$
Master
hector@hector-Laptop:~/ca-authority$ for i in 0 1 2; do
> instance="${NAME}-master-${i}" \
>   external_ip=$(aws ec2 describe-instances \
>     --filters "Name=tag:Name,Values=${instance}" \
>     --output text --query 'Reservations[].Instances[].PublicIpAddress')
>   scp -i ../ssh/${NAME}.id_rsa \
>   kube-controller-manager.kubeconfig kube-scheduler.kubeconfig ubuntu@${external_ip}:~/;
> done
kube-controller-manager.kubeconfig                                                                          100% 6425   104.3KB/s   00:00
kube-scheduler.kubeconfig                                                                                   100% 6371    89.5KB/s   00:00
kube-controller-manager.kubeconfig                                                                          100% 6425    87.8KB/s   00:00
kube-scheduler.kubeconfig                                                                                   100% 6371    99.5KB/s   00:00
kube-controller-manager.kubeconfig                                                                          100% 6425   102.6KB/s   00:00
kube-scheduler.kubeconfig                                                                                   100% 6371    86.1KB/s   00:00
hector@hector-Laptop:~/ca-authority$
STEP 6 - PREPARE THE ETCD DATABASE FOR ENCRYPTION AT REST
Kubernetes uses etcd (A distributed key value store) to store variety of data which includes the cluster state, application configurations, and secrets. By default, the data that is being persisted to the disk is not encrypted. To mitigate this risk, we must prepare to encrypt etcd at rest.
”At rest” means data that is stored and persists on a disk ”in-flight” or ”in transit” refers to data that is being transferred over the network, this encryption is done through TLS.
Generating the encryption key and encode it using base64
hector@hector-Laptop:~/ca-authority$ ETCD_ENCRYPTION_KEY=$(head -c 64 /dev/urandom | base64)
#See the output generated
hector@hector-Laptop:~/ca-authority$ echo $ETCD_ENCRYPTION_KEY
ibbYlKxF8d9rfVJrNB3qGuSvw8JPtNw1dnEOHpYxSppc2uRz91buFt9iF1VTYgSkXnlW73y9dReR saUXK3gDVw==
hector@hector-Laptop:~/ca-authority$
Creating an encryption-config.yaml file Kubernetes Documentation
hector@hector-Laptop:~/ca-authority$ cat > encryption-config.yaml <<EOF
> kind: EncryptionConfig
> apiVersion: v1
> resources:
>   - resources:
>       - secrets
>     providers:
>       - aescbc:
>           keys:
>             - name: key1
>               secret: ${ETCD_ENCRYPTION_KEY}
>       - identity: {}
> EOF
hector@hector-Laptop:~/ca-authority$ ls | grep encryption
encryption-config.yaml
Looking inside the newly created encryption-config.yaml
hector@hector-Laptop:~/ca-authority$ bat encryption-config.yaml
───────┬──────────────────────────────────────────────────────────────────────────────────────
       │ File: encryption-config.yaml
───────┼──────────────────────────────────────────────────────────────────────────────────────
   1   │ kind: EncryptionConfig
   2   │ apiVersion: v1
   3   │ resources:
   4   │   - resources:
   5   │       - secrets
   6   │     providers:
   7   │       - aescbc:
   8   │           keys:
   9   │             - name: key1
  10   │               secret: ibbYlKxF8d9rfVJrNB3qGuSvw8JPtNw1dnEOHpYxSppc2uRz91buFt9iF1VTYgSkXnlW73y9dReR
  11   │ saUXK3gDVw==
  12   │       - identity: {}
───────┴────────────────────────────────────────────────────────────────────────────────────────
hector@hector-Laptop:~/ca-authority$
Sending the encryption file to the Controller nodes using scp and a for loop.
Master:
hector@hector-Laptop:~/ca-authority$ for i in 0 1 2; do
> instance="${NAME}-master-${i}" \
>   external_ip=$(aws ec2 describe-instances \
>     --filters "Name=tag:Name,Values=${instance}" \
>     --output text --query 'Reservations[].Instances[].PublicIpAddress')
>   scp -i ../ssh/${NAME}.id_rsa \
>   encryption-config.yaml ubuntu@${external_ip}:~/;
> done
encryption-config.yaml                                                                                      100%  285     4.9KB/s   00:00
encryption-config.yaml                                                                                      100%  285     5.7KB/s   00:00
encryption-config.yaml                                                                                      100%  285     5.6KB/s   00:00
hector@hector-Laptop:~/ca-authority$
Bootstrap etcd cluster
The primary purpose of the etcd component is to store the state of the cluster. Kubernetes itself is stateless. Therefore, all its stateful data will persist in etcd. Since Kubernetes is a distributed system – it needs a distributed storage to keep persistent data in it and etcd fits the purpose. All K8s cluster configurations are stored in the form of key value pairs in etcd, it also stores the actual and desired states of the cluster. etcd cluster looks for changes made on one instance and almost instantly replicate those changes to the rest of the instances, so all of them will be always reconciled.
- SSH into the controller server
The key we need k8s-cluster-from-ground-up.id_rsa is in directory ~/.ssh
hector@hector-Laptop:~/ca-authority$ cd ~/.ssh/
hector@hector-Laptop:~/ssh$ pwd
/home/hector/ssh
hector@hector-Laptop:~/ssh$ ls
k8s-cluster-from-ground-up.id_rsa
hector@hector-Laptop:~/ssh$
Master 1 (after I logged in, checked files)
master_1_ip=$(aws ec2 describe-instances \
--filters "Name=tag:Name,Values=${NAME}-master-0" \
--output text --query 'Reservations[].Instances[].PublicIpAddress')
ssh -i k8s-cluster-from-ground-up.id_rsa ubuntu@${master_1_ip}
ubuntu@ip-172-31-0-10:~$ ls -l
total 44
-rw------- 1 ubuntu ubuntu 1679 Jun 9 01:17 ca-key.pem
-rw-rw-r-- 1 ubuntu ubuntu 1342 Jun 9 01:17 ca.pem
-rw-rw-r-- 1 ubuntu ubuntu 285 Jun 15 15:41 encryption-config.yaml
-rw------- 1 ubuntu ubuntu 6425 Jun 15 14:52 kube-controller-manager.kubeconfig
-rw------- 1 ubuntu ubuntu 6371 Jun 15 14:52 kube-scheduler.kubeconfig
-rw------- 1 ubuntu ubuntu 1679 Jun 9 01:17 master-kubernetes-key.pem
-rw-rw-r-- 1 ubuntu ubuntu 1862 Jun 9 01:17 master-kubernetes.pem
-rw------- 1 ubuntu ubuntu 1675 Jun 9 01:17 service-account-key.pem
-rw-rw-r-- 1 ubuntu ubuntu 1432 Jun 9 01:17 service-account.pem
ubuntu@ip-172-31-0-10:~$Master 2
master_2_ip=$(aws ec2 describe-instances \
--filters "Name=tag:Name,Values=${NAME}-master-1" \
--output text --query 'Reservations[].Instances[].PublicIpAddress')
ssh -i k8s-cluster-from-ground-up.id_rsa ubuntu@${master_2_ip}
ubuntu@ip-172-31-0-11:~$ ls -l
total 44
-rw------- 1 ubuntu ubuntu 1679 Jun 9 01:17 ca-key.pem
-rw-rw-r-- 1 ubuntu ubuntu 1342 Jun 9 01:17 ca.pem
-rw-rw-r-- 1 ubuntu ubuntu 285 Jun 15 15:41 encryption-config.yaml
-rw------- 1 ubuntu ubuntu 6425 Jun 15 14:52 kube-controller-manager.kubeconfig
-rw------- 1 ubuntu ubuntu 6371 Jun 15 14:52 kube-scheduler.kubeconfig
-rw------- 1 ubuntu ubuntu 1679 Jun 9 01:17 master-kubernetes-key.pem
-rw-rw-r-- 1 ubuntu ubuntu 1862 Jun 9 01:17 master-kubernetes.pem
-rw------- 1 ubuntu ubuntu 1675 Jun 9 01:17 service-account-key.pem
-rw-rw-r-- 1 ubuntu ubuntu 1432 Jun 9 01:17 service-account.pem
ubuntu@ip-172-31-0-11:~$Master 3
master_3_ip=$(aws ec2 describe-instances \
--filters "Name=tag:Name,Values=${NAME}-master-2" \
--output text --query 'Reservations[].Instances[].PublicIpAddress')
ssh -i k8s-cluster-from-ground-up.id_rsa ubuntu@${master_3_ip}
ubuntu@ip-172-31-0-12:~$ ls -l
total 44
-rw------- 1 ubuntu ubuntu 1679 Jun 9 01:17 ca-key.pem
-rw-rw-r-- 1 ubuntu ubuntu 1342 Jun 9 01:17 ca.pem
-rw-rw-r-- 1 ubuntu ubuntu 285 Jun 15 15:41 encryption-config.yaml
-rw------- 1 ubuntu ubuntu 6425 Jun 15 14:52 kube-controller-manager.kubeconfig
-rw------- 1 ubuntu ubuntu 6371 Jun 15 14:52 kube-scheduler.kubeconfig
-rw------- 1 ubuntu ubuntu 1679 Jun 9 01:17 master-kubernetes-key.pem
-rw-rw-r-- 1 ubuntu ubuntu 1862 Jun 9 01:17 master-kubernetes.pem
-rw------- 1 ubuntu ubuntu 1675 Jun 9 01:17 service-account-key.pem
-rw-rw-r-- 1 ubuntu ubuntu 1432 Jun 9 01:17 service-account.pem
ubuntu@ip-172-31-0-12:~$- Downloading and installing
etcd
ubuntu@ip-172-31-0-10:~$ wget -q --show-progress --https-only --timestamping \
>   " https://github.com/etcd-io/etcd/releases/download/v3.4.15/etcd-v3.4.15-linux-amd64.tar.gz"
etcd-v3.4.15-linux-amd64.tar.gz                  100%[========================================================================================================>]  16.60M   108MB/s    in 0.2s
ubuntu@ip-172-31-0-10:~$- Extracting and installing the
etcdserver and theetcdctlcommand line utility:
Done on all 3 masters
#run
tar -xvf etcd-v3.4.15-linux-amd64.tar.gz && sudo mv etcd-v3.4.15-linux-amd64/etcd* /usr/local/bin/`
ubuntu@ip-172-31-0-10:~/etcd-v3.4.15-linux-amd64$ ls /usr/local/bin/
etcd etcdctl- Configure the
etcdserver
Done on all 3 masters
ubuntu@ip-172-31-0-10:~$ {
>   sudo mkdir -p /etc/etcd /var/lib/etcd
>   sudo chmod 700 /var/lib/etcd
>   sudo cp ca.pem master-kubernetes-key.pem master-kubernetes.pem /etc/etcd/
> }
sudo: unable to resolve host ip-172-31-0-10
sudo: unable to resolve host ip-172-31-0-10
sudo: unable to resolve host ip-172-31-0-10
ubuntu@ip-172-31-0-10:~$ ls /etc/etcd/
ca.pem master-kubernetes-key.pem master-kubernetes.pem- The instance’s internal IP address will be used to serve client requests and communicate with
etcdcluster peers.
Retrieving the internal IP address for the current compute instance:
export INTERNAL_IP=$(curl -s http://169.254.169.254/latest/meta-data/local-ipv4)- Each
etcdmember must have a unique name within anetcdcluster. Set theetcdname to the node Private IP address so it will uniquely identify the machine:
Done on all 3 masters
ubuntu@ip-172-31-0-11:~$ ETCD_NAME=$(curl -s http://169.254.169.254/latest/user-data/ \
>   | tr "|" "\n" | grep "^name" | cut -d"=" -f2)
ubuntu@ip-172-31-0-11:~$ echo ${ETCD_NAME}
master-1
ubuntu@ip-172-31-0-11:~$- Create the
etcd.servicesystemd unit file:
Done on all 3 masters
ubuntu@ip-172-31-0-10:/etc/systemd/system$ ls | grep etcd
etcd.service
ubuntu@ip-172-31-0-10:/etc/systemd/system$ cat etcd.service
[Unit]
Description=etcd
Documentation=https://github.com/coreos
[Service]
Type=notify
ExecStart=/usr/local/bin/etcd \
  --name master-0 \
  --trusted-ca-file=/etc/etcd/ca.pem \
  --peer-trusted-ca-file=/etc/etcd/ca.pem \
  --peer-client-cert-auth \
  --client-cert-auth \
  --listen-peer-urls https://172.31.0.10:2380 \
  --listen-client-urls https://172.31.0.10:2379,https://127.0.0.1:2379 \
  --advertise-client-urls https://172.31.0.10:2379 \
  --initial-cluster-token etcd-cluster-0 \
  --initial-cluster master-0=https://172.31.0.10:2380,master-1=https://172.31.0.11:2380,master-2=https://172.31.0.12:2380 \
  --cert-file=/etc/etcd/master-kubernetes.pem \
  --key-file=/etc/etcd/master-kubernetes-key.pem \
  --peer-cert-file=/etc/etcd/master-kubernetes.pem \
  --peer-key-file=/etc/etcd/master-kubernetes-key.al-advertise-peepem \
  --initir-urls https://0 \
  --initia{INTERNAL_IP}:23l-cluster-state new \
  --data-dir=/var/lib/etcd
Restart=on-failure
RestartSec=5
[Install]
WantedBy=multi-user.target
ubuntu@ip-172-31-0-10:/etc/systemd/system$- Start and enable the
etcdServer
Done on all 3 masters
ubuntu@ip-172-31-0-12:~$ {
> sudo systemctl daemon-reload
> sudo systemctl enable etcd
> sudo systemctl start etcd
> }
sudo: unable to resolve host ip-172-31-0-12
sudo: unable to resolve host ip-172-31-0-12
sudo: unable to resolve host ip-172-31-0-12
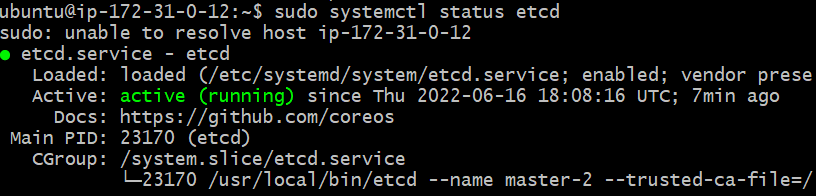
ubuntu@ip-172-31-0-12:~$Now all 3 master have status active
master3 sample
- Verify the
etcdinstallation
Master 1 (master-0)
ubuntu@ip-172-31-0-10:~$ sudo ETCDCTL_API=3 etcdctl member list \
>   --endpoints=https://127.0.0.1:2379 \
>   --cacert=/etc/etcd/ca.pem \
>   --cert=/etc/etcd/master-kubernetes.pem \
>   --key=/etc/etcd/master-kubernetes-key.pem
sudo: unable to resolve host ip-172-31-0-10
6709c481b5234095, started, master-0, https://172.31.0.10:2380, https://172.31.0.10:2379, false
ade74a4f39c39f33, started, master-1, https://172.31.0.11:2380, https://172.31.0.11:2379, false
ed33b44c0b153ee3, started, master-2, https://172.31.0.12:2380, https://172.31.0.12:2379, false
ubuntu@ip-172-31-0-10:~$
Master 2 (master-1)
ubuntu@ip-172-31-0-11:~$ sudo ETCDCTL_API=3 etcdctl member list \
>   --endpoints=https://127.0.0.1:2379 \
>   --cacert=/etc/etcd/ca.pem \
>   --cert=/etc/etcd/master-kubernetes.pem \
>   --key=/etc/etcd/master-kubernetes-key.pem
sudo: unable to resolve host ip-172-31-0-11
6709c481b5234095, started, master-0, https://172.31.0.10:2380, https://172.31.0.10:2379, false
ade74a4f39c39f33, started, master-1, https://172.31.0.11:2380, https://172.31.0.11:2379, false
ed33b44c0b153ee3, started, master-2, https://172.31.0.12:2380, https://172.31.0.12:2379, false
ubuntu@ip-172-31-0-11:~$
Master 3 (master-2)
ubuntu@ip-172-31-0-12:~$ sudo ETCDCTL_API=3 etcdctl member list \
>   --endpoints=https://127.0.0.1:2379 \
>   --cacert=/etc/etcd/ca.pem \
>   --cert=/etc/etcd/master-kubernetes.pem \
>   --key=/etc/etcd/master-kubernetes-key.pem
sudo: unable to resolve host ip-172-31-0-12
6709c481b5234095, started, master-0, https://172.31.0.10:2380, https://172.31.0.10:2379, false
ade74a4f39c39f33, started, master-1, https://172.31.0.11:2380, https://172.31.0.11:2379, false
ed33b44c0b153ee3, started, master-2, https://172.31.0.12:2380, https://172.31.0.12:2379, false
ubuntu@ip-172-31-0-12:~$
STEP 7 - BOOTSTRAP THE CONTROL PLANE
In this section, we will configure the components for the control plane on the master/controller nodes.
-
Creating the Kubernetes configuration directory:
sudo mkdir -p /etc/kubernetes/config -
Downloading the official Kubernetes release binaries:
ubuntu@ip-172-31-0-10:~$ wget -q --show-progress --https-only --timestamping \
> "https://storage.googleapis.com/kubernetes-release/release/v1.21.0/bin/linux/amd64/kube-apiserver" \
> "https://storage.googleapis.com/kubernetes-release/release/v1.21.0/bin/linux/amd64/kube-controller-manager" \
> "https://storage.googleapis.com/kubernetes-release/release/v1.21.0/bin/linux/amd64/kube-scheduler" \
> "https://storage.googleapis.com/kubernetes-release/release/v1.21.0/bin/linux/amd64/kubectl"
kube-apiserver                      100%[==================================================================>] 116.41M  94.1MB/s    in 1.2s
kube-controller-manager             100%[==================================================================>] 110.89M   100MB/s    in 1.1s
kube-scheduler                      100%[==================================================================>]  44.92M  90.3MB/s    in 0.5s
kubectl                             100%[==================================================================>]  44.29M  98.6MB/s    in 0.4s
ubuntu@ip-172-31-0-10:~$- Installing the Kubernetes binaries:
ubuntu@ip-172-31-0-10:~$ {
> chmod +x kube-apiserver kube-controller-manager kube-scheduler kubectl
> sudo mv kube-apiserver kube-controller-manager kube-scheduler kubectl /usr/local/bin/
> }
sudo: unable to resolve host ip-172-31-0-10
ubuntu@ip-172-31-0-10:~$ ls /usr/local/bin/
etcd  etcdctl  kube-apiserver  kube-controller-manager  kubectl  kube-scheduler
ubuntu@ip-172-31-0-10:~$- Configuring the Kubernetes API Server:
ubuntu@ip-172-31-0-10:~$ {
> sudo mkdir -p /var/lib/kubernetes/
>
> sudo mv ca.pem ca-key.pem master-kubernetes-key.pem master-kubernetes.pem \
> service-account-key.pem service-account.pem \
> encryption-config.yaml /var/lib/kubernetes/
> }
sudo: unable to resolve host ip-172-31-0-10
sudo: unable to resolve host ip-172-31-0-10
ubuntu@ip-172-31-0-10:~$ ls /var/lib/kubernetes/
ca-key.pem  ca.pem  encryption-config.yaml  master-kubernetes-key.pem  master-kubernetes.pem  service-account-key.pem  service-account.pem
ubuntu@ip-172-31-0-10:~$
The instance’s internal IP address will be used to advertise the API Server to members of the cluster.
Getting the internal IP to build the file
export INTERNAL_IP=$(curl -s http://169.254.169.254/latest/meta-data/local-ipv4
Creating the kube-apiserver.service systemd unit file:
Documentation kube-apiserver
cat <<EOF | sudo tee /etc/systemd/system/kube-apiserver.service
[Unit]
Description=Kubernetes API Server
Documentation=https://github.com/kubernetes/kubernetes
[Service]
ExecStart=/usr/local/bin/kube-apiserver \\
  --advertise-address=${INTERNAL_IP} \\
  --allow-privileged=true \\
  --apiserver-count=3 \\
  --audit-log-maxage=30 \\
  --audit-log-maxbackup=3 \\
  --audit-log-maxsize=100 \\
  --audit-log-path=/var/log/audit.log \\
  --authorization-mode=Node,RBAC \\
  --bind-address=0.0.0.0 \\
  --client-ca-file=/var/lib/kubernetes/ca.pem \\
  --enable-admission-plugins=NamespaceLifecycle,NodeRestriction,LimitRanger,ServiceAccount,DefaultStorageClass,ResourceQuota \\
  --etcd-cafile=/var/lib/kubernetes/ca.pem \\
  --etcd-certfile=/var/lib/kubernetes/master-kubernetes.pem \\
  --etcd-keyfile=/var/lib/kubernetes/master-kubernetes-key.pem\\
  --etcd-servers=https://172.31.0.10:2379,https://172.31.0.11:2379,https://172.31.0.12:2379 \\
  --event-ttl=1h \\
  --encryption-provider-config=/var/lib/kubernetes/encryption-config.yaml \\
  --kubelet-certificate-authority=/var/lib/kubernetes/ca.pem \\
  --kubelet-client-certificate=/var/lib/kubernetes/master-kubernetes.pem \\
  --kubelet-client-key=/var/lib/kubernetes/master-kubernetes-key.pem \\
  --runtime-config='api/all=true' \\
  --service-account-key-file=/var/lib/kubernetes/service-account.pem \\
  --service-account-signing-key-file=/var/lib/kubernetes/service-account-key.pem \\
  --service-account-issuer=https://${INTERNAL_IP}:6443 \\
  --service-cluster-ip-range=172.32.0.0/24 \\
  --service-node-port-range=30000-32767 \\
  --tls-cert-file=/var/lib/kubernetes/master-kubernetes.pem \\
  --tls-private-key-file=/var/lib/kubernetes/master-kubernetes-key.pem \\
  --v=2
Restart=on-failure
RestartSec=5
[Install]
WantedBy=multi-user.target
EOF- Configuring the Kubernetes Controller Manager:
Moving kube-controller-manager kubeconfig into place:
sudo mv kube-controller-manager.kubeconfig /var/lib/kubernetes/
ubuntu@ip-172-31-0-10:~$ sudo mv kube-controller-manager.kubeconfig /var/lib/kubernetes/
sudo: unable to resolve host ip-172-31-0-10
ubuntu@ip-172-31-0-10:~$ ls /var/lib/kubernetes/
ca-key.pem  encryption-config.yaml              master-kubernetes-key.pem  service-account-key.pem
ca.pem      kube-controller-manager.kubeconfig  master-kubernetes.pem      service-account.pem
ubuntu@ip-172-31-0-10:~$
export some variables to retrieve the vpc_cidr (This will be required for the bind-address flag)
ubuntu@ip-172-31-0-12:~$ export AWS_METADATA="http://169.254.169.254/latest/meta-data"
ubuntu@ip-172-31-0-12:~$ export EC2_MAC_ADDRESS=$(curl -s $AWS_METADATA/network/interfaces/macs/ | head -n1 | tr -d '/')
ubuntu@ip-172-31-0-12:~$ export VPC_CIDR=$(curl -s $AWS_METADATA/network/interfaces/macs/$EC2_MAC_ADDRESS/vpc-ipv4-cidr-block/)
ubuntu@ip-172-31-0-12:~$ export NAME=k8s-cluster-from-ground-up
ubuntu@ip-172-31-0-12:~$ echo $AWS_METADATA
http://169.254.169.254/latest/meta-data
ubuntu@ip-172-31-0-12:~$ echo $EC2_MAC_ADDRESS
06:c9:ba:4b:28:03
ubuntu@ip-172-31-0-12:~$ echo $VPC_CIDR
172.31.0.0/16
ubuntu@ip-172-31-0-12:~$ echo $NAME
k8s-cluster-from-ground-up
ubuntu@ip-172-31-0-12:~$
Creating the kube-controller-manager.service systemd unit file:
cat <<EOF | sudo tee /etc/systemd/system/kube-controller-manager.service
[Unit]
Description=Kubernetes Controller Manager
Documentation=https://github.com/kubernetes/kubernetes
[Service]
ExecStart=/usr/local/bin/kube-controller-manager \\
  --bind-address=0.0.0.0 \\
  --cluster-cidr=${VPC_CIDR} \\
  --cluster-name=${NAME} \\
  --cluster-signing-cert-file=/var/lib/kubernetes/ca.pem \\
  --cluster-signing-key-file=/var/lib/kubernetes/ca-key.pem \\
  --kubeconfig=/var/lib/kubernetes/kube-controller-manager.kubeconfig \\
  --authentication-kubeconfig=/var/lib/kubernetes/kube-controller-manager.kubeconfig \\
  --authorization-kubeconfig=/var/lib/kubernetes/kube-controller-manager.kubeconfig \\
  --leader-elect=true \\
  --root-ca-file=/var/lib/kubernetes/ca.pem \\
  --service-account-private-key-file=/var/lib/kubernetes/service-account-key.pem \\
  --service-cluster-ip-range=172.32.0.0/24 \\
  --use-service-account-credentials=true \\
  --v=2
Restart=on-failure
RestartSec=5
[Install]
WantedBy=multi-user.target
EOF
Checking
ubuntu@ip-172-31-0-10:~$ ls /etc/systemd/system/ | grep kube-controller-manager.service
kube-controller-manager.service
ubuntu@ip-172-31-0-10:~$- Configuring the Kubernetes Scheduler:
Moving the kube-scheduler kubeconfig into place:
ubuntu@ip-172-31-0-10:~$ sudo mv kube-scheduler.kubeconfig /var/lib/kubernetes/
sudo: unable to resolve host ip-172-31-0-10
ubuntu@ip-172-31-0-10:~$ sudo mkdir -p /etc/kubernetes/config
sudo: unable to resolve host ip-172-31-0-10
ubuntu@ip-172-31-0-10:~$ ls /var/lib/kubernetes/ | grep kube-schedul
kube-scheduler.kubeconfig
ubuntu@ip-172-31-0-10:~$ ls /etc/kubernetes/
config
ubuntu@ip-172-31-0-10:~$
Creating the kube-scheduler.yaml configuration file:
ubuntu@ip-172-31-0-10:~$ cat <<EOF | sudo tee /etc/kubernetes/config/kube-scheduler.yaml
> apiVersion: kubescheduler.config.k8s.io/v1beta1
> kind: KubeSchedulerConfiguration
> clientConnection:
>   kubeconfig: "/var/lib/kubernetes/kube-scheduler.kubeconfig"
> leaderElection:
>   leaderElect: true
> EOF
sudo: unable to resolve host ip-172-31-0-10
apiVersion: kubescheduler.config.k8s.io/v1beta1
kind: KubeSchedulerConfiguration
clientConnection:
  kubeconfig: "/var/lib/kubernetes/kube-scheduler.kubeconfig"
leaderElection:
  leaderElect: true
ubuntu@ip-172-31-0-10:~$
Creating the kube-scheduler.service systemd unit file:
ubuntu@ip-172-31-0-10:~$ cat <<EOF | sudo tee /etc/systemd/system/kube-scheduler.service
> [Unit]
> Description=Kubernetes Scheduler
> Documentation=https://github.com/kubernetes/kubernetes
> [Service]
> ExecStart=/usr/local/bin/kube-scheduler \\
>   --config=/etc/kubernetes/config/kube-scheduler.yaml \\
>   --v=2
> Restart=on-failure
> RestartSec=5
> [Install]
> WantedBy=multi-user.target
> EOF
sudo: unable to resolve host ip-172-31-0-10
[Unit]
Description=Kubernetes Scheduler
Documentation=https://github.com/kubernetes/kubernetes
[Service]
ExecStart=/usr/local/bin/kube-scheduler \
  --config=/etc/kubernetes/config/kube-scheduler.yaml \
  --v=2
Restart=on-failure
RestartSec=5
[Install]
WantedBy=multi-user.target
ubuntu@ip-172-31-0-10:~$- Starting the Controller Services
ubuntu@ip-172-31-0-10:~$ {
> sudo systemctl daemon-reload
> sudo systemctl enable kube-apiserver kube-controller-manager kube-scheduler
> sudo systemctl start kube-apiserver kube-controller-manager kube-scheduler
> }
sudo: unable to resolve host ip-172-31-0-10
sudo: unable to resolve host ip-172-31-0-10
Created symlink from /etc/systemd/system/multi-user.target.wants/kube-apiserver.service to /etc/systemd/system/kube-apiserver.service.
Created symlink from /etc/systemd/system/multi-user.target.wants/kube-controller-manager.service to /etc/systemd/system/kube-controller-manager.service.
Created symlink from /etc/systemd/system/multi-user.target.wants/kube-scheduler.service to /etc/systemd/system/kube-scheduler.service.
sudo: unable to resolve host ip-172-31-0-10
ubuntu@ip-172-31-0-10:~$
Checking the status of the services
sudo systemctl status kube-apiserver
sudo systemctl status kube-controller-manager
sudo systemctl status kube-scheduler
STEP 8 - TEST THAT EVERYTHING IS WORKING FINE
- Getting cluster details:
kubectl cluster-info --kubeconfig admin.kubeconfig

(wont use —kubeconfig admin.kubeconfig here on I replaced .kube/config with it making it default)
- Checking the current namespaces:
hector@hector-Laptop:~/ca-authority$ kubectl get namespaces --kubeconfig admin.kubeconfig
NAME              STATUS   AGE
default           Active   24h
kube-node-lease   Active   24h
kube-public       Active   24h
kube-system       Active   24h
hector@hector-Laptop:~/ca-authority$- To reach the Kubernetes API Server publicly
curl --cacert /var/lib/kubernetes/ca.pem https://$INTERNAL_IP:6443/version
#Master IPs
ubuntu@ip-172-31-0-10:~$ curl --cacert /var/lib/kubernetes/ca.pem  https://172.31.0.10:6443/version
{
  "major": "1",
  "minor": "21",
  "gitVersion": "v1.21.0",
  "gitCommit": "cb303e613a121a29364f75cc67d3d580833a7479",
  "gitTreeState": "clean",
  "buildDate": "2021-04-08T16:25:06Z",
  "goVersion": "go1.16.1",
  "compiler": "gc",
  "platform": "linux/amd64"
}ubuntu@ip-172-31-0-10:~$ curl --cacert /var/lib/kubernetes/ca.pem  https://172.31.0.11:6443/version
{
  "major": "1",
  "minor": "21",
  "gitVersion": "v1.21.0",
  "gitCommit": "cb303e613a121a29364f75cc67d3d580833a7479",
  "gitTreeState": "clean",
  "buildDate": "2021-04-08T16:25:06Z",
  "goVersion": "go1.16.1",
  "compiler": "gc",
  "platform": "linux/amd64"
}ubuntu@ip-172-31-0-10:~$ curl --cacert /var/lib/kubernetes/ca.pem  https://172.31.0.12:6443/version
{
  "major": "1",
  "minor": "21",
  "gitVersion": "v1.21.0",
  "gitCommit": "cb303e613a121a29364f75cc67d3d580833a7479",
  "gitTreeState": "clean",
  "buildDate": "2021-04-08T16:25:06Z",
  "goVersion": "go1.16.1",
  "compiler": "gc",
  "platform": "linux/amd64"
}ubuntu@ip-172-31-0-10:~$- Getting the status of each component:
kubectl get componentstatuses --kubeconfig admin.kubeconfig
I had to transfer the file admin.kueconfig to the master before running this command
#Putting Public IPs into variables
publicIP="ec2-54-160-126-224.compute-1.amazonaws.com"
publicIP="ec2-54-160-126-195.compute-1.amazonaws.com"
publicIP="ec2-54-237-217-61.compute-1.amazonaws.com"
#Using variable to connect
scp -i "k8s-cluster-from-ground-up.id_rsa" admin.kubeconfig ubuntu@$publicIP:~/
ubuntu@ip-172-31-0-10:~$ kubectl get componentstatuses --kubeconfig admin.kubeconfig
Warning: v1 ComponentStatus is deprecated in v1.19+
NAME STATUS MESSAGE ERROR
etcd-0 Healthy {"health":"true"}
scheduler Healthy ok
controller-manager Healthy ok
etcd-2 Healthy {"health":"true"}
etcd-1 Healthy {"health":"true"}
ubuntu@ip-172-31-0-10:~$
ubuntu@ip-172-31-0-11:~$ kubectl get componentstatuses --kubeconfig admin.kubeconfig
Warning: v1 ComponentStatus is deprecated in v1.19+
NAME STATUS MESSAGE ERROR
controller-manager Healthy ok
scheduler Healthy ok
etcd-2 Healthy {"health":"true"}
etcd-1 Healthy {"health":"true"}
etcd-0 Healthy {"health":"true"}
ubuntu@ip-172-31-0-11:~$
ubuntu@ip-172-31-0-12:~$ kubectl get componentstatuses --kubeconfig admin.kubeconfig
Warning: v1 ComponentStatus is deprecated in v1.19+
NAME STATUS MESSAGE ERROR
scheduler Healthy ok
controller-manager Healthy ok
etcd-2 Healthy {"health":"true"}
etcd-1 Healthy {"health":"true"}
etcd-0 Healthy {"health":"true"}
ubuntu@ip-172-31-0-12:~$- Configuring Role Based Access Control (RBAC) on one of the controller nodes so that the
api-serverhas necessary authorization for thekubelet.
Creating the ClusterRole:
ubuntu@ip-172-31-0-10:~$ cat <<EOF | kubectl apply --kubeconfig admin.kubeconfig -f -
> apiVersion: rbac.authorization.k8s.io/v1
> kind: ClusterRole
> metadata:
>   annotations:
>     rbac.authorization.kubernetes.io/autoupdate: "true"
>   labels:
>     kubernetes.io/bootstrapping: rbac-defaults
>   name: system:kube-apiserver-to-kubelet
> rules:
>   - apiGroups:
>       - ""
>     resources:
>       - nodes/proxy
>       - nodes/stats
>       - nodes/log
>       - nodes/spec
>       - nodes/metrics
>     verbs:
>       - "*"
> EOF
clusterrole.rbac.authorization.k8s.io/system:kube-apiserver-to-kubelet created
ubuntu@ip-172-31-0-10:
Example done on master0
ubuntu@ip-172-31-0-10:~$ cat <<EOF | kubectl --kubeconfig admin.kubeconfig  apply -f -
> apiVersion: rbac.authorization.k8s.io/v1
> kind: ClusterRoleBinding
> metadata:
>   name: system:kube-apiserver
>   namespace: ""
> roleRef:
>   apiGroup: rbac.authorization.k8s.io
>   kind: ClusterRole
>   name: system:kube-apiserver-to-kubelet
> subjects:
>   - apiGroup: rbac.authorization.k8s.io
>     kind: User
>     name: kubernetes
> EOF
clusterrolebinding.rbac.authorization.k8s.io/system:kube-apiserver created
ubuntu@ip-172-31-0-10:
STEP 9 - CONFIGURING THE KUBERNETES WORKER NODES
Done in all 3 masters
Important to understand: that the K8s API Server authenticates to the kubelet as the kubernetes user using the same kubernetes.pem certificate. We need to configure Role Based Access (RBAC) for Kubelet Authorization:
- Configuring RBAC permissions to allow the Kubernetes API Server to access the Kubelet API on each worker node. Access to the Kubelet API is required for retrieving metrics, logs, and executing commands in pods.
ubuntu@ip-172-31-0-10:~$ cat <<EOF | kubectl apply --kubeconfig admin.kubeconfig -f -
> apiVersion: rbac.authorization.k8s.io/v1
> kind: ClusterRole
> metadata:
>   annotations:
>     rbac.authorization.kubernetes.io/autoupdate: "true"
>   labels:
>     kubernetes.io/bootstrapping: rbac-defaults
>   name: system:kube-apiserver-to-kubelet
> rules:
>   - apiGroups:
>       - ""
>     resources:
>       - nodes/proxy
>       - nodes/stats
>       - nodes/log
>       - nodes/spec
>       - nodes/metrics
>     verbs:
>       - "*"
> EOF
clusterrole.rbac.authorization.k8s.io/system:kube-apiserver-to-kubelet unchanged
ubuntu@ip-172-31-0-10:~$ ls | grep admin
admin.kubeconfig- Binding the
system:kube-apiserver-to-kubeletClusterRole to the kubernetes user so that API server can authenticate successfully to thekubeletson the worker nodes:
ubuntu@ip-172-31-0-10:~$ cat <<EOF | kubectl apply --kubeconfig admin.kubeconfig -f -
> apiVersion: rbac.authorization.k8s.io/v1
> kind: ClusterRoleBinding
> metadata:
>   name: system:kube-apiserver
>   namespace: ""
> roleRef:
>   apiGroup: rbac.authorization.k8s.io
>   kind: ClusterRole
>   name: system:kube-apiserver-to-kubelet
> subjects:
>   - apiGroup: rbac.authorization.k8s.io
>     kind: User
>     name: kubernetes
> EOF
clusterrolebinding.rbac.authorization.k8s.io/system:kube-apiserver unchanged
ubuntu@ip-172-31-0-10:
Bootstraping components on the worker nodes
The following components will be installed on each node:
kubelet
kube-proxy
Containerd (or Docker)
Networking plugins
- SSHing into the worker nodes using:
Worker-1
worker_1_ip=$(aws ec2 describe-instances \
--filters "Name=tag:Name,Values=${NAME}-worker-0" \
--output text --query 'Reservations[].Instances[].PublicIpAddress')
ssh -i k8s-cluster-from-ground-up.id_rsa ubuntu@${worker_1_ip}
Worker-2
worker_2_ip=$(aws ec2 describe-instances \
--filters "Name=tag:Name,Values=${NAME}-worker-1" \
--output text --query 'Reservations[].Instances[].PublicIpAddress')
ssh -i k8s-cluster-from-ground-up.id_rsa ubuntu@${worker_2_ip}
Worker-3
worker_3_ip=$(aws ec2 describe-instances \
--filters "Name=tag:Name,Values=${NAME}-worker-2" \
--output text --query 'Reservations[].Instances[].PublicIpAddress')
ssh -i k8s-cluster-from-ground-up.id_rsa ubuntu@${worker_3_ip}- Installing OS dependencies: (all 3 workers)
{
  sudo apt-get update
  sudo apt-get -y install socat conntrack ipset
}
Information about the dependencies:
-
Socatis the default implementation for Kubernetes port-forwarding when using dockershim for the kubelet runtime. Will implement Port-forwarding with Kubernetes in the next project. -
Dockershimwas a temporary solution proposed by the Kubernetes community to add support for Docker so that it could serve as its container runtime. You should always remember that Kubernetes can use different container runtime to run containers inside its pods. For many years, Docker has been adopted widely and has been used as the container runtime for kubernetes. Hence the implementation that allowed docker is called the Dockershim. If you check the source code of Dockershim, you will see that socat was used to implement the port-forwarding functionality. -
conntrackConnection tracking (“conntrack”) is a core feature of the Linux kernel’s networking stack. It allows the kernel to keep track of all logical network connections or flows, and thereby identify all of the packets which make up each flow so they can be handled consistently together. It is essential for performant complex networking of Kubernetes where nodes need to track connection information between thousands of pods and services. -
ipsetis an extension to iptables which is used to configure firewall rules on a Linux server. ipset is a module extension to iptables that allows firewall configuration on a “set” of IP addresses. Compared with how iptables does the configuration linearly, ipset is able to store sets of addresses and index the data structure, making lookups very efficient, even when dealing with large sets. Kubernetes uses ipsets to implement a distributed firewall solution that enforces network policies within the cluster. This can then help to further restrict communications across pods or namespaces. For example, if a namespace is configured with DefaultDeny isolation type (Meaning no connection is allowed to the namespace from another namespace), network policies can be configured in the namespace to whitelist the traffic to the pods in that namespace.
STEP 10 - QUICK OVERVIEW OF KUBERNETES NETWORK POLICY AND HOW IT IS IMPLEMENTED
Quick Overview Of Kubernetes Network Policy And How It Is Implemented
Kubernetes network policies are application centric compared to infrastructure/network centric standard firewalls. There are no explicit CIDR or IP used for matching source or destination IP’s. Network policies build up on labels and selectors which are key concepts of Kubernetes that are used for proper organization (for e.g dedicating a namespace to data layer and controlling which app is able to connect there).
Example of a typical network policy that controls who can connect to the database namespace:
apiVersion: extensions/v1beta1
kind: NetworkPolicy
metadata:
  name: database-network-policy
  namespace: tooling-db
spec:
  podSelector:
    matchLabels:
      app: mysql
  ingress:
   - from:
     - namespaceSelector:
       matchLabels:
         app: tooling
     - podSelector:
       matchLabels:
       role: frontend
   ports:
     - protocol: tcp
port: 3306NOTE: Best practice is to use solutions like RDS for database implementation. So the above is just to help understand the concept.
Doing in all 3 Workers
- Disabling Swap If swap is not disabled, kubelet will not start. It is highly recommended to allow Kubernetes to handle resource allocation.
Test if swap is already enabled on the host:
sudo swapon --show
If there is no output, then you are good to go. Otherwise, run below command to turn it off
sudo swapoff -a
- Download and install a container runtime
Containerd
Download binaries forrunc,cri-ctl, andcontainerd
 wget https://github.com/opencontainers/runc/releases/download/v1.0.0-rc93/runc.amd64 \
  https://github.com/kubernetes-sigs/cri-tools/releases/download/v1.21.0/crictl-v1.21.0-linux-amd64.tar.gz \
  https://github.com/containerd/containerd/releases/download/v1.4.4/containerd-1.4.4-linux-amd64.tar.gz
We confirm all the files we just downloaded
ubuntu@ip-172-31-0-20:~$ ls -ls
total 63076
    4 -rw-rw-r-- 1 ubuntu ubuntu     1342 Jun  9 01:15 ca.pem
30472 -rw-rw-r-- 1 ubuntu ubuntu 31201022 Dec  8  2021 containerd-1.4.4-linux-amd64.tar.gz
18168 -rw-rw-r-- 1 ubuntu ubuntu 18600662 Dec  8  2021 crictl-v1.21.0-linux-amd64.tar.gz
    4 -rw------- 1 ubuntu ubuntu     1679 Jun  9 01:15 k8s-cluster-from-ground-up-worker-0-key.pem
    8 -rw------- 1 ubuntu ubuntu     6511 Jun 15 14:49 k8s-cluster-from-ground-up-worker-0.kubeconfig
    4 -rw-rw-r-- 1 ubuntu ubuntu     1505 Jun  9 01:15 k8s-cluster-from-ground-up-worker-0.pem
    8 -rw------- 1 ubuntu ubuntu     6342 Jun 15 14:49 kube-proxy.kubeconfig
14408 -rw-rw-r-- 1 ubuntu ubuntu 14753696 Dec  7  2021 runc.amd64
ubuntu@ip-172-31-0-20:~$
Configure containerd:
ubuntu@ip-172-31-0-20:~$ {
>   mkdir containerd
>   tar -xvf crictl-v1.21.0-linux-amd64.tar.gz
>   tar -xvf containerd-1.4.4-linux-amd64.tar.gz -C containerd
>   sudo mv runc.amd64 runc
>   chmod +x  crictl runc
>   sudo mv crictl runc /usr/local/bin/
>   sudo mv containerd/bin/* /bin/
> }
crictl
bin/
bin/containerd
bin/containerd-shim
bin/containerd-shim-runc-v2
bin/containerd-shim-runc-v1
bin/ctr
sudo: unable to resolve host ip-172-31-0-20
sudo: unable to resolve host ip-172-31-0-20
sudo: unable to resolve host ip-172-31-0-20
ubuntu@ip-172-31-0-20:~$fd
ubuntu@ip-172-31-0-20:~$ sudo mkdir -p /etc/containerd/
ubuntu@ip-172-31-0-20:~$ cat << EOF | sudo tee /etc/containerd/config.toml
> [plugins]
> [plugins.cri.containerd]
> snapshotter = "overlayfs"
> [plugins.cri.containerd.default_runtime]
> runtime_type = "io.containerd.runtime.v1.linux"
> runtime_engine = "/usr/local/bin/runc"
> runtime_root = ""
> EOF
sudo: unable to resolve host ip-172-31-0-20
[plugins]
[plugins.cri.containerd]
snapshotter = "overlayfs"
[plugins.cri.containerd.default_runtime]
runtime_type = "io.containerd.runtime.v1.linux"
runtime_engine = "/usr/local/bin/runc"
runtime_root = ""Checking config.toml content
ubuntu@ip-172-31-0-20:~$ cat /etc/containerd/config.toml
[plugins]
  [plugins.cri.containerd]
    snapshotter = "overlayfs"
    [plugins.cri.containerd.default_runtime]
      runtime_type = "io.containerd.runtime.v1.linux"
      runtime_engine = "/usr/local/bin/runc"
      runtime_root = ""
ubuntu@ip-172-31-0-20:~$$
Create the containerd.service systemd unit file:
ubuntu@ip-172-31-0-20:~$ cat <<EOF | sudo tee /etc/systemd/system/containerd.service
> [Unit]
> Description=containerd container runtime
> Documentation=https://containerd.io
> After=network.target
> [Service]
> ExecStartPre=/sbin/modprobe overlay
> ExecStart=/bin/containerd
> Restart=always
> RestartSec=5
> Delegate=yes
> KillMode=process
> OOMScoreAdjust=-999
> LimitNOFILE=1048576
> LimitNPROC=infinity
> LimitCORE=infinity
> [Install]
> WantedBy=multi-user.target
> EOF
sudo: unable to resolve host ip-172-31-0-20
[Unit]
Description=containerd container runtime
Documentation=https://containerd.io
After=network.target
[Service]
ExecStartPre=/sbin/modprobe overlay
ExecStart=/bin/containerd
Restart=always
RestartSec=5
Delegate=yes
KillMode=process
OOMScoreAdjust=-999
LimitNOFILE=1048576
LimitNPROC=infinity
LimitCORE=infinity
[Install]
WantedBy=multi-user.target
Confirming containerd.service creation/content
ubuntu@ip-172-31-0-20:~$ cat /etc/systemd/system/containerd.service
[Unit]
Description=containerd container runtime
Documentation=https://containerd.io
After=network.target
[Service]
ExecStartPre=/sbin/modprobe overlay
ExecStart=/bin/containerd
Restart=always
RestartSec=5
Delegate=yes
KillMode=process
OOMScoreAdjust=-999
LimitNOFILE=1048576
LimitNPROC=infinity
LimitCORE=infinity
[Install]
WantedBy=multi-user.target
ubuntu@ip-172-31-0-20:~$- Create directories for to configure
kubelet,kube-proxy,cni, and a directory to keep thekubernetes root cafile:
sudo mkdir -p \
  /var/lib/kubelet \
  /var/lib/kube-proxy \
  /etc/cni/net.d \
  /opt/cni/bin \
  /var/lib/kubernetes \
/var/run/kubernetes- Download and Install CNI
CNI (Container Network Interface), a Cloud Native Computing Foundation project, consists of a specification and libraries for writing plugins to configure network interfaces in Linux containers. It also comes with a number of plugins.
Kubernetes uses CNI as an interface between network providers and Kubernetes Pod networking. Network providers create network plugin that can be used to implement the Kubernetes networking, and includes additional set of rich features that Kubernetes does not provide out of the box.
Downloading the plugins
ubuntu@ip-172-31-0-20:~$ wget -q --show-progress --https-only --timestamping \
>   https://github.com/containernetworking/plugins/releases/download/v0.9.1/cni-plugins-linux-amd64-v0.9.1.tgz
cni-plugins-linux-amd64-v0.9.1.tgz 100%[===============================================================>]  37.93M   110MB/s    in 0.3s
Install CNI into /opt/cni/bin/
ubuntu@ip-172-31-0-20:~$ sudo tar -xvf cni-plugins-linux-amd64-v0.9.1.tgz -C /opt/cni/bin/
sudo: unable to resolve host ip-172-31-0-20
#The output shows the plugins that comes with the CNI.
./
./macvlan
./flannel
./static
./vlan
./portmap
./host-local
./vrf
./bridge
./tuning
./firewall
./host-device
./sbr
./loopback
./dhcp
./ptp
./ipvlan
./bandwidth
ubuntu@ip-172-31-0-20:~$
Other plugins that are not included in the CNI, which are also widely used in the industry. They all have their unique implementation approach and set of features.
- Download binaries for
kubectl,kube-proxy, andkubelet
ubuntu@ip-172-31-0-20:~$ wget -q --show-progress --https-only --timestamping \
>   https://storage.googleapis.com/kubernetes-release/release/v1.21.0/bin/linux/amd64/kubectl \
>   https://storage.googleapis.com/kubernetes-release/release/v1.21.0/bin/linux/amd64/kube-proxy \
>   https://storage.googleapis.com/kubernetes-release/release/v1.21.0/bin/linux/amd64/kubelet
kubectl                            100%[===============================================================>]  44.29M   109MB/s    in 0.4s
kube-proxy                         100%[===============================================================>]  41.13M   102MB/s    in 0.4s
kubelet                            100%[===============================================================>] 112.59M   108MB/s    in 1.0s
ubuntu@ip-172-31-0-20:~$- Install the downloaded binaries
ubuntu@ip-172-31-0-20:~$ {
>   chmod +x  kubectl kube-proxy kubelet
>   sudo mv  kubectl kube-proxy kubelet /usr/local/bin/
> }
sudo: unable to resolve host ip-172-31-0-20
ubuntu@ip-172-31-0-20:~$
STEP 11 - CONFIGURE THE WORKER NODES COMPONENTS
Configuring the network
Get the POD_CIDR that will be used as part of network configuration
ubuntu@ip-172-31-0-20:~$ POD_CIDR=$(curl -s http://169.254.169.254/latest/user-data/ \
>   | tr "|" "\n" | grep "^pod-cidr" | cut -d"=" -f2)
ubuntu@ip-172-31-0-20:~$ echo "${POD_CIDR}"
172.20.0.0/24

ubuntu@ip-172-31-0-21:~$ POD_CIDR=$(curl -s http://169.254.169.254/latest/user-data/ \
>   | tr "|" "\n" | grep "^pod-cidr" | cut -d"=" -f2)
ubuntu@ip-172-31-0-21:~$ echo "${POD_CIDR}"
172.20.1.0/24

ubuntu@ip-172-31-0-22:~$ POD_CIDR=$(curl -s http://169.254.169.254/latest/user-data/ \
>   | tr "|" "\n" | grep "^pod-cidr" | cut -d"=" -f2)
ubuntu@ip-172-31-0-22:~$ echo "${POD_CIDR}"
172.20.2.0/24
ubuntu@ip-172-31-0-22:~$
POD_CIDR was configured at the time of creating the worker nodes in:
STEP 2 - CREATE COMPUTE RESOURCES - 4.Creating 3 worker nodes (EC2 Instances)
--user-data "name=worker-${i}|pod-cidr=172.20.${i}.0/24" \The --user-data flag is where we specified what we want the POD_CIDR to be. It is very important to ensure that the CIDR does not overlap with EC2 IPs within the subnet.
Understanding the Kubernetes networking model:
The networking model assumes a flat network, in which containers and nodes can communicate with each other. That means, regardless of which node is running the container in the cluster, Kubernetes expects that all the containers must be able to communicate with each other. Therefore, any network interface used for a Kubernetes implementation must follow this requirement. Otherwise, containers running in pods will not be able to communicate. Of course, this has security concerns. Because if an attacker is able to get into the cluster through a compromised container, then the entire cluster can be exploited.
To mitigate security risks and have a better controlled network topology, Kubernetes uses CNI(Container Network Interface) to manage Network Policies which can be used to operate the Pod network through external plugins such as Calico, Flannel or Weave Net to name a few. With these, you can set policies similar to how you would configure segurity groups in AWS and limit network communications through either cidr ipBlock, namespaceSelectors, or podSelectors.
Basic concepts around Kubernetes networking:
Pods:
A Pod is the basic building block of Kubernetes; it is the smallest and simplest unit in the Kubernetes object model that you create or deploy. A Pod represents a running process on your cluster.
It encapsulates a container running an application (or, in some cases, multiple containers), storage resources, a unique network IP, and options that govern how the container(s) should run. All the containers running inside a Pod can reach each other on localhost.
In most cases one Pod contains just one container, but there are some design patterns that imply multi-container pods (e.g. sidecar, ambassador, adapter)
Multi-Container Pod article
Pod Network:
You must decide on the Pod CIDR per worker node. Each worker node will run multiple pods, and each pod will have its own IP address. IP address of a particular Pod on worker node 1 should be able to communicate with the IP address of another particular Pod on worker node 2. For this to become possible, there must be a bridge network with virtual network interfaces that connects them all together.
Additional read that goes a little deeper
- Configure the bridge and loopback networks
ubuntu@ip-172-31-0-20:~$ cat > 172-20-bridge.conf <<EOF
> {
>     "cniVersion": "0.3.1",
>     "name": "bridge",
>     "type": "bridge",
>     "bridge": "cnio0",
>     "isGateway": true,
>     "ipMasq": true,
>     "ipam": {
>         "type": "host-local",
>         "ranges": [
>           [{"subnet": "${POD_CIDR}"}]
>         ],
>         "routes": [{"dst": "0.0.0.0/0"}]
>     }
> }
> EOF
ubuntu@ip-172-31-0-20:~$ ls | grep bridge
172-20-bridge.conf
ubuntu@ip-172-31-0-20:~$ cat > 99-loopback.conf <<EOF
> {
> "cniVersion": "0.3.1",
> "type": "loopback"
> }
> EOF
ubuntu@ip-172-31-0-20:~$ ls | grep loop
99-loopback.conf
ubuntu@ip-172-31-0-20:~$- Move the files to the network configuration directory:
ubuntu@ip-172-31-0-20:~$ sudo mv 172-20-bridge.conf 99-loopback.conf /etc/cni/net.d/
sudo: unable to resolve host ip-172-31-0-20
ubuntu@ip-172-31-0-20:~$ ls /etc/cni/net.d/
172-20-bridge.conf  99-loopback.conf
ubuntu@ip-172-31-0-20:~$- Store the worker’s name in a variable: (sample done worker 0)
ubuntu@ip-172-31-0-20:~$ NAME=k8s-cluster-from-ground-up
ubuntu@ip-172-31-0-20:~$ WORKER_NAME=${NAME}-$(curl -s http://169.254.169.254/latest/user-data/ \
>   | tr "|" "\n" | grep "^name" | cut -d"=" -f2)
ubuntu@ip-172-31-0-20:~$ echo "${WORKER_NAME}"
k8s-cluster-from-ground-up-worker-0
ubuntu@ip-172-31-0-20:~$- Move the certificates and
kubeconfigfile to their respective configuration directories:
ubuntu@ip-172-31-0-20:~$ ls -l
total 87512
-rw-rw-r-- 1 ubuntu ubuntu     1342 Jun  9 01:15 ca.pem
-rw-rw-r-- 1 ubuntu ubuntu 39771622 Dec  8  2021 cni-plugins-linux-amd64-v0.9.1.tgz
drwxrwxr-x 3 ubuntu ubuntu     4096 Aug  7 14:06 containerd
-rw-rw-r-- 1 ubuntu ubuntu 31201022 Dec  8  2021 containerd-1.4.4-linux-amd64.tar.gz
-rw-rw-r-- 1 ubuntu ubuntu 18600662 Dec  8  2021 crictl-v1.21.0-linux-amd64.tar.gz
-rw------- 1 ubuntu ubuntu     1679 Jun  9 01:15 k8s-cluster-from-ground-up-worker-0-key.pem
-rw------- 1 ubuntu ubuntu     6511 Jun 15 14:49 k8s-cluster-from-ground-up-worker-0.kubeconfig
-rw-rw-r-- 1 ubuntu ubuntu     1505 Jun  9 01:15 k8s-cluster-from-ground-up-worker-0.pem
-rw------- 1 ubuntu ubuntu     6342 Jun 15 14:49 kube-proxy.kubeconfig
ubuntu@ip-172-31-0-20:~$ sudo mv ${WORKER_NAME}-key.pem ${WORKER_NAME}.pem /var/lib/kubelet/
sudo: unable to resolve host ip-172-31-0-20
ubuntu@ip-172-31-0-20:~$ sudo mv ${WORKER_NAME}.kubeconfig /var/lib/kubelet/kubeconfig
sudo: unable to resolve host ip-172-31-0-20
ubuntu@ip-172-31-0-20:~$ sudo mv kube-proxy.kubeconfig /var/lib/kube-proxy/kubeconfig
sudo: unable to resolve host ip-172-31-0-20
ubuntu@ip-172-31-0-20:~$ sudo mv ca.pem /var/lib/kubernetes/
sudo: unable to resolve host ip-172-31-0-20
ubuntu@ip-172-31-0-20:~$ ls -l
total 87484
-rw-rw-r-- 1 ubuntu ubuntu 39771622 Dec  8  2021 cni-plugins-linux-amd64-v0.9.1.tgz
drwxrwxr-x 3 ubuntu ubuntu     4096 Aug  7 14:06 containerd
-rw-rw-r-- 1 ubuntu ubuntu 31201022 Dec  8  2021 containerd-1.4.4-linux-amd64.tar.gz
-rw-rw-r-- 1 ubuntu ubuntu 18600662 Dec  8  2021 crictl-v1.21.0-linux-amd64.tar.gz
ubuntu@ip-172-31-0-20:~$- Create the
kubelet-config.yamlfile (example worker0)
ubuntu@ip-172-31-0-20:~$ NAME=k8s-cluster-from-ground-up
ubuntu@ip-172-31-0-20:~$ WORKER_NAME=${NAME}-$(curl -s http://169.254.169.254/latest/user-data/ \
>   | tr "|" "\n" | grep "^name" | cut -d"=" -f2)
apiVersion: kubelet.config.k8s.io/v1beta1
authentication:
  anonymous:
    enabled: false
  webhook:
    enabled: true
  x509:
    clientCAFile: "/var/lib/kubernetes/ca.pem"
authorization:
  mode: Webhook
clusterDomain: "cluster.local"
clusterDNS:
  - "10.32.0.10"
resolvConf: "/etc/resolv.conf"
runtimeRequestTimeout: "15m"
tlsCertFile: "/var/lib/kubelet/${WORKER_NAME}.pem"
ubuntu@ip-172-31-0-20:~$ echo "${WORKER_NAME}"
k8s-cluster-from-ground-up-worker-0
ubuntu@ip-172-31-0-20:~$ cat <<EOF | sudo tee /var/lib/kubelet/kubelet-config.yaml
> kind: KubeletConfiguration
> apiVersion: kubelet.config.k8s.io/v1beta1
> authentication:
> anonymous:
> enabled: false
> webhook:
> enabled: true
> x509:
> clientCAFile: "/var/lib/kubernetes/ca.pem"
> authorization:
> mode: Webhook
> clusterDomain: "cluster.local"
> clusterDNS:
> - "10.32.0.10"
> resolvConf: "/etc/resolv.conf"
> runtimeRequestTimeout: "15m"
> tlsCertFile: "/var/lib/kubelet/${WORKER_NAME}.pem"
> tlsPrivateKeyFile: "/var/lib/kubelet/${WORKER_NAME}-key.pem"
> EOF
sudo: unable to resolve host ip-172-31-0-20
kind: KubeletConfiguration
apiVersion: kubelet.config.k8s.io/v1beta1
authentication:
anonymous:
enabled: false
webhook:
enabled: true
x509:
clientCAFile: "/var/lib/kubernetes/ca.pem"
authorization:
mode: Webhook
clusterDomain: "cluster.local"
clusterDNS:
- "10.32.0.10"
resolvConf: "/etc/resolv.conf"
runtimeRequestTimeout: "15m"
tlsCertFile: "/var/lib/kubelet/k8s-cluster-from-ground-up-worker-0.pem"
tlsPrivateKeyFile: "/var/lib/kubelet/k8s-cluster-from-ground-up-worker-0-key.pem"
ubuntu@ip-172-31-0-20:~$FINAL STEPS
Rather than using multiple startup flags in systemd it is recommended to create the kubelet-config.yaml and set the configuration there. We will simply point to the yaml file.
The config file specifies where to find certificates, the DNS server, and authentication information. As you already know, kubelet is responsible for the containers running on the node, regardless if the runtime is Docker or Containerd; as long as the containers are being created through Kubernetes, kubelet manages them. Kubernetes is not aware of it of container created from containerd/docker, therefore kubelet will not manage those. Kubelet’s major responsibility is to always watch the containers in its care, by default every 20 seconds, and ensuring that they are always running. Think of it as a process watcher.
The clusterDNS is the address of the DNS server. As of Kubernetes v1.12, CoreDNS is the recommended DNS Server
In Kubernetes, Pods are able to find each other using service names through the internal DNS server. Every time a service is created, it gets registered in the DNS server.
In Kubernetes, the kubelet process on a worker node configures each pod. Part of the configuration process is to create the file /etc/resolv.conf and specify the correct DNS server.
- Configure the
kubeletsystemd service
ubuntu@ip-172-31-0-20:~$ cat <<EOF | sudo tee /etc/systemd/system/kubelet.service
> [Unit]
> Description=Kubernetes Kubelet
> Documentation=https://github.com/kubernetes/kubernetes
> After=containerd.service
> Requires=containerd.service
> [Service]
> ExecStart=/usr/local/bin/kubelet \\
>   --config=/var/lib/kubelet/kubelet-config.yaml \\
>   --cluster-domain=cluster.local \\
>   --container-runtime=remote \\
>   --container-runtime-endpoint=unix:///var/run/containerd/containerd.sock \\
>   --image-pull-progress-deadline=2m \\
>   --kubeconfig=/var/lib/kubelet/kubeconfig \\
>   --network-plugin=cni \\
>   --register-node=true \\
>   --v=2
> Restart=on-failure
> RestartSec=5
> [Install]
> WantedBy=multi-user.target
> EOF
sudo: unable to resolve host ip-172-31-0-20
[Unit]
Description=Kubernetes Kubelet
Documentation=https://github.com/kubernetes/kubernetes
After=containerd.service
Requires=containerd.service
[Service]
ExecStart=/usr/local/bin/kubelet \
  --config=/var/lib/kubelet/kubelet-config.yaml \
  --cluster-domain=cluster.local \
  --container-runtime=remote \
  --container-runtime-endpoint=unix:///var/run/containerd/containerd.sock \
  --image-pull-progress-deadline=2m \
  --kubeconfig=/var/lib/kubelet/kubeconfig \
  --network-plugin=cni \
  --register-node=true \
  --v=2
Restart=on-failure
RestartSec=5
[Install]
WantedBy=multi-user.target
ubuntu@ip-172-31-0-20:~$- Create the
kube-proxy.yamlfile
ubuntu@ip-172-31-0-20:~$ cat <<EOF | sudo tee /var/lib/kube-proxy/kube-proxy-config.yaml
> kind: KubeProxyConfiguration
> apiVersion: kubeproxy.config.k8s.io/v1alpha1
> clientConnection:
>   kubeconfig: "/var/lib/kube-proxy/kubeconfig"
> mode: "iptables"
> clusterCIDR: "172.31.0.0/16"
> EOF
sudo: unable to resolve host ip-172-31-0-20
kind: KubeProxyConfiguration
apiVersion: kubeproxy.config.k8s.io/v1alpha1
clientConnection:
  kubeconfig: "/var/lib/kube-proxy/kubeconfig"
mode: "iptables"
clusterCIDR: "172.31.0.0/16"
ubuntu@ip-172-31-0-20:~$

ubuntu@ip-172-31-0-20:~$ ls /var/lib/kube-proxy/kube-proxy-config.yaml
/var/lib/kube-proxy/kube-proxy-config.yaml
ubuntu@ip-172-31-0-20:~$- Configure the Kube Proxy systemd service
ubuntu@ip-172-31-0-20:~$ cat <<EOF | sudo tee /etc/systemd/system/kube-proxy.service
> [Unit]
> Description=Kubernetes Kube Proxy
> Documentation=https://github.com/kubernetes/kubernetes
> [Service]
> ExecStart=/usr/local/bin/kube-proxy \\
>   --config=/var/lib/kube-proxy/kube-proxy-config.yaml
> Restart=on-failure
> RestartSec=5
> [Install]
> WantedBy=multi-user.target
> EOF
sudo: unable to resolve host ip-172-31-0-20
[Unit]
Description=Kubernetes Kube Proxy
Documentation=https://github.com/kubernetes/kubernetes
[Service]
ExecStart=/usr/local/bin/kube-proxy \
  --config=/var/lib/kube-proxy/kube-proxy-config.yaml
Restart=on-failure
RestartSec=5
[Install]
WantedBy=multi-user.target
ubuntu@ip-172-31-0-20:~$ ls /etc/systemd/system/kube-proxy.service
/etc/systemd/system/kube-proxy.service
ubuntu@ip-172-31-0-20:~$- Reload configurations and start both services
ubuntu@ip-172-31-0-20:~$ {
>   sudo systemctl daemon-reload
>   sudo systemctl enable containerd kubelet kube-proxy
>   sudo systemctl start containerd kubelet kube-proxy
> }
sudo: unable to resolve host ip-172-31-0-20
sudo: unable to resolve host ip-172-31-0-20
Created symlink from /etc/systemd/system/multi-user.target.wants/containerd.service to /etc/systemd/system/containerd.service.
Created symlink from /etc/systemd/system/multi-user.target.wants/kubelet.service to /etc/systemd/system/kubelet.service.
Created symlink from /etc/systemd/system/multi-user.target.wants/kube-proxy.service to /etc/systemd/system/kube-proxy.service.
sudo: unable to resolve host ip-172-31-0-20
ubuntu@ip-172-31-0-20:~$
TESTING IT
hector@hector-Laptop:~/ca-authority$ kubectl get nodes --kubeconfig admin.kubeconfig -o wide
NAME             STATUS   ROLES    AGE     VERSION   INTERNAL-IP   EXTERNAL-IP   OS-IMAGE             KERNEL-VERSION   CONTAINER-RUNTIME
ip-172-31-0-20   Ready    <none>   6m14s   v1.21.0   172.31.0.20   <none>        Ubuntu 16.04.7 LTS   4.4.0-1128-aws   containerd://1.4.4
ip-172-31-0-21   Ready    <none>   6m11s   v1.21.0   172.31.0.21   <none>        Ubuntu 16.04.7 LTS   4.4.0-1128-aws   containerd://1.4.4
ip-172-31-0-22   Ready    <none>   6m8s    v1.21.0   172.31.0.22   <none>        Ubuntu 16.04.7 LTS   4.4.0-1128-aws   containerd://1.4.4
hector@hector-Laptop:~/ca-authority$