Module 6: Case Study - 1
Problem Statement: You work for XYZ Corporation. Their application requires a storage service that can store files and publicly share them if required. Implement S3 for the same.
While migrating, you are asked to perform the following tasks:
- Ensure that any amount of data can be stored on the cloud and can be retrieved at any time from anywhere on the web.
- Manage the lifecycle of data that is being stored on the cloud so that it gets automatically deleted after 75 days.
- Retrieve the old version of a file if the content of the current version of that file is compromised accidently.
- Host your static website on the AWS cloud using the domain name created in Module 3 assignment.
- Display an error page if proper domain name is not used while attempting to access the company’s website.
1. Storing and Retrieving Data:
Steps I Followed to Create the S3 Bucket:
- Accessing S3:
- I logged into the AWS Management Console.
- I navigated to the “S3” service under the storage section.
- Starting the Bucket Creation Process:
- I clicked on the “Create bucket” button.
- Configuring General Settings:
- Bucket Name: I designated it as
temp.hectorproko.com.
Tip
When using S3 for static website hosting and Route 53, the bucket name should match the domain/subdomain name you’re trying to associate with it.
- AWS Region: Retained the default, which was “US East (N. Virginia) us-east-1”.
- Object Ownership Configuration:
- I selected the “ACLs enabled” option. By enabling ACLs, I granted the flexibility to specify access permissions for the bucket, allowing for actions like “Make public using ACL” at the object level later on.
- Public Access Configuration:
- I deselected the “Block all public access” choice.
- I acknowledged the associated warnings by marking the checkbox that reads, “I acknowledge that the current settings might result in this bucket and the objects within becoming public.”
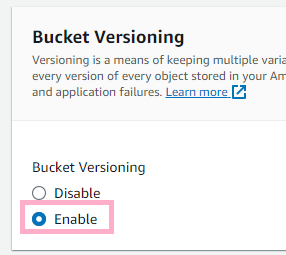
- Activating Bucket Versioning:
- I turned on “Bucket Versioning”. This permits the maintenance of multiple variants of an object within the same bucket.
After ensuring all the settings met my requirements, I finalized by clicking on the “Create bucket” button.
2. Managing Lifecycle of Data:
Setting Up Auto-Deletion in S3 Bucket:
Step 1: Logged in to AWS, navigate to S3, and selected the desired bucket.
Step 2: Clicked the “Management” tab, then “Create lifecycle rule”.
Step 3: Name the rule “AutoDeleteAfter75Days”.
Step 4: Choose “Expire current versions of objects” and set to 75 days.
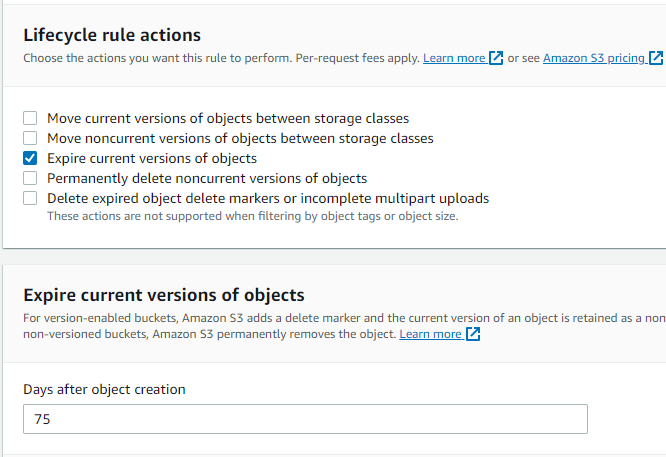
Step 5: Save the rule.
3. Versioning for File Retrieval:
When I created the bucket, I enabled “Versioning”
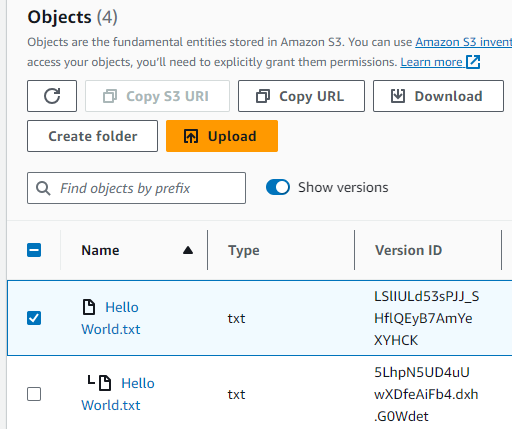
Demonstrating Versioning in Amazon S3:
-
Initial Upload: I created a
.txtfile namedHello World.txtwith the content “Hello World” and uploaded it to the S3 bucket. -
Modify and Re-upload: I then edited the content of the same
.txtfile to “Hello World 2” and uploaded it again. -
Viewing Versions: Inside the S3 bucket, I toggled the “Show versions” option. This revealed both the initial and modified versions of the file, each with its unique version ID.
-
Retrieving Content: By selecting and opening each version, I confirmed that the content corresponds to its respective upload: the older version displays “Hello World” and the newer version displays “Hello World 2”.
4. Hosting Static Website with Custom Domain:
Step 1: Navigated to the “Properties” tab in your S3 bucket.
Step 2: Clicked “Edit” next to “Static website hosting” .
Step 3: Set ‘index.html’ as the Index document and ‘error.html’ as the Error document.
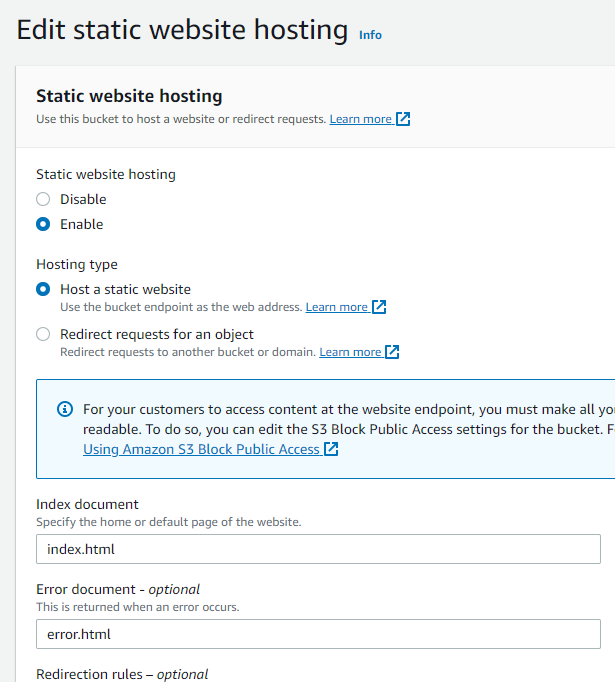
Step 5: Uploaded index.htm and error.html with the following content:
index.html
<h1>Index Page</h1>error.html
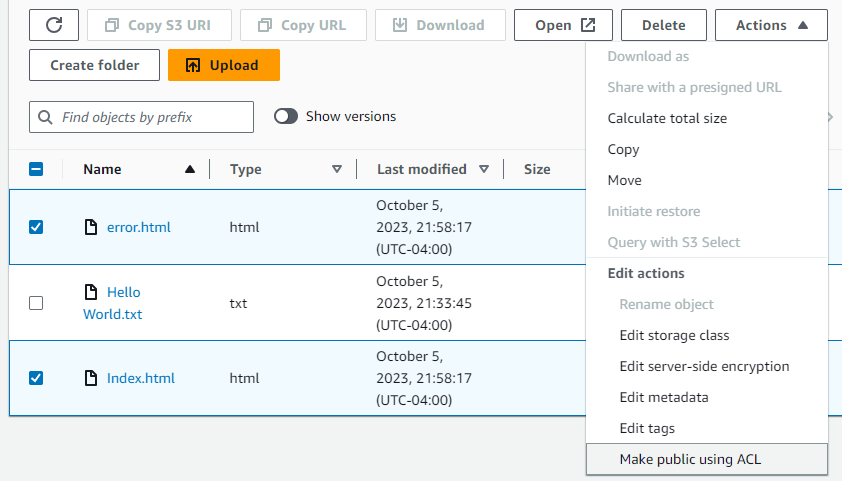
<h1>Error Page</h1>Step 5: Made the static site available to the public, I clicked on ‘Actions’ and then select ‘Make public using ACL’.
Step 6: Configuring Route 53 to Point to the S3 Static Website
- I returned to the AWS Route 53 service, recalling the setup from Assignment 3 – Route 53.
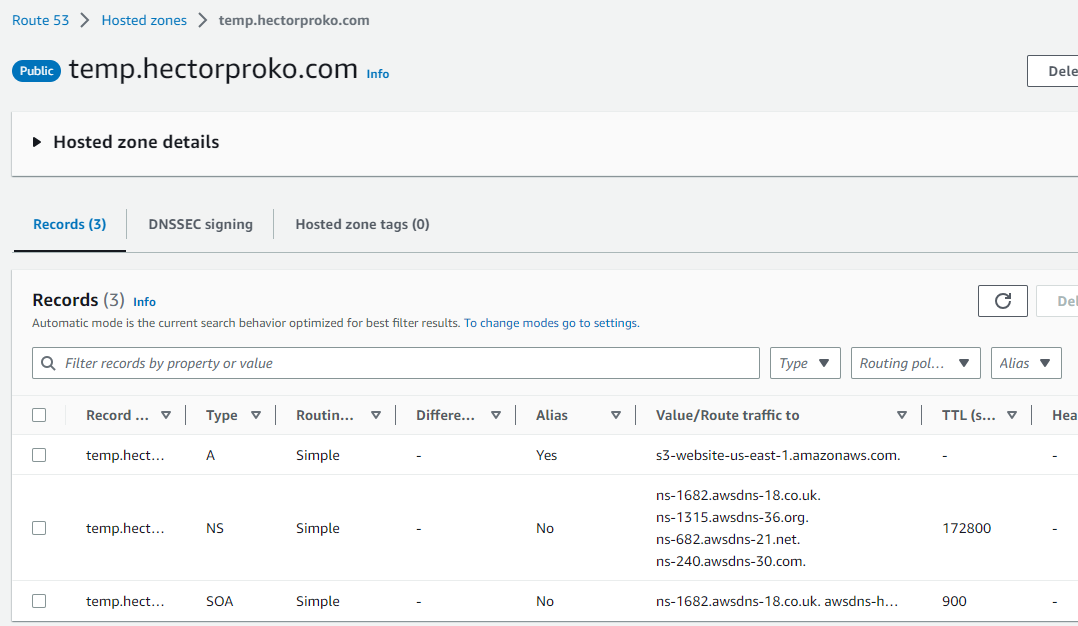
- Within Route 53, I navigated to the hosted zone for “temp.hectorproko.com”.
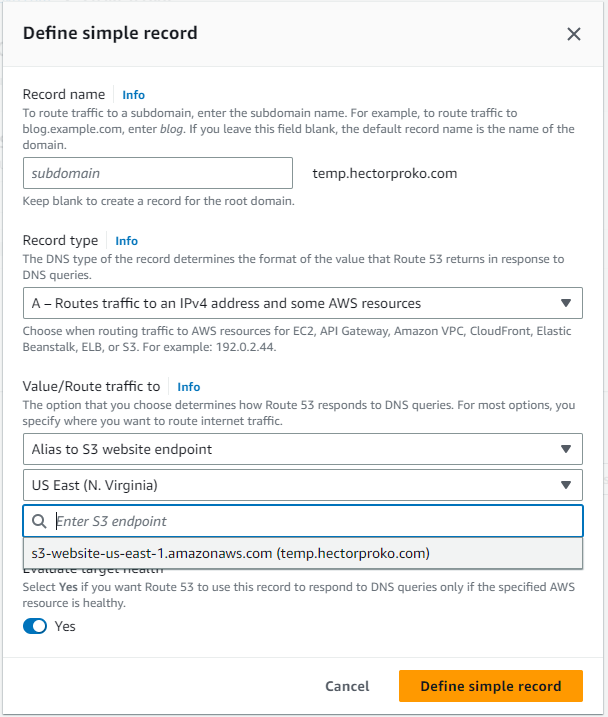
- Here, I initiated the process to define a simple record that would route traffic to the S3 bucket.
- I left the subdomain field empty to target the root domain.
- I set the record type as “A” and enabled the alias option.
- For the “Route traffic to” section, I chose the S3 website endpoint associated with my static site’s bucket.
- After ensuring all details were accurate, I saved my configuration.
With this configuration in place, any visits to “temp.hectorproko.com” will be routed to the static site I’ve set up in my S3 bucket.
Step 7: Site Testing:
- I accessed
temp.hectorproko.comand was correctly presented with the Index Page.
Success

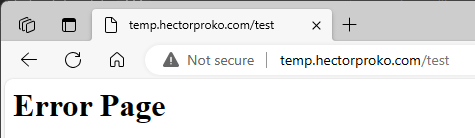
- To simulate an error, I navigated to
temp.hectorproko.com/testand was appropriately directed to the Error Page.
Success
Once we’ve completed these steps, XYZ Corporation’s requirements will be fully implemented. The data will be stored securely on AWS, with a lifecycle rule ensuring automatic deletion after 75 days. Additionally, the website will be hosted on AWS, with proper error handling in place.