Module 4: Route 53 Assignment
Problem Statement: You work for XYZ Corporation that uses on premise solutions and some limited number of systems. With the increase in requests in their application, the load also increases. So, to handle the load the corporation has to buy more systems almost on a regular basis. Realizing the need to cut down the expenses on systems, they decided to move their infrastructure to AWS.
Tasks To Be Performed:
- Use the Route 53 hosted zone created in the assignment.
- Route the traffic to an EC2 instance with an Apache web server running in it using its IP address.
Created an EC2 instance with a Web Server:
- Launched the EC2 Instance Noted the Public IP.

- Installed the Web Server
#!/bin/bash
# Update the package manager
sudo yum update
# Install the Apache web server
sudo yum install httpd -y
# Start the Apache web server
sudo systemctl start httpd
# Create a web page
echo "Hello from Web Server!" | sudo tee /var/www/html/index.html
# Restart the Apache web server
sudo systemctl restart httpd- Testing.
Created a Hosted Zone in Route 53:
- Opened the Route 53 console in the AWS Management Console.
- In the left navigation pane, clicked on “Hosted zones”.
- Clicked the “Create hosted zone” button.
- In the “Create Hosted Zone” form:
- Domain Name: Entered my domain name
temp.hectorproko.com. - Type: Selected “Public Hosted Zone”.
- Domain Name: Entered my domain name
- Clicked “Create”.
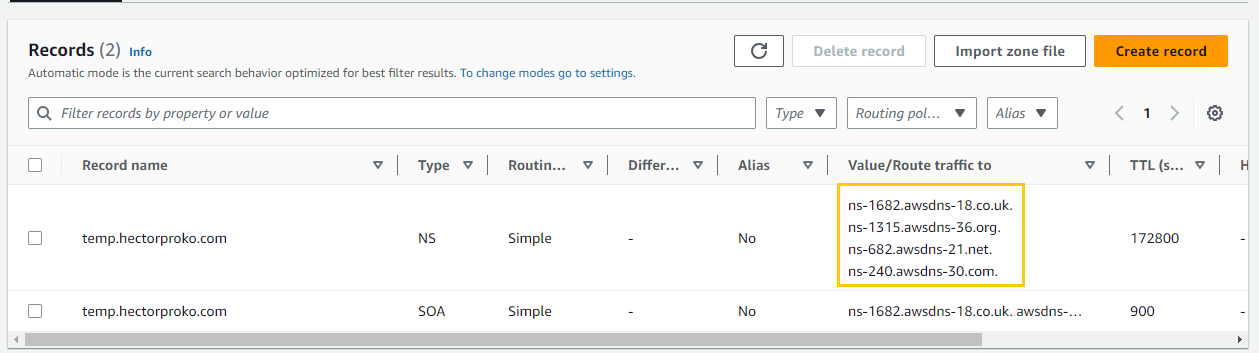
After creating the hosted zone, Route 53 provides me with a set of NS (Name Server) records. We’ll need to update out domain registrar’s nameserver settings with these NS records to delegate the domain’s DNS to Route 53.
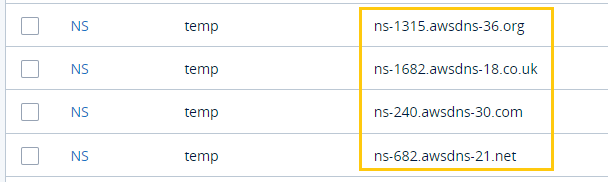
Updating Registrar
I’ve mapped all four Name Servers to my domain ‘temp.hectorproko.com’ within the IONOS platform, inputting them one by one.
- Clicked on “Create Record” to point
temp.hectorproko.comto Web Server. - In the record creation form:
- Name: Entered the domain I wish to route. Left it blank to route to the root domain.
- Type: Chose “A - IPv4 address”.
- Alias: Select “No”.
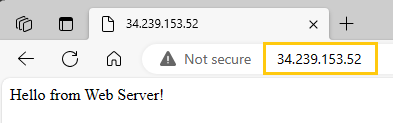
- Value/Route traffic to: Entered the public IPv4 address of your EC2 instance.
- TTL (Time to Live): A common value is 300 seconds, but you can adjust based on your needs.
- Record type: Chose “Simple routing”.
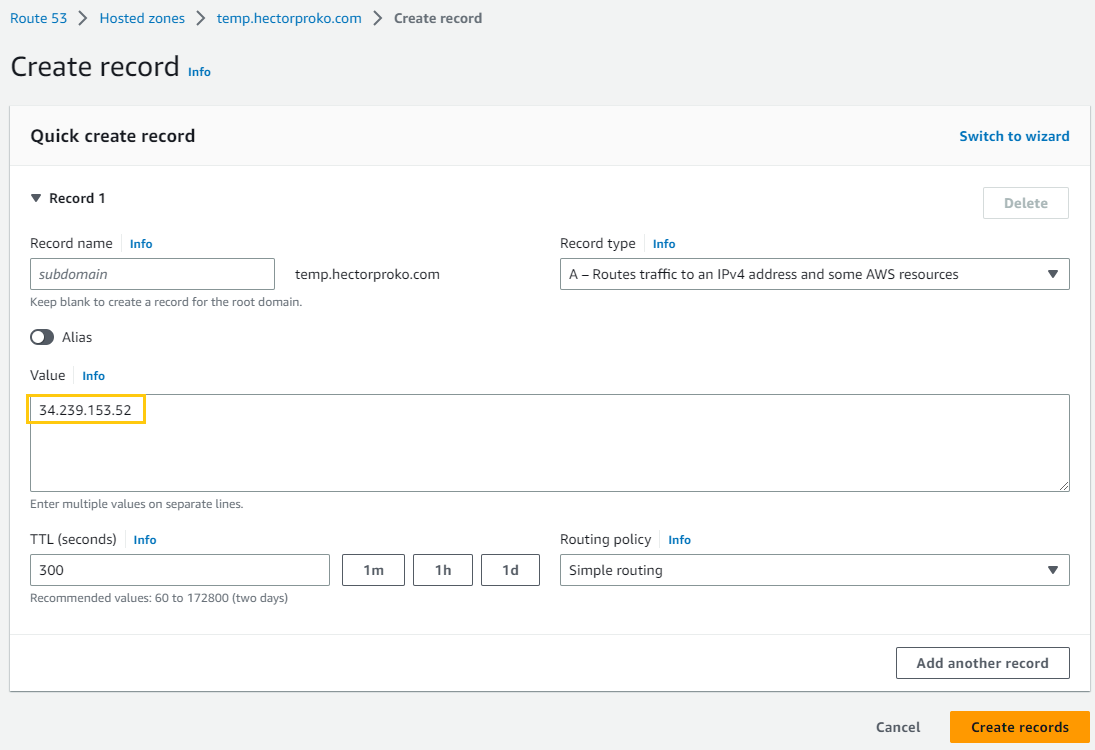
- Clicked “Create records”.

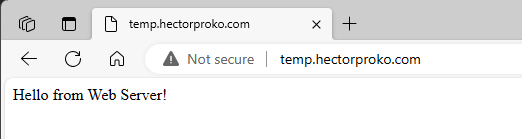
Verifying the Route:
Opened a browser and enter my domain name. I should see the Apache web server page I created.
Success