Nagios Assignment - 1
To Be Performed:
- Create a Nagios Master-Slave architecture and add 2 hosts
I used Ubuntu 22.04 and opened port 80.
EC2s used and Private IPs
nagios
10.0.1.146my-linux-host110.0.1.164my-linux-host210.0.1.228
^aa7b48
Installing Nagios Core From Source
#===== Ubuntu 20.x =====
#Prerequisites
#Perform these steps to install the pre-requisite packages.
sudo apt-get update -y
sudo apt-get install -y autoconf gcc libc6 make wget unzip apache2 php libapache2-mod-php7.4 libgd-dev
sudo apt-get install openssl libssl-dev -y
#Downloading the Source
cd /tmp
sudo wget -O nagioscore.tar.gz https://github.com/NagiosEnterprises/nagioscore/archive/nagios-4.4.14.tar.gz
tar xzf nagioscore.tar.gz
#Compile
cd /tmp/nagioscore-nagios-4.4.14/
sudo ./configure --with-httpd-conf=/etc/apache2/sites-enabled
sudo make all
#Create User And Group
#This creates the nagios user and group. The www-data user is also added to the nagios group.
sudo make install-groups-users
sudo usermod -a -G nagios www-data
#Install Binaries
#This step installs the binary files, CGIs, and HTML files.
sudo make install
#Install Service / Daemon
#This installs the service or daemon files and also configures them to start on boot.
sudo make install-daemoninit
#Install Command Mode
#This installs and configures the external command file.
sudo make install-commandmode
#Install Configuration Files
#This installs the *SAMPLE* configuration files. These are required as Nagios needs some configuration files to allow it to start.
sudo make install-config
#Install Apache Config Files
#This installs the Apache web server configuration files and configures Apache settings.
sudo make install-webconf
sudo a2enmod rewrite
sudo a2enmod cgi
#Configure Firewall
#You need to allow port 80 inbound traffic on the local firewall so you can reach the Nagios Core web interface.
sudo ufw allow Apache
sudo ufw reload
#Create nagiosadmin User Account
#You'll need to create an Apache user account to be able to log into Nagios.
#The following command will create a user account called nagiosadmin and you will be prompted to provide a password for the account.
sudo htpasswd -c /usr/local/nagios/etc/htpasswd.users nagiosadmin
#Start Apache Web Server
#Need to restart it because it is already running.
sudo systemctl restart apache2.service
#Start Service / Daemon
#This command starts Nagios Core.
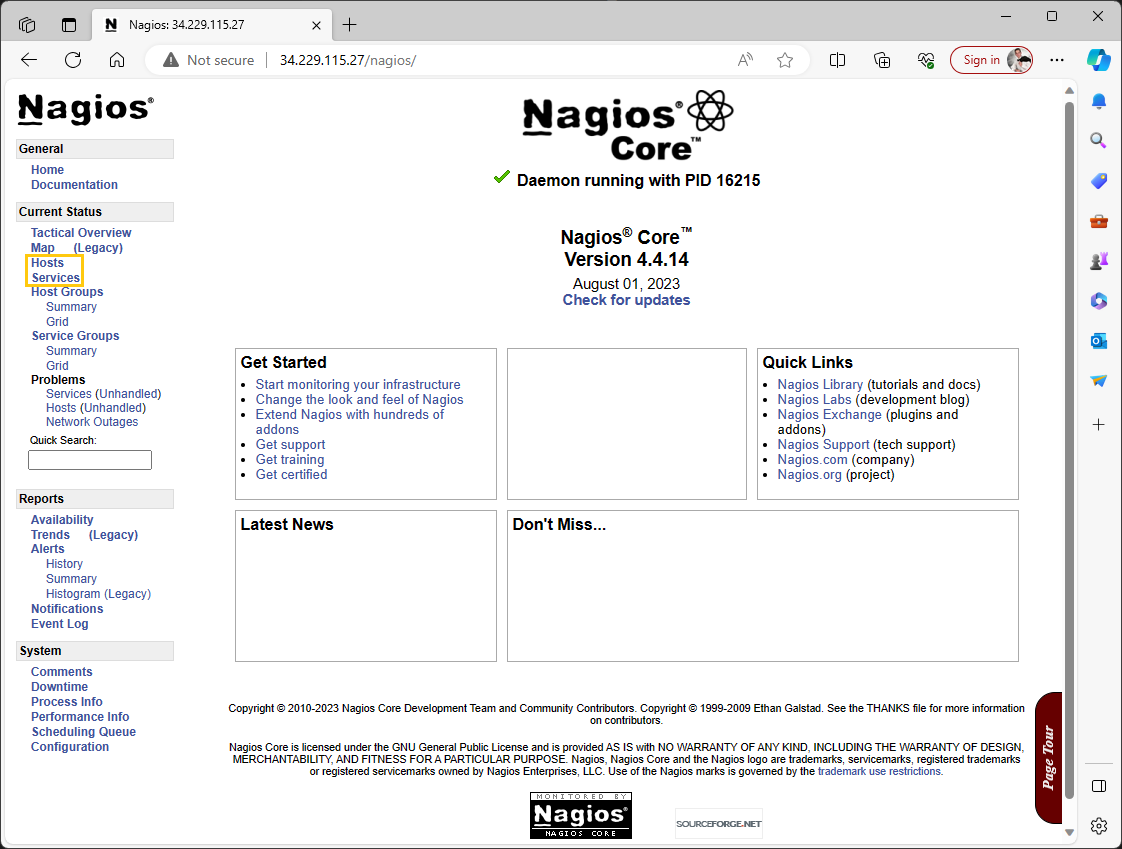
sudo systemctl start nagios.serviceI verify that the Nagios server is up and running by accessing its GUI from the browser using the following URL: <Public IP>/nagios.
![[Pasted image 20231121194952.png|]]
We login with the nagiosadmin we previously created
Since we haven’t installed Nagios Plugins yet, An error is displayed in the ‘Status Information’ of Hosts and Services.

Installing The Nagios Plugins
Nagios Core needs plugins to operate properly. The following steps will walk you through installing Nagios Plugins 2.4.6.
Prerequisites
Make sure that you have the following packages installed.
sudo apt-get install -y autoconf gcc libc6 libmcrypt-dev make libssl-dev wget bc gawk dc build-essential snmp libnet-snmp-perl gettextDownloading The Source
cd /tmp
wget --no-check-certificate -O nagios-plugins.tar.gz https://github.com/nagios-plugins/nagios-plugins/archive/release-2.4.6.tar.gz
tar zxf nagios-plugins.tar.gz
Compile + Install
cd /tmp/nagios-plugins-release-2.4.6/
sudo ./tools/setup
sudo ./configure
sudo make
sudo make install
Now the previous error disappears
Success

We are all set with the Nagios installation on Master
Adding 2 hosts
To install prerequisites on Nagios agents, I chose to use pre-compiled packages instead of building from source. This approach is simpler and faster, as it involves installing packages directly from a package manager like apt-get, eliminating the need for manual source code compilation and installation.
sudo apt-get update
sudo apt-get install nagios-nrpe-server nagios-plugins
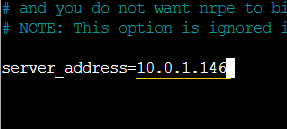
sudo nano /etc/nagios/nrpe.cfg
sudo /etc/init.d/nagios-nrpe-server restartI edited the file /etc/nagios/nrpe.cfg to add the Nagios (master) private IP address.
Now, on the Nagios server, I need to configure it to interact with that client. To facilitate this, I will add a host file for each host. Consequently, I created host1.cfg and host2.cfg.”
vi /usr/local/nagios/etc/objects/host1.cfg
define host {
  use linux-server
  host_name my-linux-host1
  alias My Linux Host1
  address 10.0.1.164
}
vi /usr/local/nagios/etc/objects/host2.cfg
define host {
use linux-server
host_name my-linux-host2
alias My Linux Host2
address 10.0.1.228
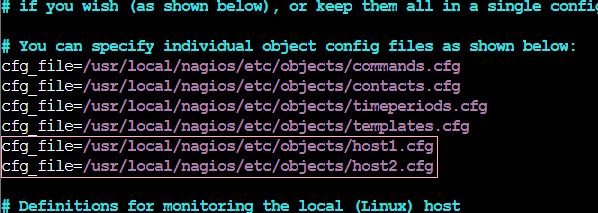
}Now, I will modify the main configuration file, nagios.cfg, to include the configuration files I just created, host1.cfg and host2.cfg.
sudo vi /usr/local/nagios/etc/nagios.cfg
I restart Nagios service
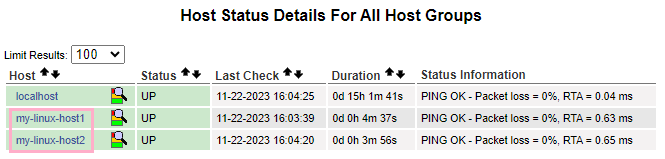
sudo systemctl restart nagiosIn Nagios GUI I navigate to Current Status > Hosts and confirm newly added hosts
Success