Module 4: Auto-Scaling Assignment
Problem Statement: You work for XYZ Corporation that uses on premise solutions and some limited number of systems. With the increase in requests in their application, the load also increases. So, to handle the load the corporation has to buy more systems almost on a regular basis. Realizing the need to cut down the expenses on systems, they decided to move their infrastructure to AWS.
Tasks To Be Performed:
- Create a web server AMI with Apache 2 server running in it.
- Create a launch configuration with this AMI.
- Use this launch configuration to create an Auto Scaling group with 1 minimum and 3 maximum instances.
Task 1: Create a Web Server AMI
- Launch an EC2 Instance:
-
I’ll log in to my AWS Management Console.
-
Next, I’ll navigate to the EC2 dashboard.
-
Now, I’ll click on
Launch instance. -
I’ll choose an Amazon Machine Image (AMI) that fits my needs, like Amazon Linux.
-
I’ll select an instance type that suits my requirements.
-
In
Configure Instance Details, I’ll set up network settings, security groups, and any other necessary configurations.
- Install and Configure Apache:
- I’ll connect to my EC2 instance using SSH.
- Once connected, I’ll install the Apache web server:
sudo yum install httpd -y- Start Apache and enable it to start on boot:
- I’ll replace the default web page located in
/var/www/htmlwith my own web content.
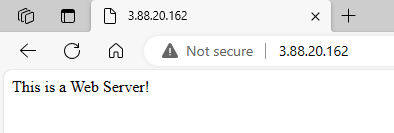
echo "This is a Web Server!" | sudo tee /var/www/html/index.html
sudo service httpd start
sudo systemctl enable httpd
Testing page:
- Create an AMI:
- After configuring the web server as I want, I’ll create an Amazon Machine Image (AMI) from my EC2 instance:
- In the EC2 dashboard, I’ll right-click on my running instance.
- Then, I’ll select
Imageand chooseImage and templatesandCreate Image.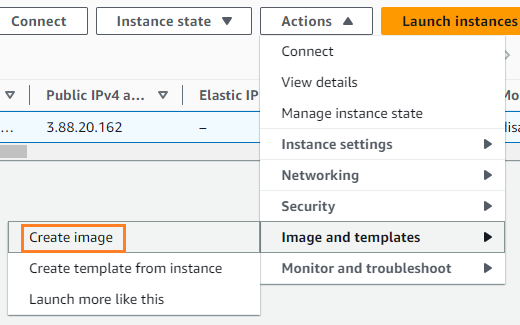
- I’ll follow the prompts to create the image.

Task 2: Create a Launch Template
-
In the AWS Management Console, I’ll go to the Auto Scaling dashboard.
-
I’ll click on
Launch Configurationsin the left sidebar. -
Then, I’ll click the
Create launch configurationbutton. -
I’ll choose the AMI I created in Task 1.
-
I’ll select an instance type that suits my needs.
-
If necessary, I’ll configure any user data or advanced details.
-
If I require an IAM role, I’ll create or choose an existing one.
-
In the AWS Management Console, I’ll go to the EC2 dashboard .
-
In the EC2 dashboard, I’ll find
Launch Templatesin the left sidebar. -
I’ll click the
Create launch templatebutton. -
In the Launch Template configuration:
- I’ll choose the AMI I created in Task 1.
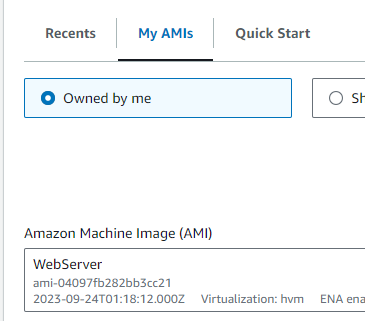
- I’ll select an instance type that suits my needs.
- I’ll pick a security groups with HTTP/s open.
- I’ll choose the AMI I created in Task 1.
-
After configuring the Launch Template:
- I’ll review the settings.
- Finally, I’ll click
Create Launch Template.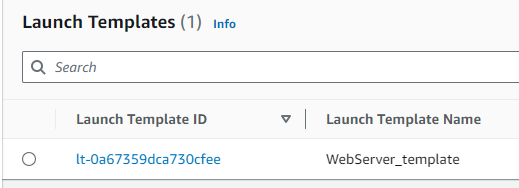
Task 3: Create an Auto Scaling Group
- Create an Auto Scaling Group:
- After creating the launch configuration, I’ll go to the
Auto Scaling Groupstab in the EC2 dashboard. - I’ll click the
Create Auto Scaling groupbutton.
- Configure Auto Scaling Group Settings:
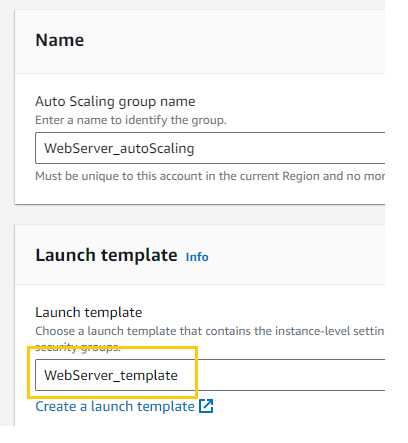
- I’ll select the launch configuration I created in Task 2.
- I’ll set the desired capacity, with a minimum of 1 instance and a maximum of 3 instances.
- If needed, I can configure other settings like network, subnets, and load balancers.
- We’ll skip scaling policies based on metrics such as CPU utilization or network traffic.
- I’ll carefully review the Auto Scaling group settings.
- Finally, I’ll click
Create Auto Scaling group.
I’ll terminate my instance to see if Auto Scaling starts a new one:
 Confirmed new instance comes up

