Project - 1: Deploying a Multi-Tier Website Using AWS EC2
Description: Amazon Elastic Compute Cloud (Amazon EC2) provides scalable computing capacity in the Amazon Web Services (AWS) cloud. Using Amazon EC2 eliminates your need to invest in hardware up front so you can develop and deploy applications faster. You can use Amazon EC2 to launch as many or as few virtual servers as you need, configure security and networking, and manage storage. Amazon EC2 enables you to scale up or down to handle changes in requirements or spikes in popularity, reducing your need to forecast traffic.
Problem Statement: Company ABC wants to move their product to AWS. They have the following things set up right now:
- MySQL DB
- Website (PHP)
The company wants high availability on this product, therefore wants Auto Scaling to be enabled on this website.
Steps To Solve:
- Launch an EC2 Instance
- Enable Auto Scaling on these instances (minimum 2)
- Create an RDS Instance
- Create Database & Table in RDS instance: a. Database name: intel b. Table name: data c. Database password: intel123
- Change hostname in website
- Allow traffic from EC2 to RDS instance
- Allow all-traffic to EC2 instance
EC2
Referring to Assignment 1 – EC2, I have configured an EC2 instance with the following specifications:
- Selected key pair: daro.io
- Operating System: Ubuntu
- Chosen VPC: MyVPC
- Deployed in a public subnet
- Ports 22 and 80 are open.
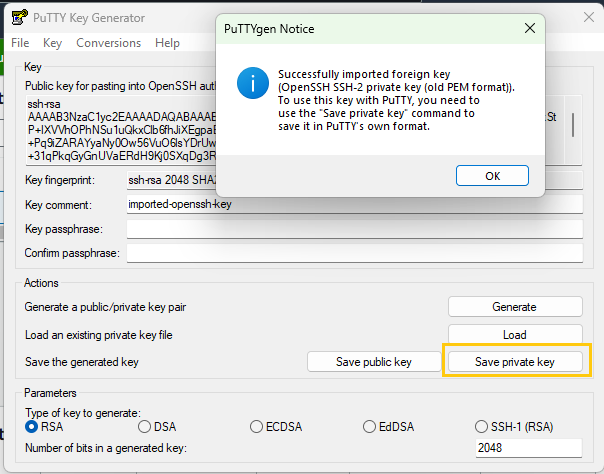
Convert the private key ‘daro.io.pem’ using PuTTYgen to .ppk format
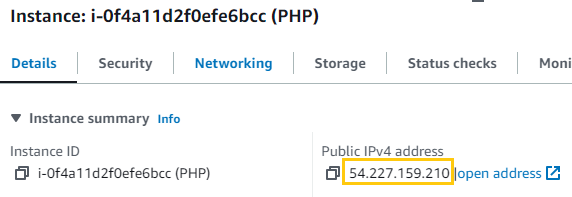
I get the Public IP of the instance
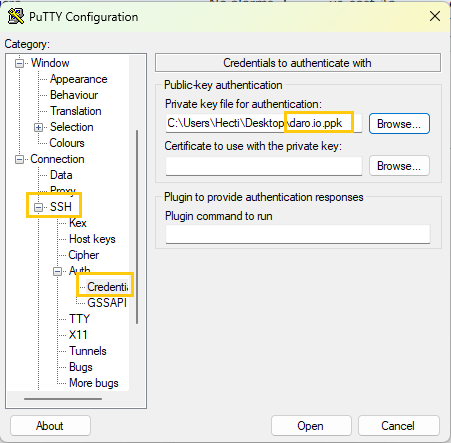
I use PuTTY to connect by loading the newly converted ‘daro.io.ppk’ key into the PuTTY configuration.
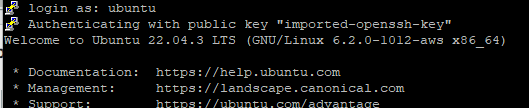
Once the login prompt appears, I use ‘ubuntu’ as the username.
I proceed with the following commands
#!/bin/bash
# Update all system packages to their latest versions
sudo apt-get update -y
# Install the Apache2 web server
sudo apt-get install apache2 -y
# Add the 'ondrej/php' Personal Package Archive (PPA) to get PHP versions not provided in standard Ubuntu repositories
sudo add-apt-repository -y ppa:ondrej/php -y
# Install PHP version 5.6 along with mysql-client and the mysqli extension for PHP
sudo apt install php5.6 mysql-client php5.6-mysqli -y
Create RDS
Using Assignment 3 – AWS Migration as a reference, I create an RDS database instance with the following specifications:
- Engine: MySQL
- Tier: Free tier
- DB Instance Identifier: MySQLDatabase
- Template: Free tier
- Master Username: admin
- Password:
[SecuredPassword] - Chosen VPC: MyVPC
- Public Access: Checked
- Instance Configuration: db.t2.micro.
I ensure that the initial database name ‘Intel’ is set up.


Clicked on “View connection details”
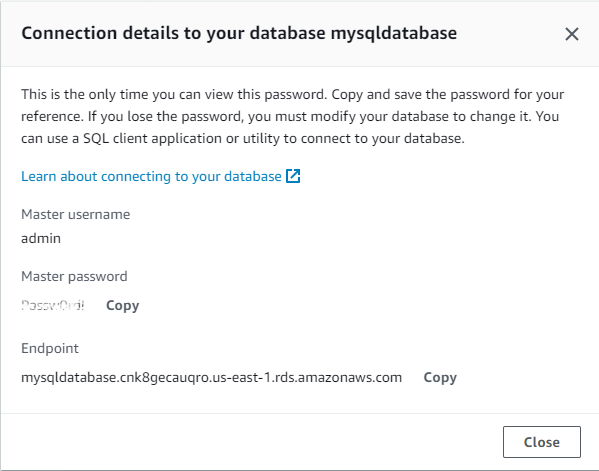
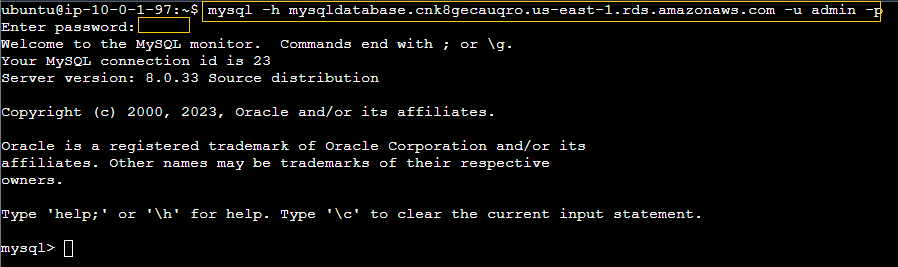
mysqldatabase.cnk8gecauqro.us-east-1.rds.amazonaws.com
I copy the Security Group from the EC2

launch-wizard-73
I click on the security group associated with the RDS to edit its settings.

Once I open the security group for the RDS, I edit its inbound rules to restrict access solely to my EC2 instance through the EC2’s assigned security group launch-wizard-73.

I establish a connection to the RDS from the EC2 instance.
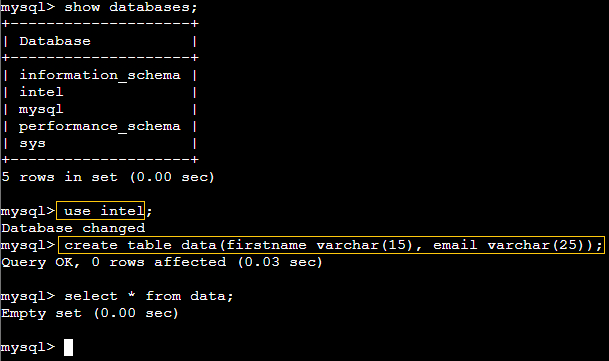
I create a table named ‘data’ in the ‘Intel’ database.
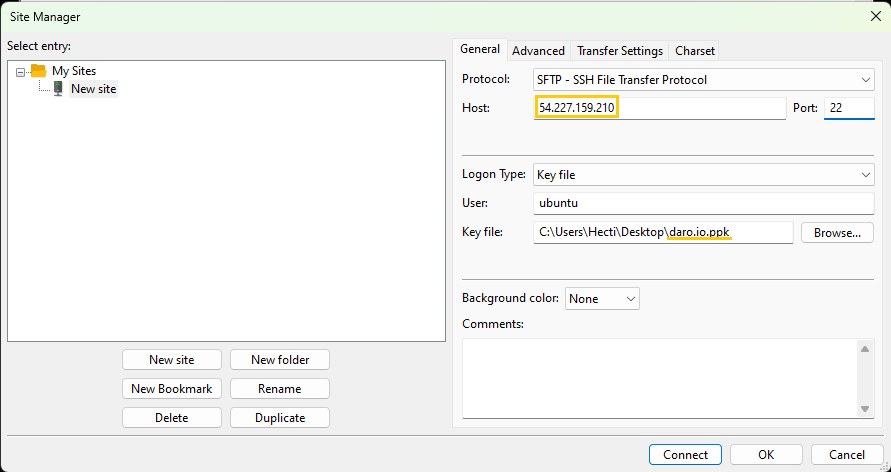
I will transfer my website files to my EC2 instance for hosting using FileZilla.
I have installed the FileZilla client, which is available for download at the FileZilla project website.
I will establish a connection to the EC2 instance using the FileZilla client by following these steps: Navigate to File > Site Manager, select the ‘SFTP’ protocol, enter the EC2 public IP, and use the same .ppk key for authentication that we used with PuTTY.
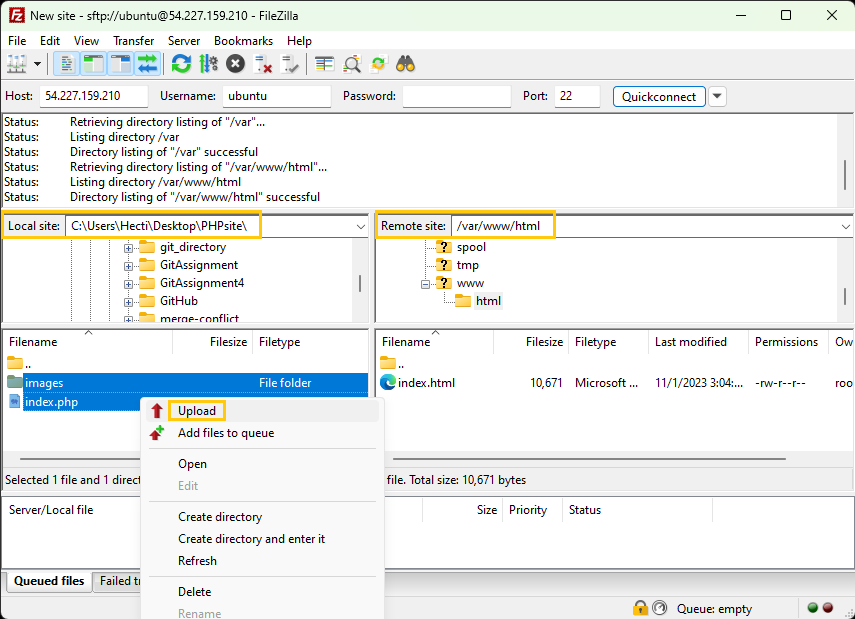
In the FileZilla client, I select the ‘index.php’ file and ‘images’ folder from the ‘Local site’ panel, which is my source directory. In the ‘Remote site’ panel, I target the ‘/var/www/html’ directory as my destination on the EC2 instance. By right-clicking the selected items and clicking ‘Upload’, I initiate the process to transfer the files from my local machine to the remote server.
Warning
Before I can transfer files using FileZilla with the ‘ubuntu’ user, I must set the proper permissions for the ‘html’ directory by executing the command
I verify ‘index.php’ for database connection setup.

sudo nano /etc/apache2/sites-available/000-default.conf
 Always ensure to check the syntax of the Apache configuration files before restarting the service:
sudo apache2ctl configtest
If you get Syntax OK, then it’s safe to proceed with the restart. Otherwise, check for any errors reported by the command and correct them before restarting Apache.
After you’ve modified the file, restart Apache to apply the changes:
sudo systemctl restart apache2
Note
To ensure Apache serves ‘index.php’ by default, I take the following step:
- I edit the Apache default configuration file by executing:
sudo nano /etc/apache2/sites-available/000-default.conf
Before applying changes, it’s crucial to verify the configuration’s syntax. I run the following command:
sudo apache2ctl configtestIf I receive a
Syntax OKresult, it’s safe for me to restart Apache with:sudo systemctl restart apache2
To verify that the webpage is active and to test data input functionality, I navigate to my EC2 instance’s public IP address in a web browser.
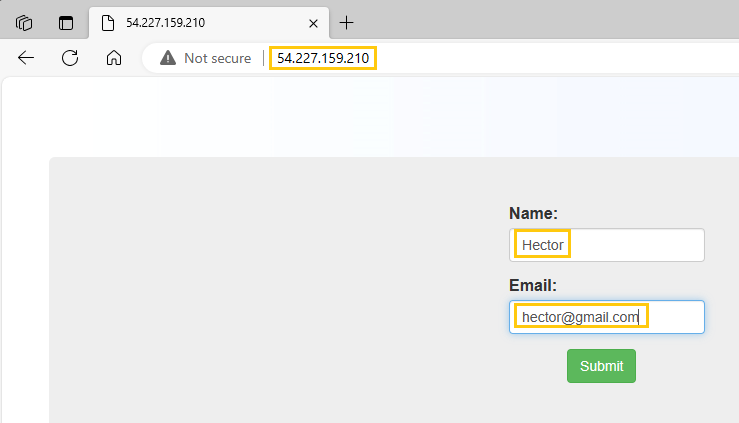 Click “Submit”
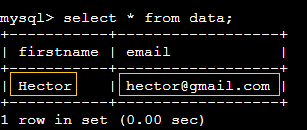
I verify the data input by executing a SELECT query on the ‘data’ table within the ‘intel’ database. The query results confirm that the input has been successfully recorded, as shown by the retrieved data entries.
Success
Now that my EC2 instance is fully equipped for hosting, I ensure it is also capable of auto-scaling, following the procedures outlined in Assignment 2 – Auto Scaling. My first step is to create an Amazon Machine Image (AMI) from the existing EC2 instance. Next, I craft a Launch Template incorporating this AMI. Finally, I establish an Auto Scaling group utilizing this Launch Template and configure it to maintain a desired capacity, with the parameters set to a minimum of 2 instance and a maximum of 3 instances. This setup guarantees that the hosting infrastructure adjusts automatically to the incoming traffic, maintaining efficiency and cost-effectiveness.