AWS DevOps Case Study - 1
Training Problem Statement: You work for XYZ Corporation. Your corporation wants the files to be stored on a private repository on the AWS Cloud. Once done, you are required to automate a few tasks for ease of the development team.
Tasks To Be Performed:
- Create a website in any language of your choice and push the code into GitHub.
- Migrate your GitHub repository into the AWS CodeCommit repository.
- Create two CodeDeploy deployments (for the QA stage and the Production stage) with an EC2 deployment group into which you can push the code from the CodeCommit repository.
- Using AWS CodePipeline, create a software development life cycle: a. The source is the CodeCommit repository b. The code will be pushed into the deployment created in CodeDeploy c. There should be two stages in deployment, the QA stage and the Production stage d. Only when the QA stage is successful, the Production stage should be executed
- Create a third stage where the same website is pushed into an Elastic Beanstalk environment.
Note: The application can be of any language, or it can even be a sample application. The purpose here is to create a CI/CD pipeline, not to create a great application.
Referencing previous assignments:
- Assignment 1 – AWS DevOps: Set up the SSH client and change the local git repo remote origin.
- Assignment 2 – CodeDeploy: Create a CodeDeploy application and Deployment Group.
- Assignment 3 – CodePipeline: Use the same PHP page.
- Assignment 2 – Elastic Beanstalk: Learn how to create a Beanstalk environment.
- GitHub Repository Creation:
- Created a GitHub repository named
php_page.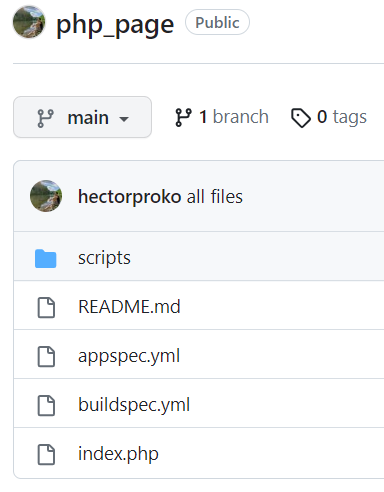
- AWS CodeCommit Repository:
- Created a new repository named
php_pagein AWS CodeCommit.
- Linking Repositories:
- Clone the
php_pagerepository. - Change the remote origin to link the local repository to the
php_pagerepository in CodeCommit.
Use the following command:
git remote add codecommit ssh://git-codecommit.us-east-1.amazonaws.com/v1/repos/php_page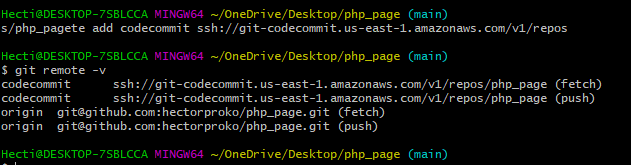
-
Setting Up the SSH Client for AWS CodeCommit I open my terminal: This is where I’ll input all the necessary commands.
I edit the SSH configuration:
Host git-codecommit.*.amazonaws.com
User APKAG4NQRHE3SUWI647
IdentityFile ~/.ssh/id_rsa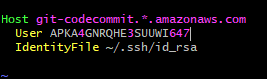
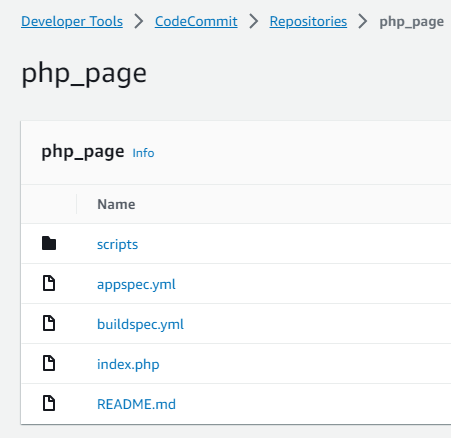
I push the content to AWS CodeCommit: Using the terminal, I run:
git push codecommit mainI verify the push: I navigate to the php_page repository in CodeCommit
- Setting Up 2 EC2 Instances for Deployment
- I make a mental note: Every EC2 instance requires three main configurations a Role, the CodeDeploy Agent installed, and the appropriate tags.
- I configure the security group to ensure ports for SSH and HTTP are open for accessibility.
CodeDeploy Agent Install In the user data section, I paste the following script to install CodeDeploy agent:
#!/bin/bash
sudo apt-get update -y
sudo apt-get -y install ruby
sudo apt-get -y install wget
cd /home/ubuntu
wget https://aws-codedeploy-us-east-1.s3.amazonaws.com/latest/install
sudo chmod +x ./install
sudo ./install auto
sudo service codedeploy-agent start
EC2 Instance Tags The tags for each EC2 instance are crucial. They enable the deployment group in AWS CodeDeploy to correctly reference and target the instances during the deployment process. Without the appropriate tagging, the deployment might not work as intended.
Server 1 (QA Environment)
| Key | Value |
|---|---|
| env | QA |
| Name | server1 |
| app | XYZ-Website |
Server 2 (PROD Environment)
| Key | Value |
|---|---|
| env | PROD |
| Name | server2 |
| app | XYZ-Webs |
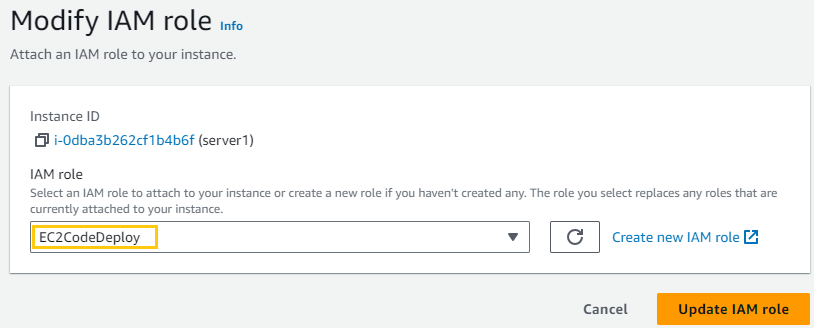
Attaching an IAM Role to EC2
After creating the EC2 instances, I select them in the EC2 dashboard. Then, I click on Modify IAM role. In the dropdown menu, I pick the role EC2CodeDeploy (associated with the policy AmazonEC2RoleCodeDeploy).

-
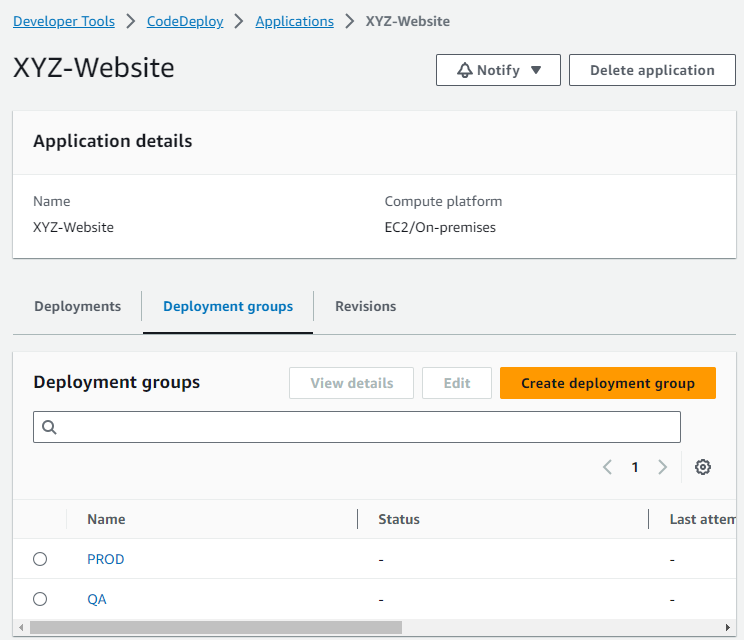
Creating Application in AWS CodeDeploy
Application Name: XYZ-website
- Navigate to Developer Tools > CodeDeploy > Applications > Create application.
- Under “Application configuration”, set the following:
- Application name: XYZ-website
- Compute platform: EC2/On-premises

Deployment Groups: Create two deployment groups, namely QA and PROD.
-
Role:
CodeDeployRole(with policiesAmazonEC2FullAccessandAWSCodeDeployRole).
I manage Tags:
-
I ensure to pick tags that relate to my EC2 instances.
-
I identify the specific EC2 instance by selecting two tags: “app” and “env”. I make sure both tags match by using two tag groups.
-
During the setup, I uncheck the option “Enable load balancing”.
I replicate the steps for PROD:
-
I repeat the same steps to set up the application in the PROD environment.
-
Creating an Elastic Beanstalk Environment
I start by navigating to AWS Elastic Beanstalk. Once there, I initiate the creation process by clicking on the
Applicationstab and selecting “Create New Application”. I then set the application name to “PHP_app”. Keeping in line with Assignment 2 – Elastic Beanstalk, I ensure that I choose a PHP web environment to host my page.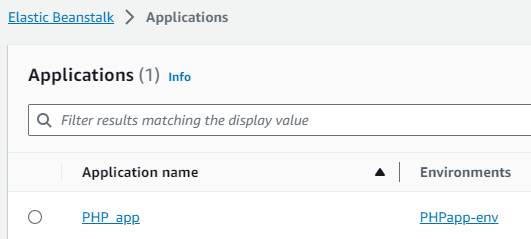

-
Creating a CodePipeline
I start by naming my pipeline “Deploying_PHP” and selecting “V1” for the version. I use the default role.
Next, for the source stage, I choose AWS CodeCommit as the source provider. I pick the repository “php_page” and set the branch to “php”.
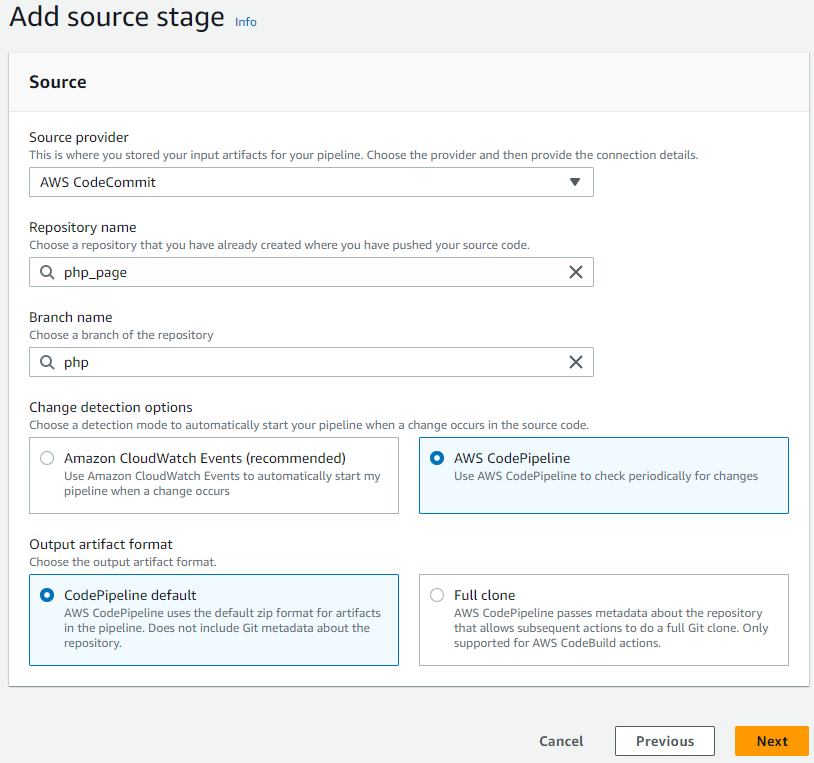 I chose the “php” branch because that’s where I stored the web pages and scripts
In the “Add build stage”, I selected AWS CodeBuild as my build provider. I set the region to “US East (N. Virginia)“. When it came to selecting a project name, I realized I needed to create a new one. So, I opted to create “SimpleZIP” right there by clicking the “Create project” button. Once “SimpleZIP” was successfully created in the AWS CodeBuild console, I proceeded. I didn’t add any environment variables at this stage. For the build type, I chose “Simple build” to trigger a single build.
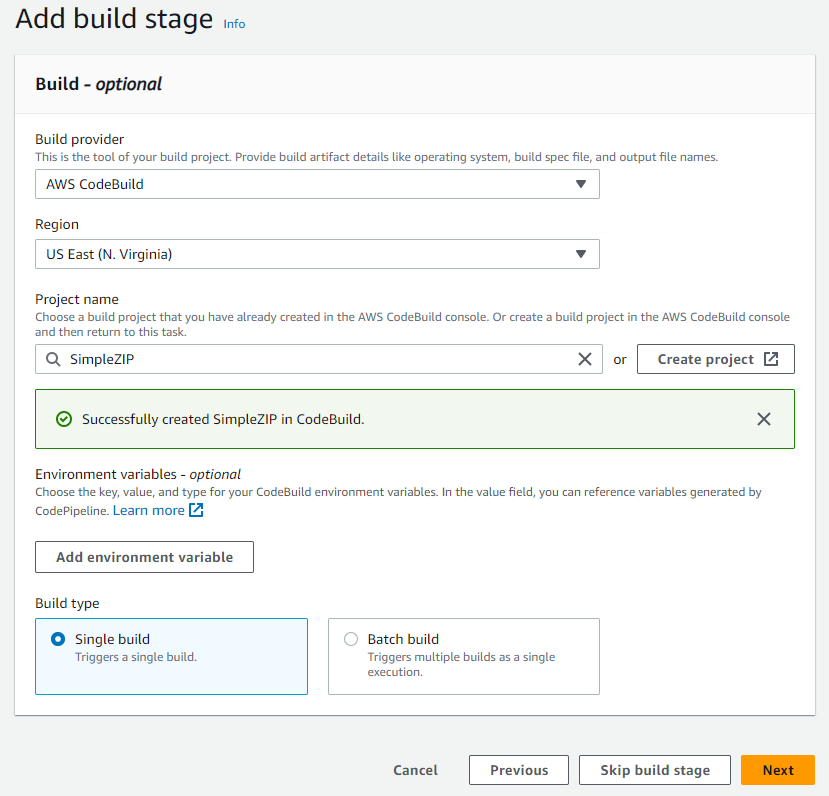 A BuildProject defines the environment in which you execute the build phase commands.
For the “Add deploy stage”, I’ll skip it for now. Once I edit the pipeline, I’ll incorporate all the deploy stages.
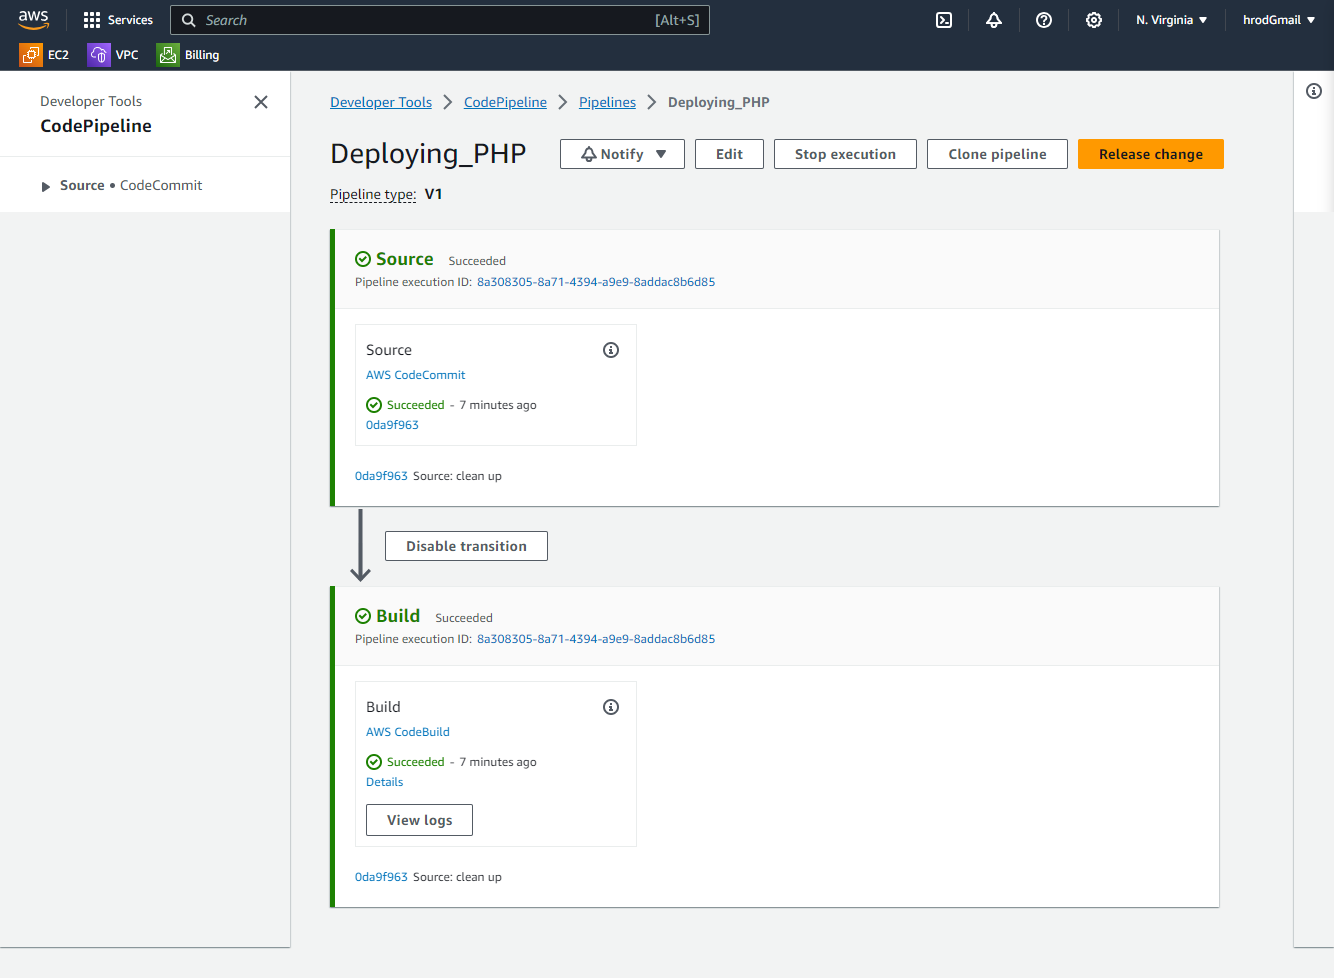
Both stages have completed without any issues as indicated by the green checkmarks. Next, I’ll proceed by clicking the “Edit” button to make necessary adjustments.
I’ve added three new stages titled “QA”, “PROD”, and “Beanstalk” by clicking the “Add stage” button. For each stage, there’s an option to include specific actions.
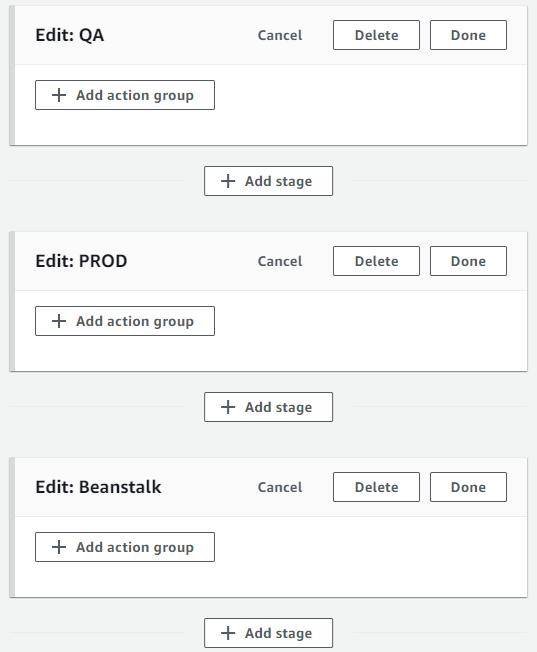
To define actions for these stages, I’ll proceed by clicking the “Add action group” button within each stage.
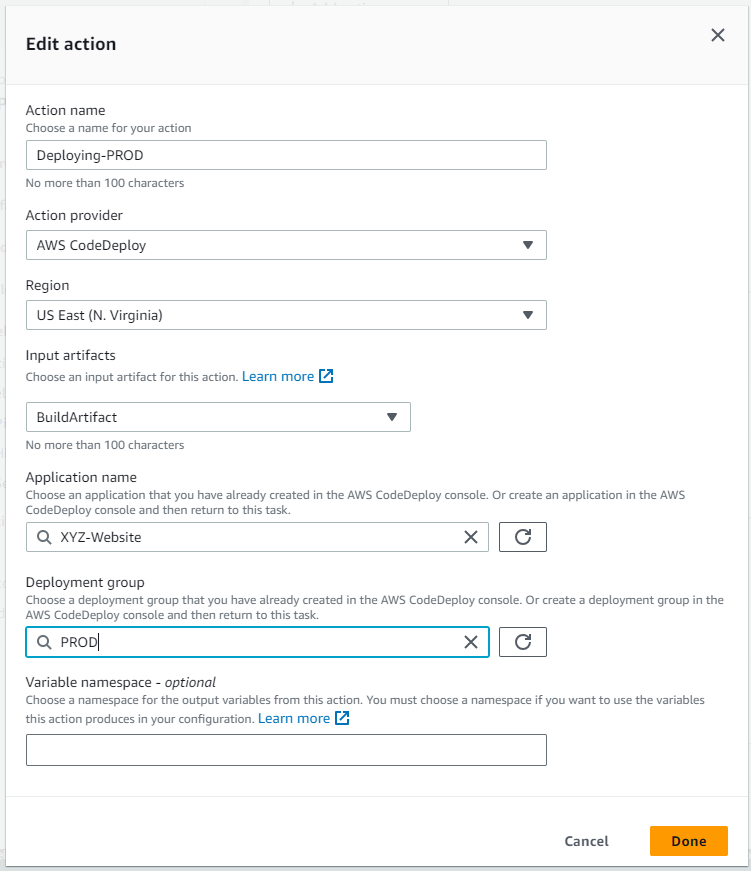
For the “QA” stage, an action group named “Deploying-QA” has been set up. It utilizes AWS CodeDeploy as the action provider and targets the “US East (N. Virginia)” region. The input artifact selected is “BuildArtifact”. Within this action, the application name defined is “QX-XYZ-Website” and the deployment group is “QA”.
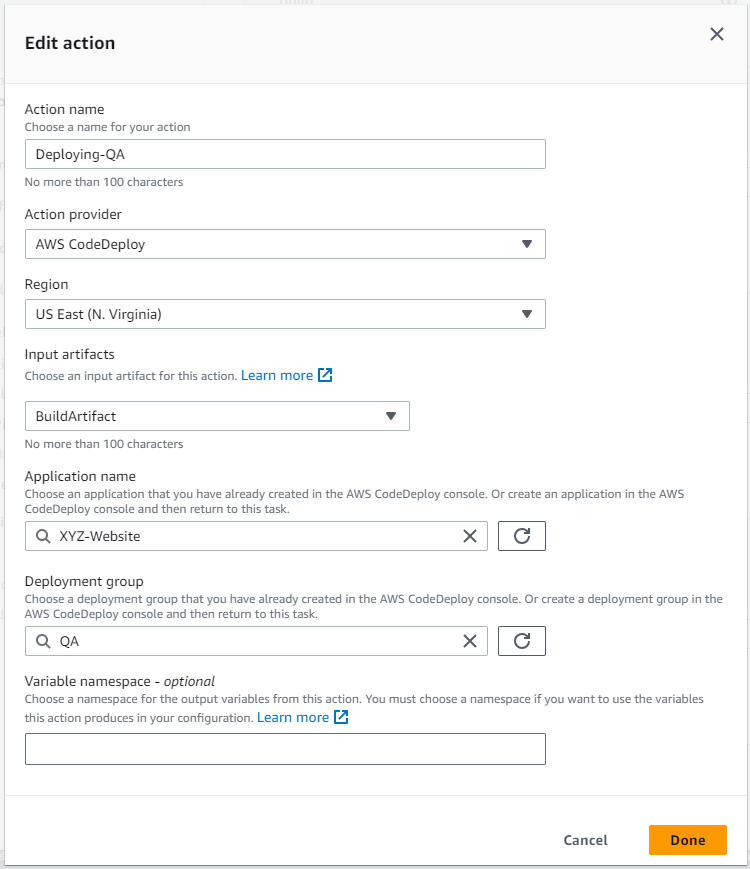
Similarly, for the “PROD” stage, an action group has been created with settings that are largely consistent with the “QA” action group, but with a different deployment group specified.
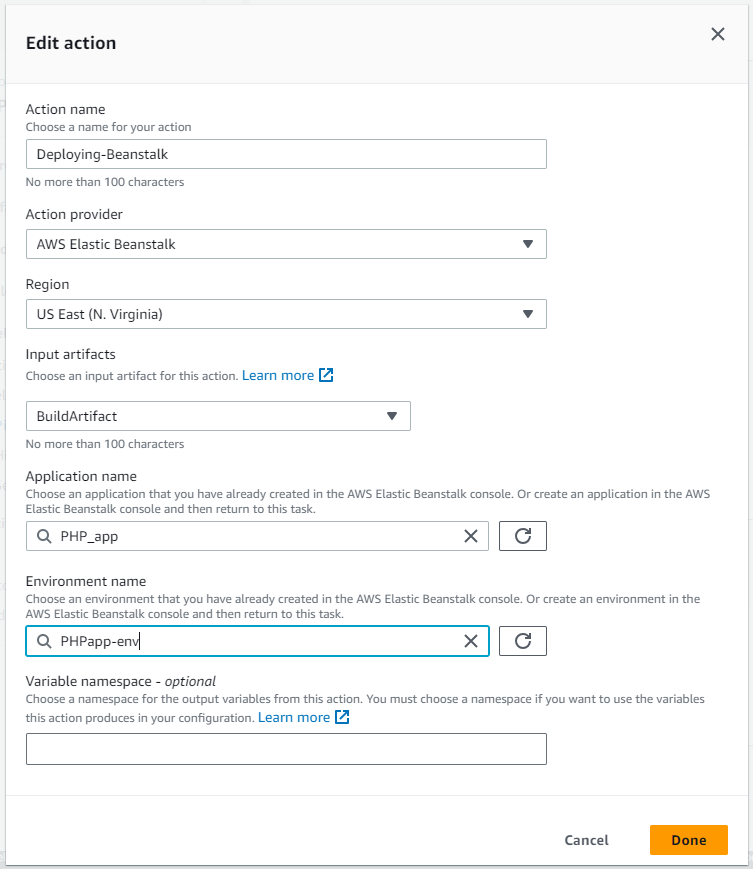
For the “Beanstalk” stage, an action group named “Deploying-Beanstalk” has been established. This action uses AWS Elastic Beanstalk as its provider and is directed at the “US East (N. Virginia)” region. The input artifact chosen is “BuildArtifact”. The specified application within this action is ”PHP_app” and it targets the ”PHPapp-env” environment in Elastic Beanstalk.
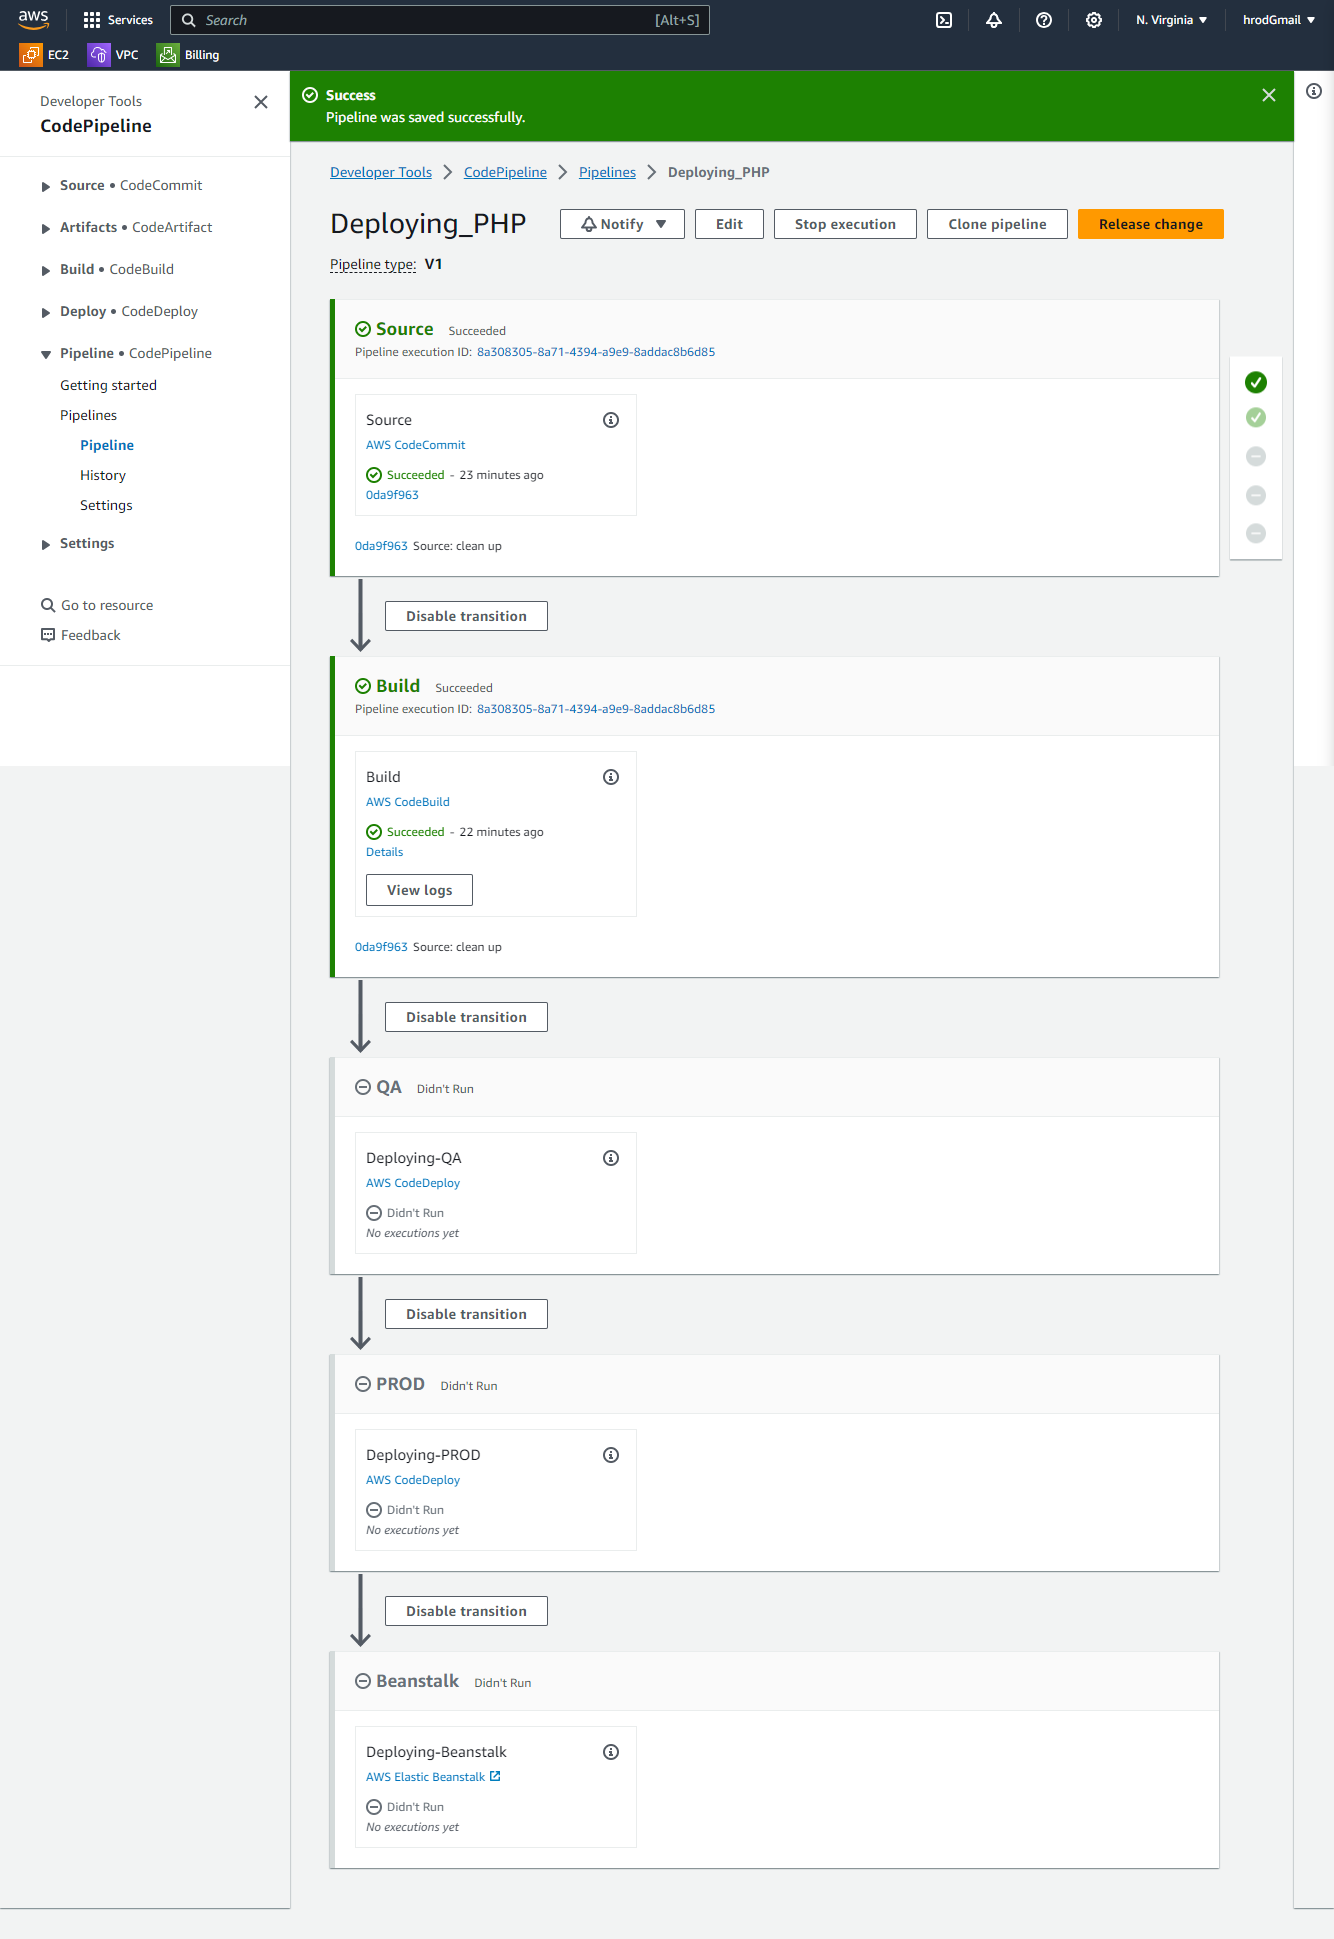
After finalizing my changes, I click the “Save” button and see newly created stages.
Click button “Release change” to restart the pipeline
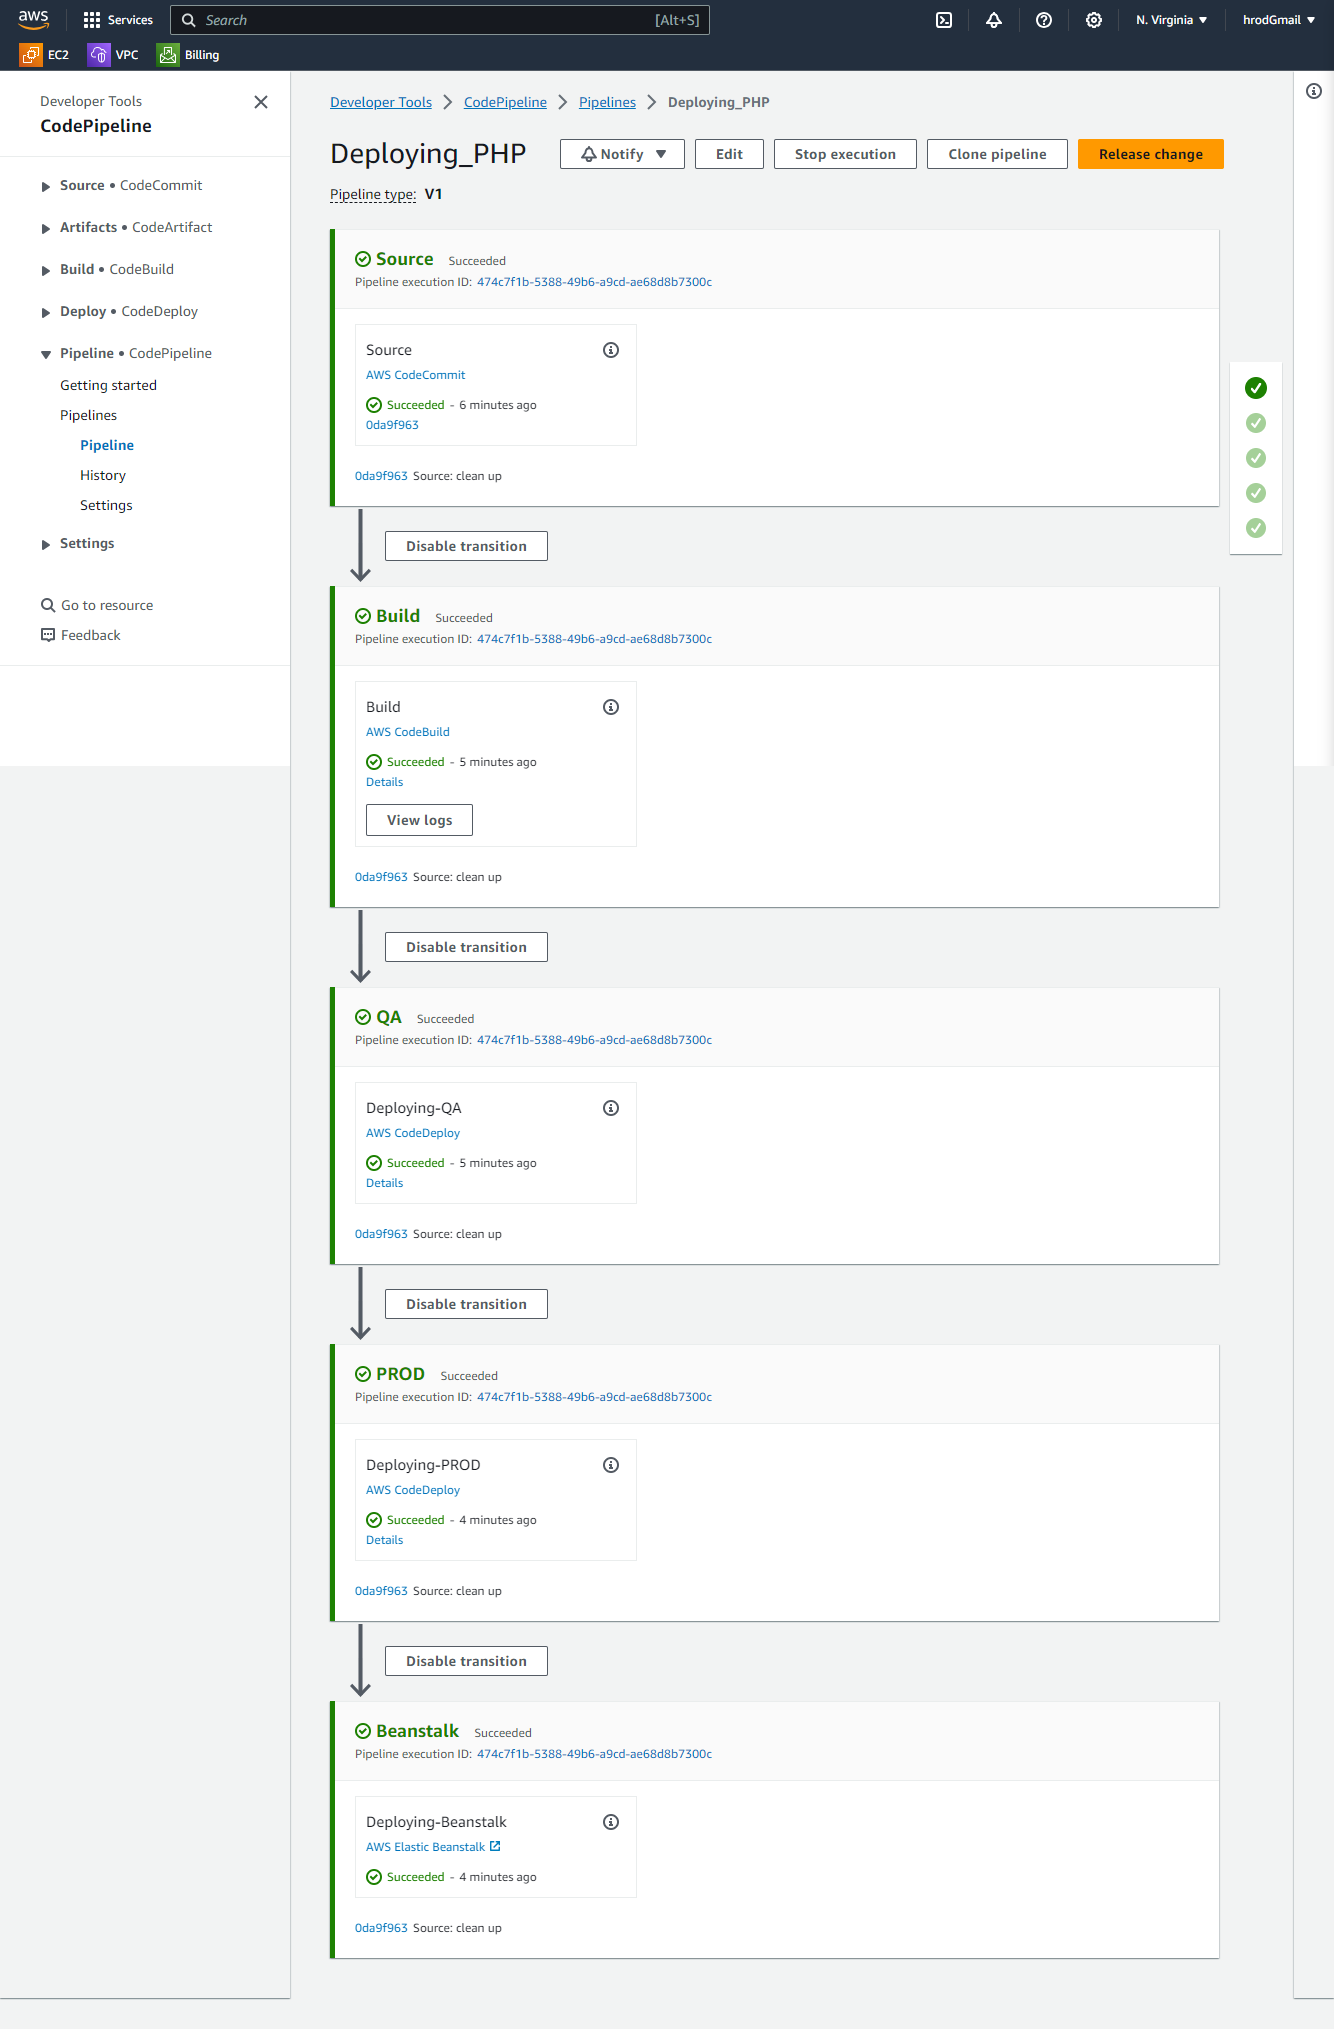
When I see that all stages have been successfully completed stages have been successfully completed, I know my tasks are accomplished.
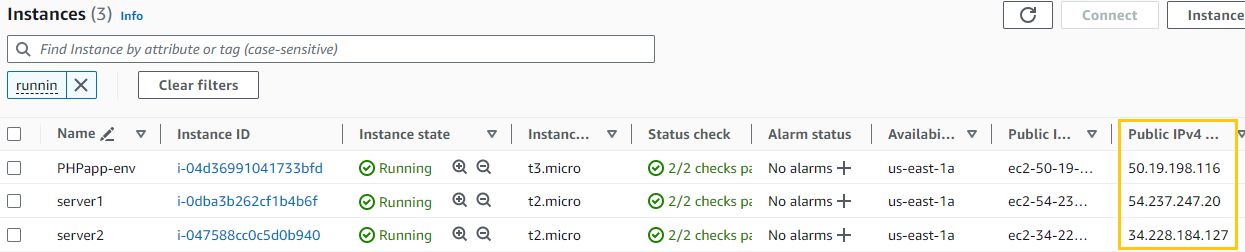
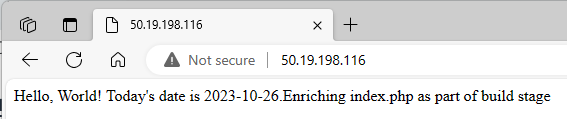
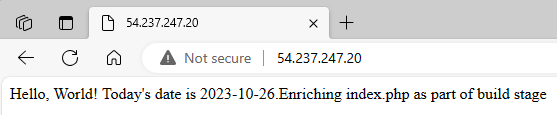
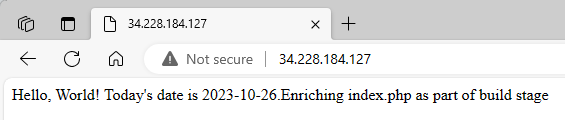
I navigate to my EC2 dashboard to verify if the page is hosted. Once there, I spot all my EC2 instances that are hosting the PHP page, including the Beanstalk-associated one. Using their public IPs, I promptly access my browser and input each IP to view the hosted content.
Success
Beanstalk
Server1 (QA)
Server 2 (PROD)